IBM x3400 User Guide - Page 66
Installing, hot-swap, power, supply
 |
View all IBM x3400 manuals
Add to My Manuals
Save this manual to your list of manuals |
Page 66 highlights
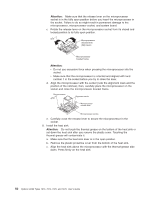
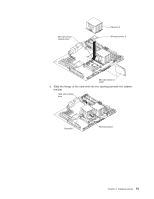
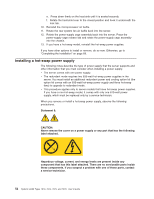
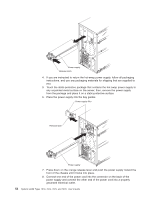
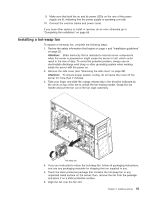
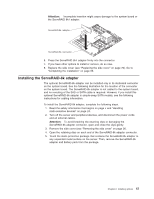
e. Press down firmly on the heat sink until it is seated securely. f. Rotate the heat-sink lever to the closed position and hook it underneath the lock tab. 10. Reinstall the microprocessor air baffle. 11. Rotate the rear system fan air baffle back into the server. 12. Rotate the power-supply cage assembly back into the server. Press the power-supply cage release tab and rotate the power-supply cage assembly into the chassis. 13. If you have a hot-swap model, reinstall the hot-swap power supplies. If you have other options to install or remove, do so now. Otherwise, go to "Completing the installation" on page 68. Installing a hot-swap power supply The following notes describe the type of power supply that the server supports and other information that you must consider when installing a power supply: v The server comes with one power supply. v The redundant mode requires two 835-watt hot-swap power supplies in the server. You must install an additional redundant power and cooling option kit (the option kit comes with an 835-watt hot-swap power supply and three hot-swap fans) to upgrade to redundant mode. v This procedure applies only to server models that have hot-swap power supplies. If you have a non-hot-swap model, it comes with only one 670-watt power supply, which must be replaced only by a service technician. When you remove or install a hot-swap power supply, observe the following precautions. Statement 8: CAUTION: Never remove the cover on a power supply or any part that has the following label attached. Hazardous voltage, current, and energy levels are present inside any component that has this label attached. There are no serviceable parts inside these components. If you suspect a problem with one of these parts, contact a service technician. 52 System x3400 Types 7973, 7974, 7975, and 7976: User's Guide
-
 1
1 -
2
-
3
-
4
-
5
-
6
-
7
-
8
-
9
-
10
-
11
-
12
-
13
-
14
-
15
-
16
-
17
-
18
-
19
-
20
-
21
-
22
-
23
-
24
-
25
-
26
-
27
-
28
-
29
-
30
-
31
-
32
-
33
-
34
-
35
-
36
-
37
-
38
-
39
-
40
-
41
-
42
-
43
-
44
-
45
-
46
-
47
-
48
-
49
-
50
-
51
-
52
-
53
-
54
-
55
-
56
-
57
-
58
-
59
-
60
-
 61
61 -
 62
62 -
 63
63 -
 64
64 -
 65
65 -
 66
66 -
 67
67 -
 68
68 -
 69
69 -
 70
70 -
 71
71 -
72
-
73
-
74
-
75
-
76
-
77
-
78
-
79
-
80
-
81
-
82
-
83
-
84
-
85
-
86
-
87
-
88
-
89
-
90
-
91
-
92
-
93
-
94
-
95
-
96
-
97
-
98
-
99
-
100
-
101
-
102
-
103
-
104
-
105
-
106
-
107
-
108
-
109
-
110
-
111
-
112
-
113
-
114
-
115
-
116
-
117
-
118
-
119
-
120
-
121
-
122
-
123
-
124
-
125
-
126
-
127
-
128
-
129
-
130
-
131
-
132
-
133
-
134
 |
 |