IBM x3400 User Guide - Page 83
Press, sliding, hinge, mount, until, extends, beyond, bezel, place., Align, assembly, chassis.,
 |
View all IBM x3400 manuals
Add to My Manuals
Save this manual to your list of manuals |
Page 83 highlights
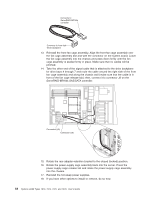
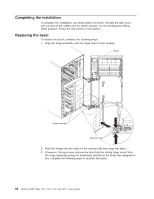
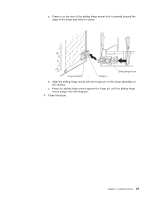
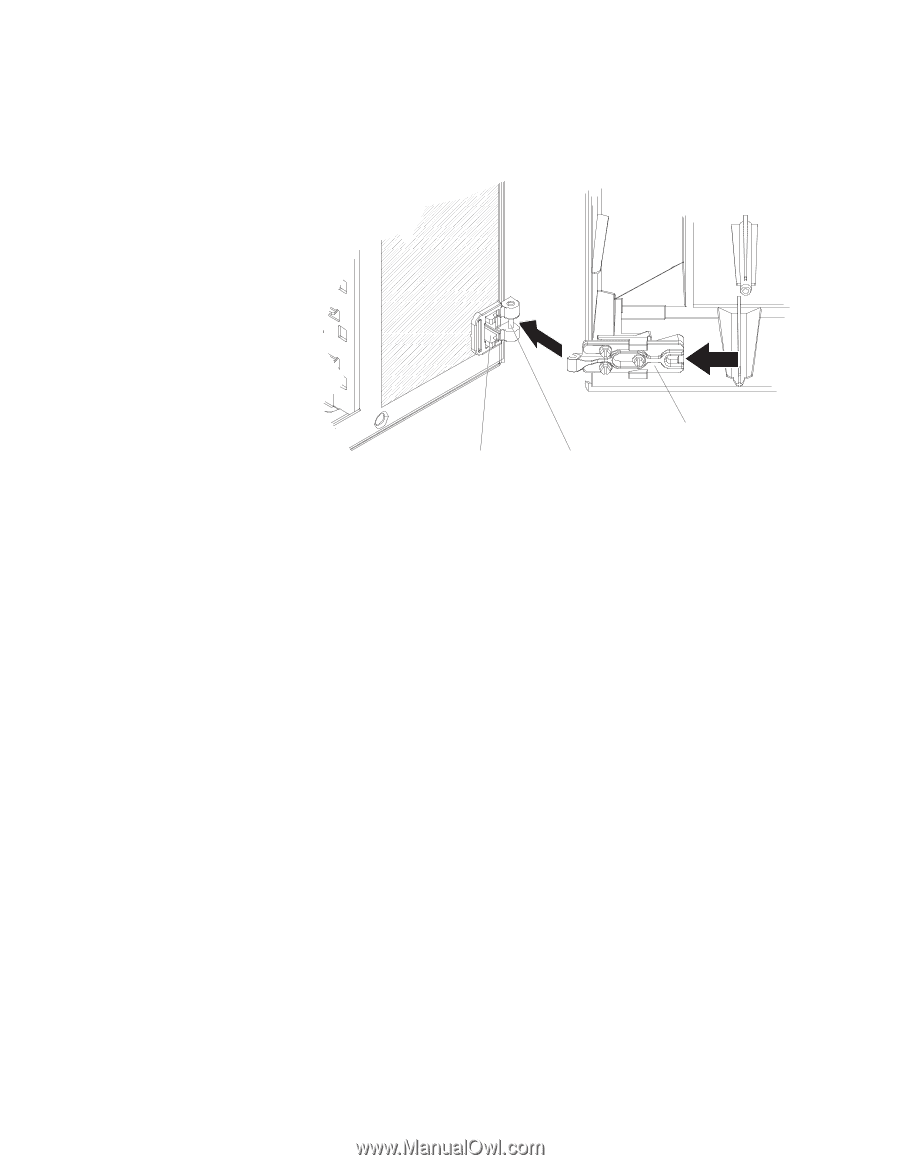
a. Press in on the rear of the sliding hinge mount until it extends beyond the edge of the bezel and hold it in place. Hinge assembly Hinge pin Sliding hinge mount b. Align the sliding hinge mount with the hinge pin on the hinge assembly on the chassis. c. Press the sliding hinge mount against the hinge pin until the sliding hinge mount snaps onto the hinge pin. 4. Close the bezel. Chapter 2. Installing options 69
-
 1
1 -
2
-
3
-
4
-
5
-
6
-
7
-
8
-
9
-
10
-
11
-
12
-
13
-
14
-
15
-
16
-
17
-
18
-
19
-
20
-
21
-
22
-
23
-
24
-
25
-
26
-
27
-
28
-
29
-
30
-
31
-
32
-
33
-
34
-
35
-
36
-
37
-
38
-
39
-
40
-
41
-
42
-
43
-
44
-
45
-
46
-
47
-
48
-
49
-
50
-
51
-
52
-
53
-
54
-
55
-
56
-
57
-
58
-
59
-
60
-
61
-
62
-
63
-
64
-
65
-
66
-
67
-
68
-
69
-
70
-
71
-
72
-
73
-
74
-
75
-
76
-
77
-
 78
78 -
 79
79 -
 80
80 -
 81
81 -
 82
82 -
 83
83 -
 84
84 -
 85
85 -
 86
86 -
 87
87 -
 88
88 -
89
-
90
-
91
-
92
-
93
-
94
-
95
-
96
-
97
-
98
-
99
-
100
-
101
-
102
-
103
-
104
-
105
-
106
-
107
-
108
-
109
-
110
-
111
-
112
-
113
-
114
-
115
-
116
-
117
-
118
-
119
-
120
-
121
-
122
-
123
-
124
-
125
-
126
-
127
-
128
-
129
-
130
-
131
-
132
-
133
-
134
 |
 |
a.
Press
in
on
the
rear
of
the
sliding
hinge
mount
until
it
extends
beyond
the
edge
of
the
bezel
and
hold
it
in
place.
Sliding hinge mount
Hinge assembly
Hinge pin
b.
Align
the
sliding
hinge
mount
with
the
hinge
pin
on
the
hinge
assembly
on
the
chassis.
c.
Press
the
sliding
hinge
mount
against
the
hinge
pin
until
the
sliding
hinge
mount
snaps
onto
the
hinge
pin.
4.
Close
the
bezel.
Chapter
2.
Installing
options
69