IBM x3400 User Guide - Page 69
Installing, hot-swap
 |
View all IBM x3400 manuals
Add to My Manuals
Save this manual to your list of manuals |
Page 69 highlights
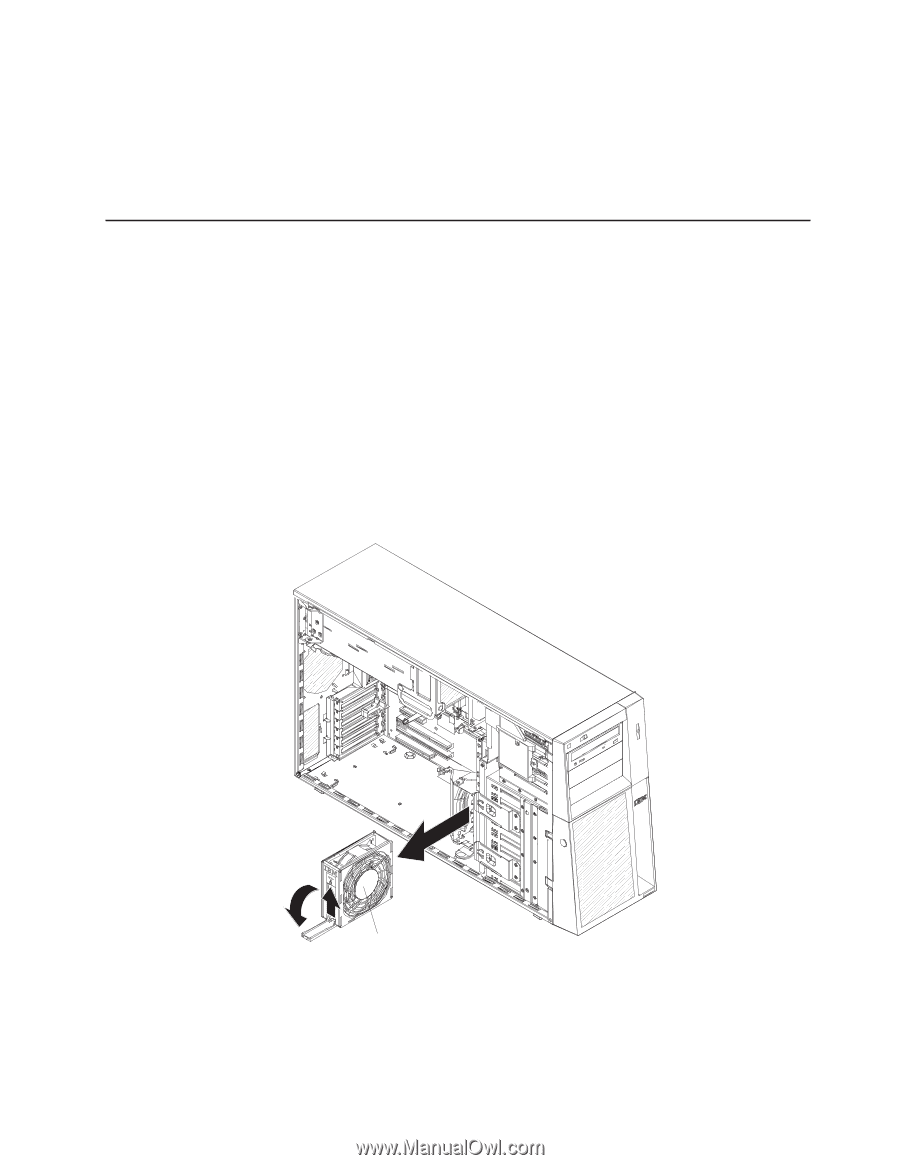
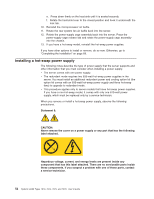
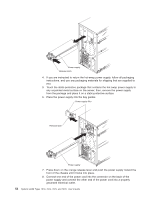
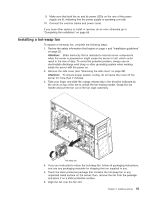
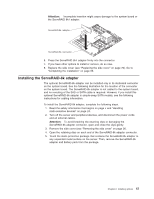
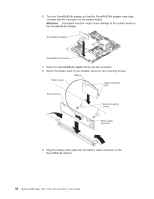
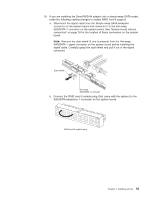
9. Make sure that both the ac and dc power LEDs on the rear of the power supply are lit, indicating that the power supply is operating correctly. 10. Connect the external cables and power cords. If you have other options to install or remove, do so now; otherwise go to "Completing the installation" on page 68. Installing a hot-swap fan To replace a hot-swap fan, complete the following steps: 1. Review the safety information that begins on page v and "Installation guidelines" on page 22. Attention: Static electricity that is released to internal server components when the server is powered-on might cause the server to halt, which could result in the loss of data. To avoid this potential problem, always use an electrostatic-discharge wrist strap or other grounding system when working inside the server with the power on. 2. Remove the side cover (see "Removing the side cover" on page 26). Attention: To ensure proper system cooling, do not leave the cover off the server for more than 2 minutes. 3. Take your finger and slide the orange release tab in the direction indicated by the arrow on top of the fan to unlock the fan-locking handle. Grasp the fan handle and pull the fan out of the fan cage assembly. Hot-swap fan 4. If you are instructed to return the hot-swap fan, follow all packaging instructions, and use any packaging materials for shipping that are supplied to you. 5. Touch the static-protective package that contains the hot-swap fan to any unpainted metal surface on the server; then, remove the fan from the package and place it on a static-protective surface. 6. Align the fan over the fan slot. Chapter 2. Installing options 55
-
 1
1 -
2
-
3
-
4
-
5
-
6
-
7
-
8
-
9
-
10
-
11
-
12
-
13
-
14
-
15
-
16
-
17
-
18
-
19
-
20
-
21
-
22
-
23
-
24
-
25
-
26
-
27
-
28
-
29
-
30
-
31
-
32
-
33
-
34
-
35
-
36
-
37
-
38
-
39
-
40
-
41
-
42
-
43
-
44
-
45
-
46
-
47
-
48
-
49
-
50
-
51
-
52
-
53
-
54
-
55
-
56
-
57
-
58
-
59
-
60
-
61
-
62
-
63
-
 64
64 -
 65
65 -
 66
66 -
 67
67 -
 68
68 -
 69
69 -
 70
70 -
 71
71 -
 72
72 -
 73
73 -
 74
74 -
75
-
76
-
77
-
78
-
79
-
80
-
81
-
82
-
83
-
84
-
85
-
86
-
87
-
88
-
89
-
90
-
91
-
92
-
93
-
94
-
95
-
96
-
97
-
98
-
99
-
100
-
101
-
102
-
103
-
104
-
105
-
106
-
107
-
108
-
109
-
110
-
111
-
112
-
113
-
114
-
115
-
116
-
117
-
118
-
119
-
120
-
121
-
122
-
123
-
124
-
125
-
126
-
127
-
128
-
129
-
130
-
131
-
132
-
133
-
134
 |
 |