IBM x3500 Installation Guide - Page 95
Memory, problems
 |
UPC - 883436005760
View all IBM x3500 manuals
Add to My Manuals
Save this manual to your list of manuals |
Page 95 highlights
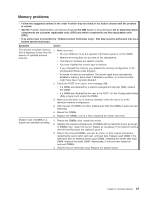
Memory problems v Follow the suggested actions in the order in which they are listed in the Action column until the problem is solved. v See the Problem Determination and Service Guide on the IBM System x Documentation CD to determine which components are customer replaceable units (CRU) and which components are field replaceable units (FRU). v If an action step is preceded by "(Trained service technician only)," that step must be performed only by a trained service technician. Symptom Action The amount of system memory 1. Make sure that: that is displayed is less than the amount of installed physical v No error LEDs are lit on the operator information panel or on the DIMM. memory. v Memory mirroring does not account for the discrepancy. v The memory modules are seated correctly. v You have installed the correct type of memory. v If you changed the memory, you updated the memory configuration in the Configuration/Setup Utility program. v All banks of memory are enabled. The server might have automatically disabled a memory bank when it detected a problem, or a memory bank might have been manually disabled. 2. Check the POST error log for error message 289: v If a DIMM was disabled by a system-management interrupt (SMI), replace the DIMM. v If a DIMM was disabled by the user or by POST, run the Configuration/Setup Utility program and enable the DIMM. 3. Make sure that there is no memory mismatch when the server is at the minimum memory configuration. 4. Add one pair of DIMMs at a time, making sure that the DIMMs in each pair are matching. 5. Reseat the DIMMs. 6. Replace the DIMMs, one at a time, restarting the server each time. Multiple rows of DIMMs in a branch are identified as failing. 1. Reseat the DIMMs; then, restart the server. 2. Replace the lowest-numbered pair of DIMMs with an identical known good pair of DIMMs; then, restart the server. Repeat as necessary. If the failures continue after all identified pairs are replaced, go to 4. 3. Return the removed DIMMs, one pair at a time, to their original connectors, restarting the server after each pair, until pair fails. Replace each DIMM in the failed pair with an identical known good DIMM, restarting the server after each DIMM. Replace the failed DIMM. Repeat step 3 until you have tested all removed DIMMs. 4. (Trained service technician only) Replace the system board. Chapter 5. Solving problems 81
-
 1
1 -
2
-
3
-
4
-
5
-
6
-
7
-
8
-
9
-
10
-
11
-
12
-
13
-
14
-
15
-
16
-
17
-
18
-
19
-
20
-
21
-
22
-
23
-
24
-
25
-
26
-
27
-
28
-
29
-
30
-
31
-
32
-
33
-
34
-
35
-
36
-
37
-
38
-
39
-
40
-
41
-
42
-
43
-
44
-
45
-
46
-
47
-
48
-
49
-
50
-
51
-
52
-
53
-
54
-
55
-
56
-
57
-
58
-
59
-
60
-
61
-
62
-
63
-
64
-
65
-
66
-
67
-
68
-
69
-
70
-
71
-
72
-
73
-
74
-
75
-
76
-
77
-
78
-
79
-
80
-
81
-
82
-
83
-
84
-
85
-
86
-
87
-
88
-
89
-
 90
90 -
 91
91 -
 92
92 -
 93
93 -
 94
94 -
 95
95 -
 96
96 -
 97
97 -
 98
98 -
 99
99 -
 100
100 -
101
-
102
-
103
-
104
-
105
-
106
-
107
-
108
-
109
-
110
-
111
-
112
-
113
-
114
-
115
-
116
-
117
-
118
-
119
-
120
-
121
-
122
-
123
-
124
 |
 |