JVC DLA-X550R Instruction Manual - Page 57
Maintenance, Replacing the Lamp, Lamp Replacement Procedure
 |
View all JVC DLA-X550R manuals
Add to My Manuals
Save this manual to your list of manuals |
Page 57 highlights
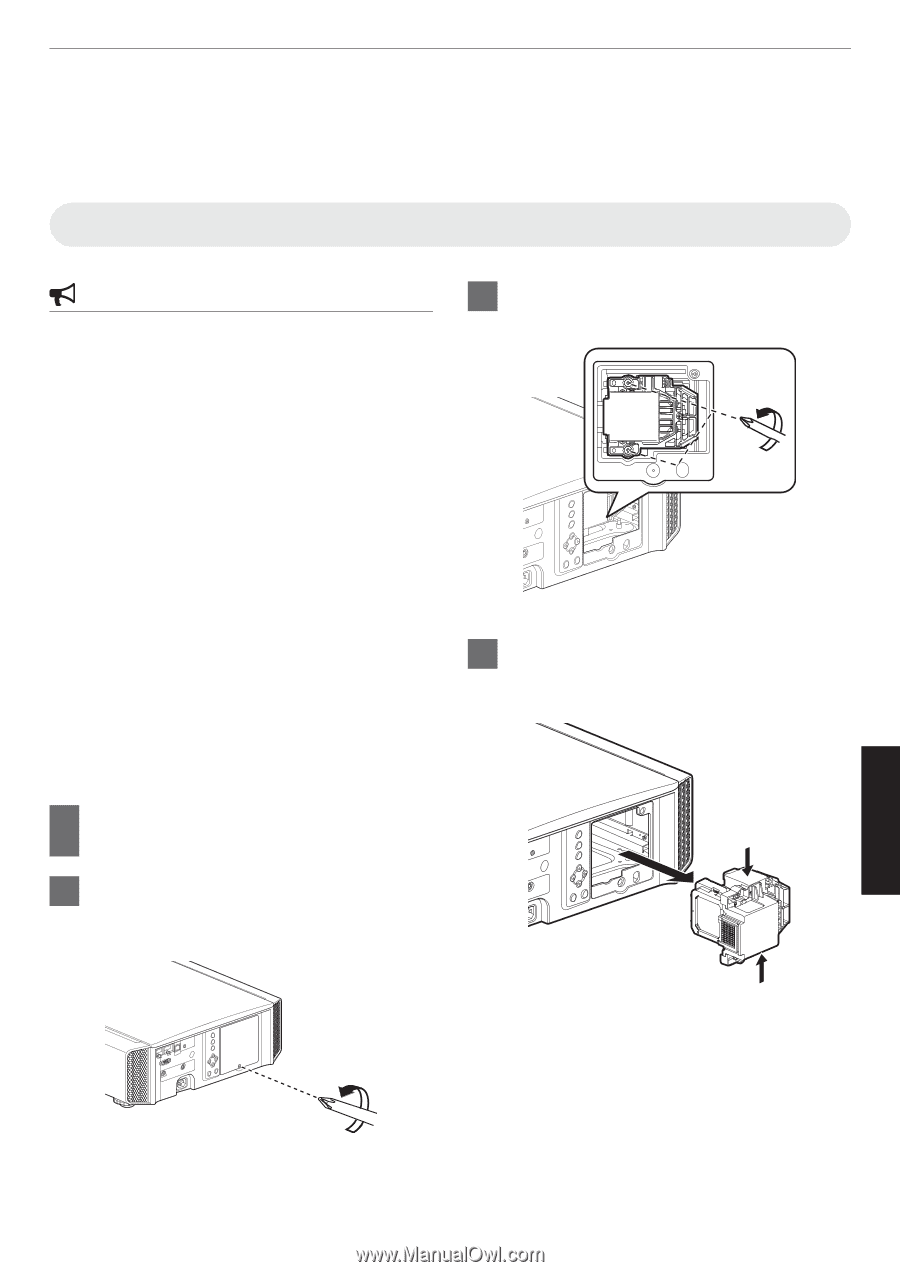
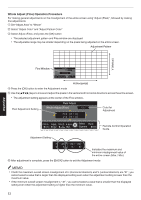
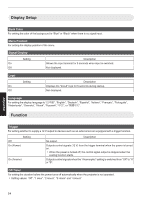
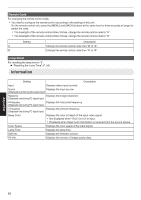
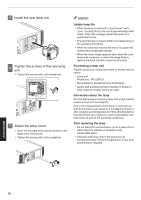
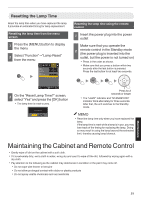
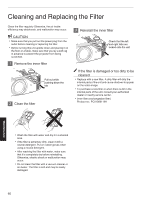
Replacing the Lamp The lamp is a consumable item. If the image appears dark or the lamp goes out, replace the lamp unit. 0 When the lamp replacement time approaches, the user is notified with a message displayed on the screen and by the indicator. (P. 74) Lamp Replacement Procedure CAUTION 0 Do not insert your hands into the lamp compartment. This could cause significant deterioration in the performance of the equipment, or lead to injury and electric shock. 0 Do not replace the lamp immediately after the unit has been used. Allow a cooling period of at least one hour before replacement. The temperature of the lamp is still high, and may cause burn injuries. 0 Do not subject the lamp unit to shock. Doing so may cause lamp blowout. 0 Do not use a flammable air duster to clean the internal parts of the unit. Doing so may cause fire. 0 Use only genuine replacement parts for the lamp unit. Also, never attempt to reuse an old lamp unit. This may cause the unit to malfunction. 0 Do not touch the surface of a new lamp. Doing so may shorten the lamp life and cause lamp blowout. 0 When replacing the lamp, be careful not to injure yourself as the lamp may be broken. 0 When replacing the lamp of a projector suspended from the ceiling, work at height is required. This is a dangerous operation. Please consult our service center. 1 Pull out the power plug from the power outlet 2 Remove the lamp cover 0 Remove the screw of the lamp cover with a t screwdriver. 3 Loosen the screws of the lamp unit 0 Loosen the screws with a t screwdriver. . 4 Pull out the lamp unit 0 Hold the lamp unit at the dents at the top and bottom, and pull it out. . Maintenance . 57
-
 1
1 -
2
-
3
-
4
-
5
-
6
-
7
-
8
-
9
-
10
-
11
-
12
-
13
-
14
-
15
-
16
-
17
-
18
-
19
-
20
-
21
-
22
-
23
-
24
-
25
-
26
-
27
-
28
-
29
-
30
-
31
-
32
-
33
-
34
-
35
-
36
-
37
-
38
-
39
-
40
-
41
-
42
-
43
-
44
-
45
-
46
-
47
-
48
-
49
-
50
-
51
-
 52
52 -
 53
53 -
 54
54 -
 55
55 -
 56
56 -
 57
57 -
 58
58 -
 59
59 -
 60
60 -
 61
61 -
 62
62 -
63
-
64
-
65
-
66
-
67
-
68
-
69
-
70
-
71
-
72
-
73
-
74
-
75
-
76
-
77
-
78
-
79
-
80
 |
 |