JVC DLA-X550R Instruction Manual - Page 60
Cleaning and Replacing the Filter
 |
View all JVC DLA-X550R manuals
Add to My Manuals
Save this manual to your list of manuals |
Page 60 highlights
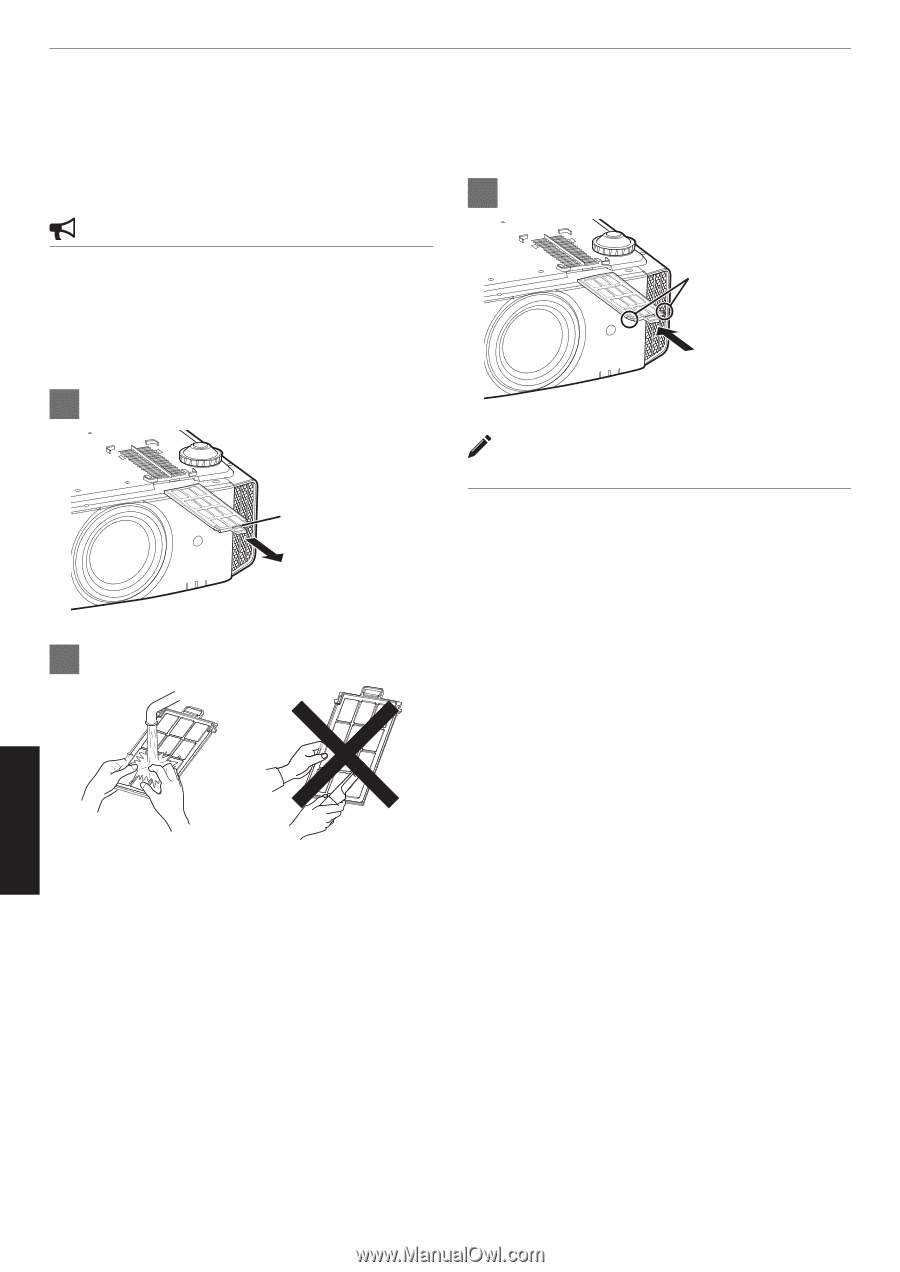
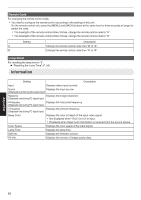
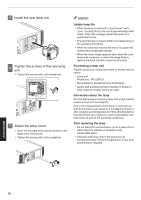
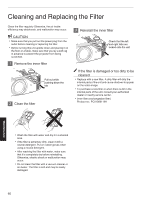
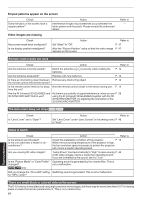
Cleaning and Replacing the Filter Clean the filter regularly Otherwise, the air intake efficiency may deteriorate, and malfunction may occur. CAUTION 0 Make sure that you pull out the power plug from the outlet before cleaning or replacing the filter. 0 Before turning this unit upside down and placing it on the floor or a table, make sure that you lay a soft rag in advance to prevent the projector from being scratched. 1 Remove the inner filter Pull out while pushing down the tab . 2 Clean the filter 3 Reinstall the inner filter Check that the left and right tabs are locked onto the unit . If the filter is damaged or too dirty to be cleaned 0 Replace with a new filter. A dirty filter will dirty the internal parts of the unit and cause shadows to appear on the video image. 0 To purchase a new filter or when there is dirt in the internal parts of the unit, consult your authorized dealer or nearby service center. 0 Inner filter (exchangeable filter) Product no.: PC010661199 Maintenance . 0 Wash the filter with water and dry it in a shaded area. 0 If the filter is extremely dirty, clean it with a neutral detergent. Put on rubber gloves when using a neutral detergent. 0 After washing the filter with water, make sure that it is completely dry before reinstalling. Otherwise, electric shock or malfunction may occur. 0 Do not clean the filter with a vacuum cleaner or air duster. The filter is soft and may be easily damaged. 60
-
 1
1 -
2
-
3
-
4
-
5
-
6
-
7
-
8
-
9
-
10
-
11
-
12
-
13
-
14
-
15
-
16
-
17
-
18
-
19
-
20
-
21
-
22
-
23
-
24
-
25
-
26
-
27
-
28
-
29
-
30
-
31
-
32
-
33
-
34
-
35
-
36
-
37
-
38
-
39
-
40
-
41
-
42
-
43
-
44
-
45
-
46
-
47
-
48
-
49
-
50
-
51
-
52
-
53
-
54
-
 55
55 -
 56
56 -
 57
57 -
 58
58 -
 59
59 -
 60
60 -
 61
61 -
 62
62 -
 63
63 -
 64
64 -
 65
65 -
66
-
67
-
68
-
69
-
70
-
71
-
72
-
73
-
74
-
75
-
76
-
77
-
78
-
79
-
80
 |
 |