Kyocera KM-C2230 Fiery X3e 22C-KM Configuration Guide for KM-C2230 - Page 64
After 1 day/Manually/After 1 week [After 1 day
 |
View all Kyocera KM-C2230 manuals
Add to My Manuals
Save this manual to your list of manuals |
Page 64 highlights
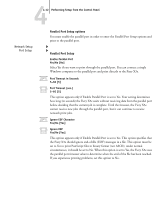
44-8 Performing Setup from the Control Panel Jobs Saved in Printed Queue 1-99 [10] Jobs to Save 1-99 [10] This option appears only if Enable Printed Queue is set to Yes. Specify the number of jobs to be stored in the Printed queue. Jobs in the Printed queue take up space on the Fiery X3e hard disk drive. If disk space is low, use a smaller value for saved jobs. Clear Each Scan Job After 1 day/Manually/After 1 week [After 1 day] Specify how you want to remove scanned data from the hard disk drive. If you select Manually, the scanned data remains on the hard disk drive until specifically deleted, or until all scanned jobs are cleared by the Administrator. Clear Each Scan Job Now Yes/ No [No] Specify when you want to immediately clear the scan jobs from the hard disk drive. Enable Mailbox Passwords Yes/No [Yes] Select Yes to allow users to access mailboxes with passwords. Preview While Processing Yes/ No [No] Specify whether a preview thumbnail should be displayed in the Command WorkStation when a job is being processed. If you select Yes, the preview thumbnail is always displayed in the Processing section of the Activity Monitor. Save Changes Yes/No [Yes] Select Yes to activate any changes made in the Server Setup; select No to return to the main Setup menu without making any changes.
-
 1
1 -
2
-
3
-
4
-
5
-
6
-
7
-
8
-
9
-
10
-
11
-
12
-
13
-
14
-
15
-
16
-
17
-
18
-
19
-
20
-
21
-
22
-
23
-
24
-
25
-
26
-
27
-
28
-
29
-
30
-
31
-
32
-
33
-
34
-
35
-
36
-
37
-
38
-
39
-
40
-
41
-
42
-
43
-
44
-
45
-
46
-
47
-
48
-
49
-
50
-
51
-
52
-
53
-
54
-
55
-
56
-
57
-
58
-
 59
59 -
 60
60 -
 61
61 -
 62
62 -
 63
63 -
 64
64 -
 65
65 -
 66
66 -
 67
67 -
 68
68 -
 69
69 -
70
-
71
-
72
-
73
-
74
-
75
-
76
-
77
-
78
-
79
-
80
-
81
-
82
-
83
-
84
-
85
-
86
-
87
-
88
-
89
-
90
-
91
-
92
-
93
-
94
-
95
-
96
-
97
-
98
-
99
-
100
-
101
-
102
-
103
-
104
-
105
-
106
-
107
-
108
-
109
-
110
-
111
-
112
-
113
-
114
-
115
-
116
-
117
-
118
-
119
-
120
-
121
-
122
-
123
-
124
-
125
-
126
-
127
-
128
-
129
-
130
-
131
-
132
-
133
-
134
-
135
-
136
-
137
-
138
-
139
-
140
-
141
-
142
-
143
-
144
-
145
-
146
-
147
-
148
-
149
-
150
-
151
-
152
-
153
-
154
-
155
-
156
-
157
-
158
-
159
-
160
-
161
-
162
-
163
-
164
-
165
-
166
-
167
-
168
-
169
-
170
-
171
-
172
-
173
-
174
-
175
-
176
-
177
-
178
-
179
-
180
-
181
-
182
-
183
-
184
-
185
-
186
-
187
-
188
-
189
-
190
 |
 |
