LG KF700 User Guide - Page 13
Set up - screen replacement
 |
View all LG KF700 manuals
Add to My Manuals
Save this manual to your list of manuals |
Page 13 highlights
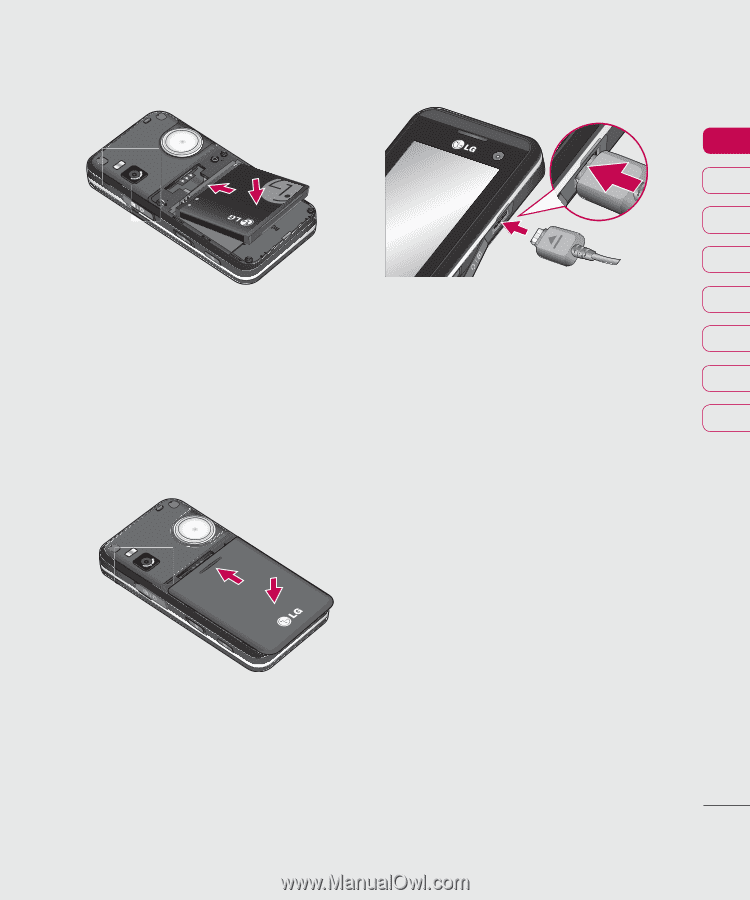
Installing the USIM and battery 01 02 03 04 4 Install the battery 6 Charging your phone 05 Insert the top of the battery first into the top edge of the battery compartment. Pull open the cover of the charger socket on 06 the side of your KF700. Insert the charger Ensure the battery contacts align with the and plug into a mains electricity socket. 07 terminals on the phone. Press the bottom of the battery down until it clips into place. Your KF700 will need to be charged until a message reading Fully Charged appears 08 on screen. Set up 5 Replace the battery cover Slide the battery cover towards the top of the phone until it clicks into place. 11
-
 1
1 -
2
-
3
-
4
-
5
-
6
-
7
-
 8
8 -
 9
9 -
 10
10 -
 11
11 -
 12
12 -
 13
13 -
 14
14 -
 15
15 -
 16
16 -
 17
17 -
 18
18 -
19
-
20
-
21
-
22
-
23
-
24
-
25
-
26
-
27
-
28
-
29
-
30
-
31
-
32
-
33
-
34
-
35
-
36
-
37
-
38
-
39
-
40
-
41
-
42
-
43
-
44
-
45
-
46
-
47
-
48
-
49
-
50
-
51
-
52
-
53
-
54
-
55
-
56
-
57
-
58
-
59
-
60
-
61
-
62
-
63
-
64
-
65
-
66
-
67
-
68
-
69
-
70
-
71
-
72
-
73
-
74
-
75
-
76
-
77
-
78
-
79
-
80
-
81
-
82
 |
 |
11
Set up
01
02
03
04
05
06
07
08
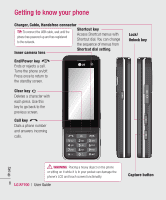
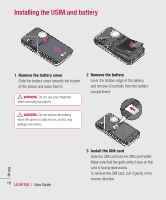
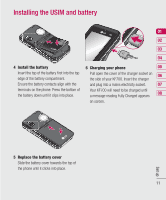
Installing the USIM and battery
4
Install the battery
Insert the top of the battery first into the top
edge of the battery compartment.
Ensure the battery contacts align with the
terminals on the phone. Press the bottom of
the battery down until it clips into place.
6
Charging your phone
Pull open the cover of the charger socket on
the side of your KF700. Insert the charger
and plug into a mains electricity socket.
Your KF700 will need to be charged until
a message reading Fully Charged appears
on screen.
5
Replace the battery cover
Slide the battery cover towards the top of
the phone until it clicks into place.