LG KF700 User Guide - Page 37
Using the flash, Adjusting the contrast, Using the advanced settings
 |
View all LG KF700 manuals
Add to My Manuals
Save this manual to your list of manuals |
Page 37 highlights
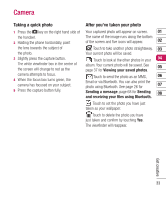
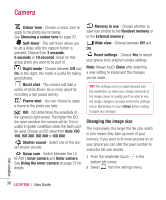
Using the flash The flash is set to Auto as a default, but there are other options. 1 Select from the middle right of the viewfinder to enter the flash sub-menu. 2 There are four flash options: Auto - Your camera will assess the lighting needed to take a good picture and use the flash as necessary. When taking a picture - The flash will only come on as you take a photo. Always on - The flash will always be on when in camera mode. Always off - The camera will never flash. This is useful if you want to save battery power. 3 Touch the flash option you'd like to use. 4 When you've made your selection the flash menu will automatically close, ready for you to take your picture. Adjusting the contrast Contrast defines the difference between light and dark in an image. A low contrast image will appear foggy, whereas a high contrast image will appear much sharper. Slide the contrast indicator along the bar, towards for a lower contrast, hazier image or towards for a higher contrast, sharper image. Using the advanced settings From the viewfinder touch to open all 01 the advanced settings options. 02 03 04 05 06 Image size - Change the size of the 07 photo to save on memory space or take a picture preset to the correct size to attach to 08 a contact. See Changing the image size on page 36. Image quality - Choose between Super fine, Fine and Normal. The finer the quality the sharper a photo will be but the file size will increase as a result, which means you'll be able to store fewer photos in your memory. Get creative White balance - The white balance ensures that any white in your photo is realistic. In order for your camera to correctly adjust the white balance you may need to determine the light conditions. Choose from Auto, Incandescent, Sunny, Fluorescent or Cloudy. 35
-
 1
1 -
2
-
3
-
4
-
5
-
6
-
7
-
8
-
9
-
10
-
11
-
12
-
13
-
14
-
15
-
16
-
17
-
18
-
19
-
20
-
21
-
22
-
23
-
24
-
25
-
26
-
27
-
28
-
29
-
30
-
31
-
 32
32 -
 33
33 -
 34
34 -
 35
35 -
 36
36 -
 37
37 -
 38
38 -
 39
39 -
 40
40 -
 41
41 -
 42
42 -
43
-
44
-
45
-
46
-
47
-
48
-
49
-
50
-
51
-
52
-
53
-
54
-
55
-
56
-
57
-
58
-
59
-
60
-
61
-
62
-
63
-
64
-
65
-
66
-
67
-
68
-
69
-
70
-
71
-
72
-
73
-
74
-
75
-
76
-
77
-
78
-
79
-
80
-
81
-
82
 |
 |
