Lenovo M495 (English) System Update 5.0 Deployment Guide - Page 41
After adding the Administrative Template for System Update, navigate the Group Policy Editor to
 |
View all Lenovo M495 manuals
Add to My Manuals
Save this manual to your list of manuals |
Page 41 highlights
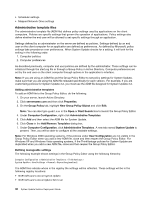
6. Select Add/Remove Templates. 7. Click Add and then select the tvsu.adm file. 8. Click Close in the Add/Remove Template dialog box. The ThinkVantage tab is created. Note: Under the ThinkVantage tab, there is a System Update tab. If you do not see the applicable policy, make sure that your Group Policy Editor is set to display all policy settings. 9. Navigate the Group Policy Editor to the following location: Computer Configuration\Administrative Templates\ThinkVantage \System Update\User Settings\General\Repository Location 10. Double-click Repository Location. 11. In the Local Repository Location 1 field, change the value from SUPPORTCENTER to your network repository share, for example: \\Server_X\TVSU_repository\ 12. Click Apply. Setting policies for multiple repositories To set policies in the Group Policy Editor for multiple repositories, refer to the following example: 1. After adding the Administrative Template for System Update, navigate the Group Policy Editor to the following location: Computer Configuration\Administrative Templates\ThinkVantage \System Update\User Settings\General\Repository Location 2. Double-click Repository Location. 3. In the Local Repository 2 field, type the file path for your local system repository, for example: %ANYDRV%\SystemUpdate3_x\ 4. In the Local Repository 3 field, type the network share repository path of your server and share, for example: \\Server_X\TVSU_repository\ 5. Click Apply. System Update version control using Active Directory If you want to control the version of System Update available to your users, you can use your network repository to store specific versions of System Update. Storing packages locally will enable System Update to search for upgrades within your network repository. To configure Active Directory for System Update version control, do the following: 1. Download the SSClientCommon.zip file from the following Lenovo Web site: http://www.lenovo.com/support/site.wss/document.do?lndocid=TVAN-ADMIN#tvsu 2. Extract the SSClientCommon.zip file to your repository folder. 3. After adding the Administrative Template for System Update, navigate the Group Policy Editor to the following location: Computer Configuration\Administrative Templates\ThinkVantage \System Update\UCSettings\HTTPSHelloSettings Chapter 3. Configurations 35
-
 1
1 -
2
-
3
-
4
-
5
-
6
-
7
-
8
-
9
-
10
-
11
-
12
-
13
-
14
-
15
-
16
-
17
-
18
-
19
-
20
-
21
-
22
-
23
-
24
-
25
-
26
-
27
-
28
-
29
-
30
-
31
-
32
-
33
-
34
-
35
-
 36
36 -
 37
37 -
 38
38 -
 39
39 -
 40
40 -
 41
41 -
 42
42 -
 43
43 -
 44
44 -
 45
45 -
 46
46 -
47
-
48
-
49
-
50
-
51
-
52
-
53
-
54
-
55
-
56
-
57
-
58
-
59
-
60
-
61
-
62
-
63
-
64
-
65
-
66
-
67
-
68
-
69
-
70
-
71
-
72
-
73
-
74
-
75
-
76
-
77
-
78
-
79
-
80
-
81
-
82
-
83
-
84
-
85
-
86
-
87
-
88
-
89
-
90
-
91
-
92
-
93
-
94
 |
 |