NEC NP-M300X M260W : user's manual - Page 114
Slowly insert the USB Wireless LAN Unit into the USB LAN, Put the USB LAN port cover back into place. - driver
 |
UPC - 805736035629
View all NEC NP-M300X manuals
Add to My Manuals
Save this manual to your list of manuals |
Page 114 highlights
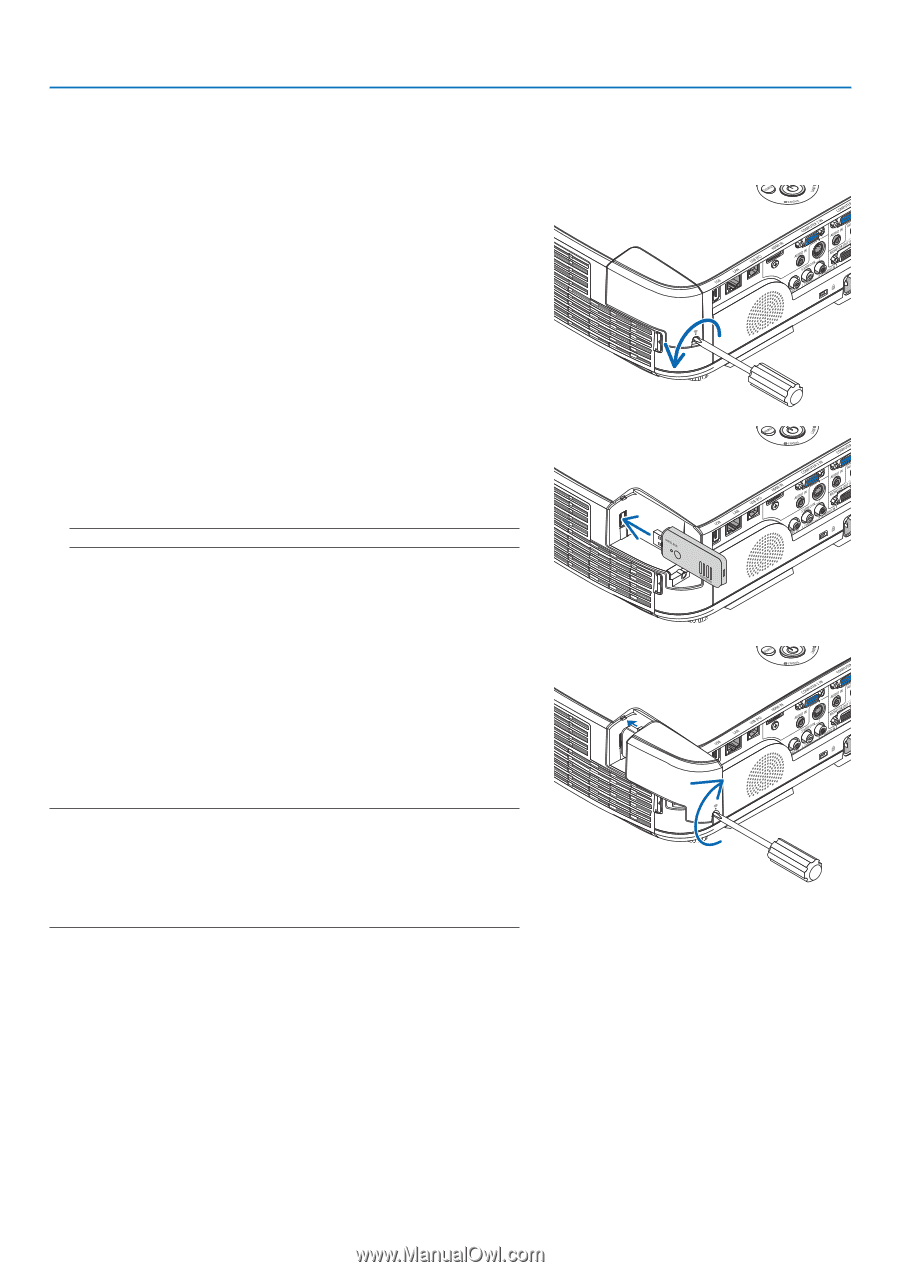
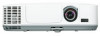
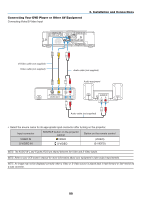
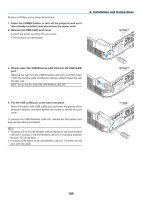
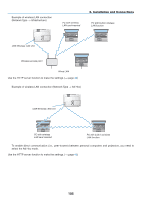
Prepare a Phillips screw driver beforehand. 1. Press the POWER button to turn off the projector and set it into standby condition, and disconnect the power cord. 2. Remove the USB (LAN) port cover. Loosen the screw securing the port cover. • The screw is not removable. 6. Installation and Connections WIRELESS WIRELESS WIRELESS 3. Slowly insert the USB Wireless LAN Unit into the USB (LAN) port. Remove the cap from the USB Wireless LAN Unit, and then insert it with the surface (side of indicator) facing outward. Keep the cap for later use. NOTE: Do not force to insert the USB Wireless LAN Unit. 4. Put the USB (LAN) port cover back into place. Insert the catch of the USB (LAN) port cover into the groove of the projector cabinet, and then tighten the screw to secure the port cover. WIRELESS To remove the USB Wireless LAN Unit, disconnect the power cord and use the above procedure. NOTE: • The green LED on the USB Wireless LAN Unit flashes to show that Wireless LAN Unit is working. If the USB Wireless LAN Unit is incorrectly attached, the blue LED will not flash. • Do not press the button on the USB Wireless LAN Unit. The button will not work with this model. 104
-
 1
1 -
2
-
3
-
4
-
5
-
6
-
7
-
8
-
9
-
10
-
11
-
12
-
13
-
14
-
15
-
16
-
17
-
18
-
19
-
20
-
21
-
22
-
23
-
24
-
25
-
26
-
27
-
28
-
29
-
30
-
31
-
32
-
33
-
34
-
35
-
36
-
37
-
38
-
39
-
40
-
41
-
42
-
43
-
44
-
45
-
46
-
47
-
48
-
49
-
50
-
51
-
52
-
53
-
54
-
55
-
56
-
57
-
58
-
59
-
60
-
61
-
62
-
63
-
64
-
65
-
66
-
67
-
68
-
69
-
70
-
71
-
72
-
73
-
74
-
75
-
76
-
77
-
78
-
79
-
80
-
81
-
82
-
83
-
84
-
85
-
86
-
87
-
88
-
89
-
90
-
91
-
92
-
93
-
94
-
95
-
96
-
97
-
98
-
99
-
100
-
101
-
102
-
103
-
104
-
105
-
106
-
107
-
108
-
 109
109 -
 110
110 -
 111
111 -
 112
112 -
 113
113 -
 114
114 -
 115
115 -
 116
116 -
 117
117 -
 118
118 -
 119
119 -
120
-
121
-
122
-
123
-
124
-
125
-
126
-
127
-
128
-
129
-
130
-
131
-
132
-
133
-
134
-
135
-
136
 |
 |