NEC NP-M300X M260W : user's manual - Page 36
(4) Changing Eco Mode/Checking Energy-Saving Effect, Using Eco Mode [ECO MODE], Convenient Features
 |
UPC - 805736035629
View all NEC NP-M300X manuals
Add to My Manuals
Save this manual to your list of manuals |
Page 36 highlights
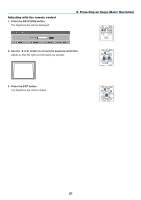
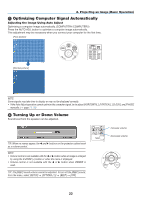
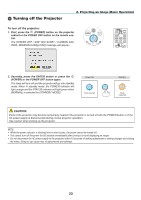
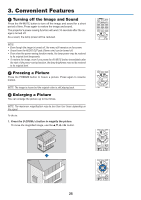
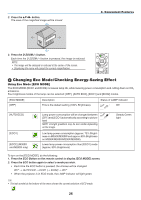
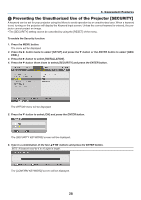
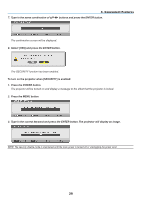
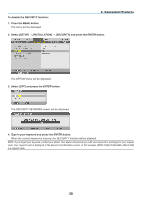
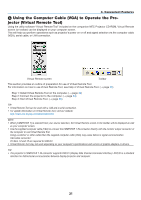
2. Press the button. The area of the magnified image will be moved 3. Convenient Features 3. Press the D-ZOOM (−) button. Each time the D-ZOOM (−) button is pressed, the image is reduced. NOTE: • The image will be enlarged or reduced at the center of the screen. • Displaying the menu will cancel the current magnification. Changing Eco Mode/Checking Energy-Saving Effect Using Eco Mode [ECO MODE] The ECO MODE (ECO1 and ECO2) increases lamp life, while lowering power consumption and cutting down on CO2 emissions. Four brightness modes of the lamp can be selected: [OFF], [AUTO ECO], [ECO1] and [ECO2] modes. [ECO MODE] [OFF] Description This is the default setting (100% Brightness). Status of LAMP indicator Off [AUTO ECO] [ECO1] [ECO2] (M300X and M260X only) Lamp power consumption will be changed between [OFF] and [ECO1] automatically according to picture level NOTE: A bright gradation may be less visible depending on the image. Low lamp power consumption (approx. 75% Brightness on M350X/M300W and approx. 80% Brightness on M300X/M260X/M230X/M260W). Lower lamp power consumption than [ECO1] mode (approx. 50% Brightness) To turn on the [ECO MODE], do the following: 1. Press the ECO Button on the remote control to display [ECO MODE] screen. 2. Press the ECO button again to select a mode you wish. • Each time the ECO button is pressed, the choices will be changed: OFF → AUTO ECO → ECO1 (→ ECO2) → OFF • When the projector is in ECO mode, the LAMP indicator will light green. TIP: • The leaf symbol at the bottom of the menu shows the current selection of ECO mode. Steady Green light 26
-
 1
1 -
2
-
3
-
4
-
5
-
6
-
7
-
8
-
9
-
10
-
11
-
12
-
13
-
14
-
15
-
16
-
17
-
18
-
19
-
20
-
21
-
22
-
23
-
24
-
25
-
26
-
27
-
28
-
29
-
30
-
 31
31 -
 32
32 -
 33
33 -
 34
34 -
 35
35 -
 36
36 -
 37
37 -
 38
38 -
 39
39 -
 40
40 -
 41
41 -
42
-
43
-
44
-
45
-
46
-
47
-
48
-
49
-
50
-
51
-
52
-
53
-
54
-
55
-
56
-
57
-
58
-
59
-
60
-
61
-
62
-
63
-
64
-
65
-
66
-
67
-
68
-
69
-
70
-
71
-
72
-
73
-
74
-
75
-
76
-
77
-
78
-
79
-
80
-
81
-
82
-
83
-
84
-
85
-
86
-
87
-
88
-
89
-
90
-
91
-
92
-
93
-
94
-
95
-
96
-
97
-
98
-
99
-
100
-
101
-
102
-
103
-
104
-
105
-
106
-
107
-
108
-
109
-
110
-
111
-
112
-
113
-
114
-
115
-
116
-
117
-
118
-
119
-
120
-
121
-
122
-
123
-
124
-
125
-
126
-
127
-
128
-
129
-
130
-
131
-
132
-
133
-
134
-
135
-
136
 |
 |