NEC NP-M300X M260W : user's manual - Page 28
Adjust the Tilt Foot, Release the Adjustable Tilt Foot Lever to lock the Adjustable tilt
 |
UPC - 805736035629
View all NEC NP-M300X manuals
Add to My Manuals
Save this manual to your list of manuals |
Page 28 highlights
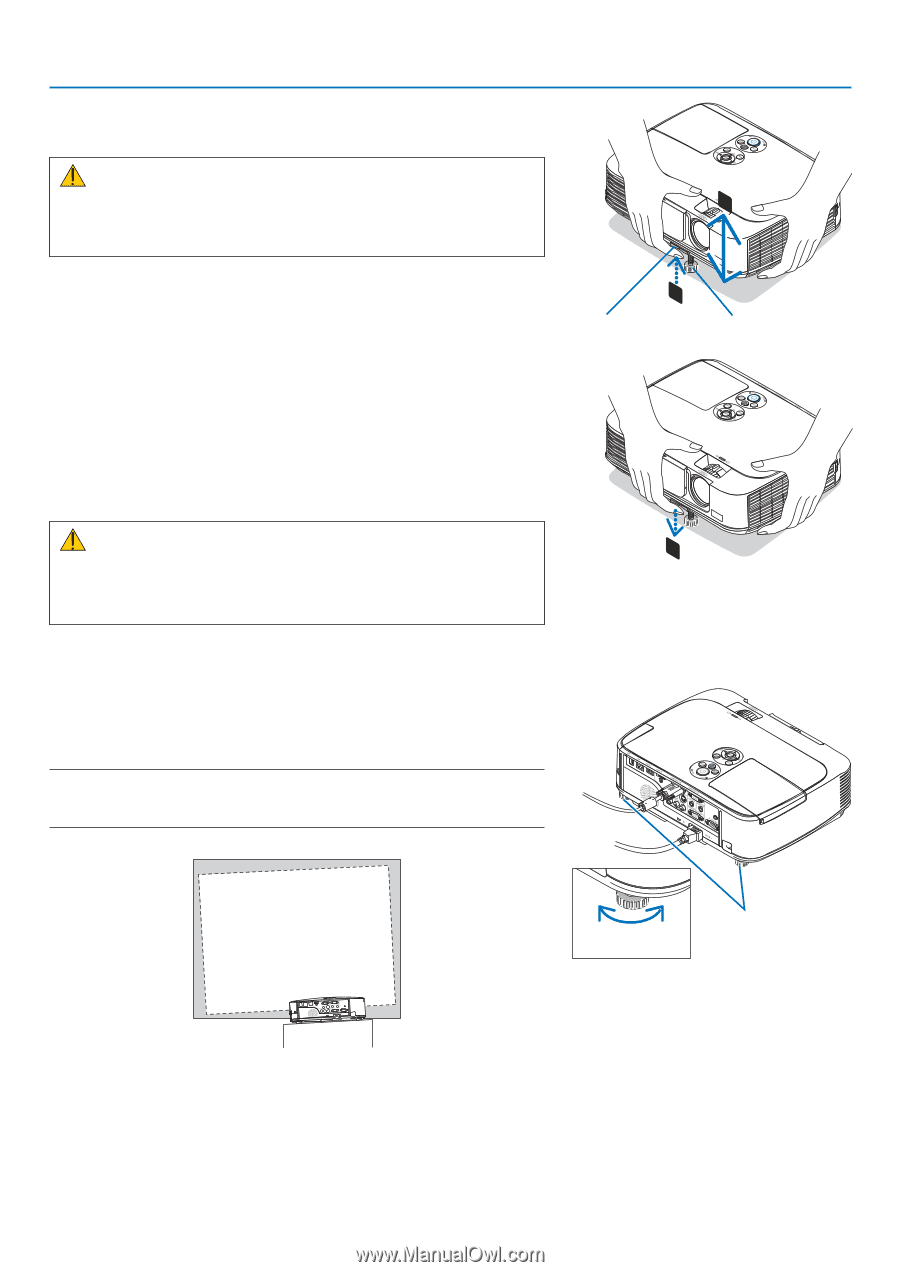
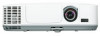
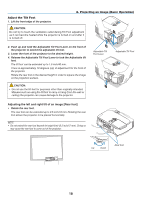
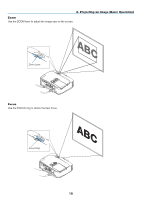
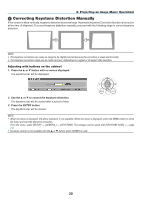
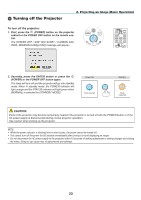
Adjust the Tilt Foot 1. Lift the front edge of the projector. 2. Projecting an Image (Basic Operation) CAUTION: Do not try to touch the ventilation outlet during Tilt Foot adjustment 1 as it can become heated while the projector is turned on and after it is turned off. 2. Push up and hold the Adjustable Tilt Foot Lever on the front of the projector to extend the adjustable tilt foot. 3. Lower the front of the projector to the desired height. 4. Release the Adjustable Tilt Foot Lever to lock the Adjustable tilt foot. The tilt foot can be extended up to 1.6 inch/40 mm. There is approximately 10 degrees (up) of adjustment for the front of the projector. Rotate the rear foot to the desired height in order to square the image on the projection surface. 2 Adjustable Tilt Foot Lever Adjustable Tilt Foot CAUTION: 3 • Do not use the tilt-foot for purposes other than originally intended. Misuses such as using the tilt foot to carry or hang (from the wall or ceiling) the projector can cause damage to the projector. Adjusting the left and right tilt of an image [Rear foot] • Rotate the rear foot. The rear foot can be extended up to 0.5 inch/12 mm. Rotating the rear foot allows the projector to be placed horizontally. NOTE: • Do not extend the rear foot beyond its height limit (0.5 inch/12 mm). Doing so may cause the rear foot to come out of the projector. Up Down Rear foot 18
-
 1
1 -
2
-
3
-
4
-
5
-
6
-
7
-
8
-
9
-
10
-
11
-
12
-
13
-
14
-
15
-
16
-
17
-
18
-
19
-
20
-
21
-
22
-
 23
23 -
 24
24 -
 25
25 -
 26
26 -
 27
27 -
 28
28 -
 29
29 -
 30
30 -
 31
31 -
 32
32 -
 33
33 -
34
-
35
-
36
-
37
-
38
-
39
-
40
-
41
-
42
-
43
-
44
-
45
-
46
-
47
-
48
-
49
-
50
-
51
-
52
-
53
-
54
-
55
-
56
-
57
-
58
-
59
-
60
-
61
-
62
-
63
-
64
-
65
-
66
-
67
-
68
-
69
-
70
-
71
-
72
-
73
-
74
-
75
-
76
-
77
-
78
-
79
-
80
-
81
-
82
-
83
-
84
-
85
-
86
-
87
-
88
-
89
-
90
-
91
-
92
-
93
-
94
-
95
-
96
-
97
-
98
-
99
-
100
-
101
-
102
-
103
-
104
-
105
-
106
-
107
-
108
-
109
-
110
-
111
-
112
-
113
-
114
-
115
-
116
-
117
-
118
-
119
-
120
-
121
-
122
-
123
-
124
-
125
-
126
-
127
-
128
-
129
-
130
-
131
-
132
-
133
-
134
-
135
-
136
 |
 |