NEC NP-M300X M260W : user's manual - Page 92
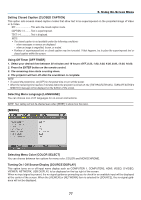
Enabling Key Sound and Error Sound [BEEP], Enabling or Disabling WXGA Mode [WXGA MODE]
 |
UPC - 805736035629
View all NEC NP-M300X manuals
Add to My Manuals
Save this manual to your list of manuals |
Page 92 highlights
5. Using On-Screen Menu Selecting Signal Format [SIGNAL SELECT] [COMPUTER1], [COMPUTER2] Allows you to choose [COMPUTER1], or [COMPUTER2] for an RGB source such as a computer, or [COMPONENT] for a component video source such as a DVD player. Normally select [RGB/COMPONENT] and the projector automatically detects a component signal. However there may be some component signals that the projector is unable to detect. If this is the case, select [COMPONENT]. [VIDEO & S-VIDEO System Select] This feature enables you to select composite video standards automatically or manually. Normally select [AUTO] and the projector will automatically detect the video standard. In the case where the projector has difficulty detecting the video standard, select the appropriate video standard from the menu. This must be done for VIDEO and S-VIDEO respectively. Enabling or Disabling WXGA Mode [WXGA MODE] Selecting [ON] will give priority to a WXGA (1280 × 768) signal in recognizing an input signal. When [WXGA MODE] is set to [ON], an XGA (1024 × 768) signal may not be recognized on M350X/M300X/M260X/ M230X. In this case, select [OFF]. NOTE: • The [OFF] is selected at the time of shipment of M350X/M300X/M260X/M230X. • The [ON] is selected at the time of shipment of M300W/M260W. Enabling the deinterlace [DEINTERLACE] Turns on or off the deinterlace function for a telecine signal. OFF Select this option if there is any jitter or artifacts in video. ON Default standard setting. NOTE: This feature is not available for HDTV (progressive) and computer signals. Setting HDMI [HDMI SETTINGS] Make the settings for video level and audio level when connecting HDMI equipment such as a DVD player. VIDEO LEVEL Select [AUTO] to automatically detect video level. If automatic detection may not work well, select [NORMAL] to disable the [ENHANCED] feature of your HDMI equipment or select [ENHANCED] to improve image contrast and increase detail in the dark areas. AUDIO SELECT Select [HDMI] to switch the HDMI IN digital audio signal and select [COMPUTER 2] to switch the COMPUTER 2 input audio signal. Enabling Key Sound and Error Sound [BEEP] This feature turns on or off the button sound or alarm when an error occurs or the following operations are performed. - Displaying the main menu - Switching sources - Resetting data by using [RESET] - Pressing POWER ON or POWER OFF button 82
-
 1
1 -
2
-
3
-
4
-
5
-
6
-
7
-
8
-
9
-
10
-
11
-
12
-
13
-
14
-
15
-
16
-
17
-
18
-
19
-
20
-
21
-
22
-
23
-
24
-
25
-
26
-
27
-
28
-
29
-
30
-
31
-
32
-
33
-
34
-
35
-
36
-
37
-
38
-
39
-
40
-
41
-
42
-
43
-
44
-
45
-
46
-
47
-
48
-
49
-
50
-
51
-
52
-
53
-
54
-
55
-
56
-
57
-
58
-
59
-
60
-
61
-
62
-
63
-
64
-
65
-
66
-
67
-
68
-
69
-
70
-
71
-
72
-
73
-
74
-
75
-
76
-
77
-
78
-
79
-
80
-
81
-
82
-
83
-
84
-
85
-
86
-
 87
87 -
 88
88 -
 89
89 -
 90
90 -
 91
91 -
 92
92 -
 93
93 -
 94
94 -
 95
95 -
 96
96 -
 97
97 -
98
-
99
-
100
-
101
-
102
-
103
-
104
-
105
-
106
-
107
-
108
-
109
-
110
-
111
-
112
-
113
-
114
-
115
-
116
-
117
-
118
-
119
-
120
-
121
-
122
-
123
-
124
-
125
-
126
-
127
-
128
-
129
-
130
-
131
-
132
-
133
-
134
-
135
-
136
 |
 |