NEC NP-M300X M260W : user's manual - Page 117
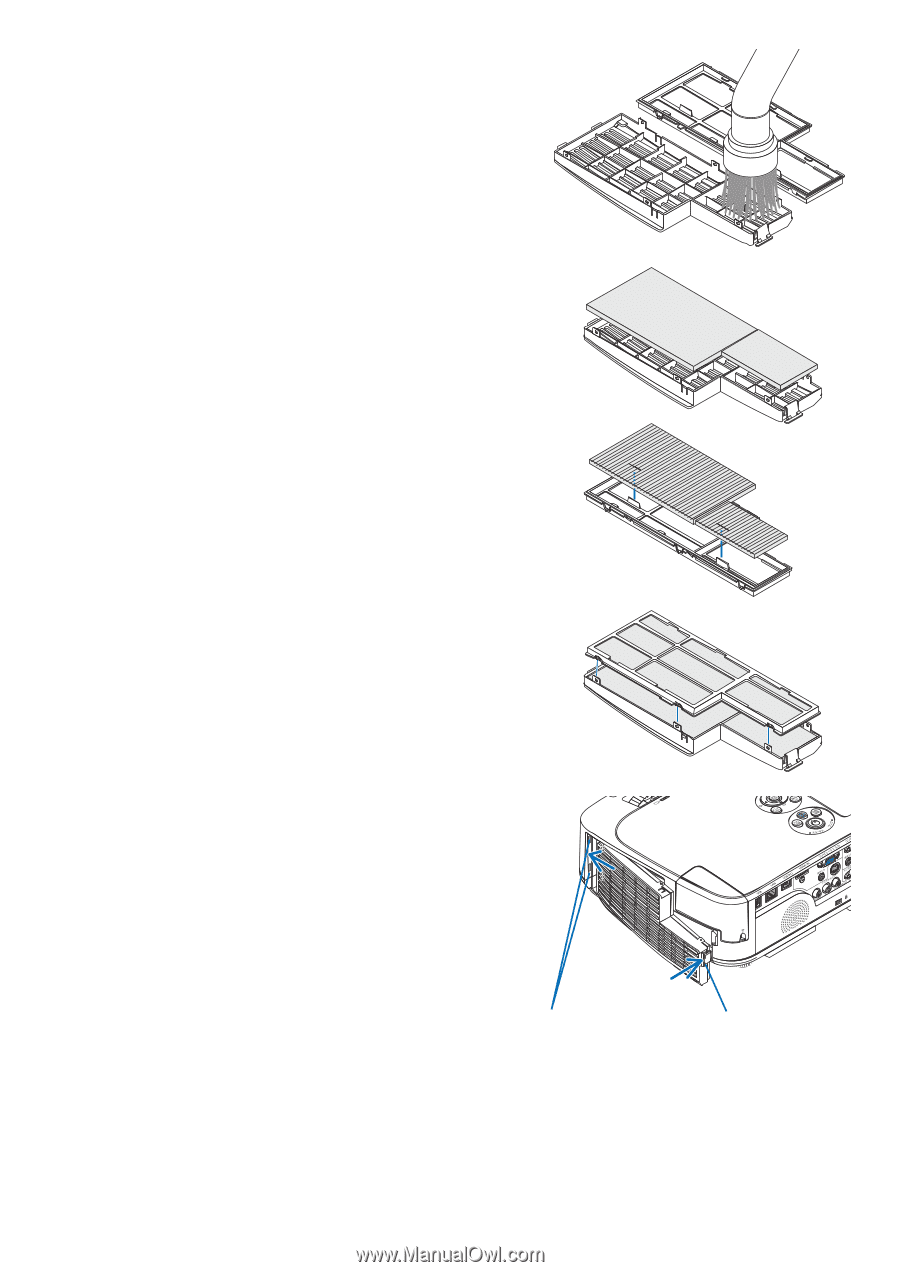
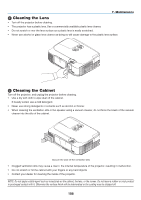
Remove dust from the filter unit and the filter cover.
 |
UPC - 805736035629
View all NEC NP-M300X manuals
Add to My Manuals
Save this manual to your list of manuals |
Page 117 highlights
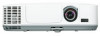
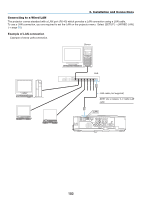
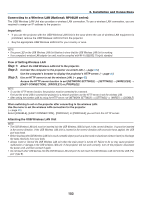
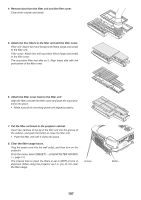
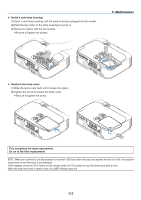
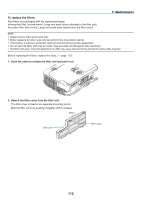
4. Remove dust from the filter unit and the filter cover. Clean both outside and inside. 5. Attach the four filters to the filter unit and the filter cover. Filter unit: Attach two hard honeycomb filters (large and small) to the filter unit. Filter cover: Attach two soft accordion filters (large and small) to the filter cover. The accordion filter has slits on it. Align these slits with the protrusions of the filter cover. 6. Attach the filter cover back to the filter unit Align the filter unit with the filter cover and push the six protrusions into place. • Make sure all six mounting points are aligned properly. 7. Put the filter unit back to the projector cabinet. Insert two catches of the tip of the filter unit into the groove of the cabinet, and push the button to close the filter unit. • Push the filter unit until it clicks into place. 8. Clear the filter usage hours. Plug the power cord into the wall outlet, and then turn on the projector. From the menu, select [RESET] → [CLEAR FILTER HOURS]. (→ page 91) The interval time to clean the filters is set to [OFF] at time of shipment. When using the projector as it is, you do not clear the filter usage Groove WIRELESS WIRELESS Button 107
-
 1
1 -
2
-
3
-
4
-
5
-
6
-
7
-
8
-
9
-
10
-
11
-
12
-
13
-
14
-
15
-
16
-
17
-
18
-
19
-
20
-
21
-
22
-
23
-
24
-
25
-
26
-
27
-
28
-
29
-
30
-
31
-
32
-
33
-
34
-
35
-
36
-
37
-
38
-
39
-
40
-
41
-
42
-
43
-
44
-
45
-
46
-
47
-
48
-
49
-
50
-
51
-
52
-
53
-
54
-
55
-
56
-
57
-
58
-
59
-
60
-
61
-
62
-
63
-
64
-
65
-
66
-
67
-
68
-
69
-
70
-
71
-
72
-
73
-
74
-
75
-
76
-
77
-
78
-
79
-
80
-
81
-
82
-
83
-
84
-
85
-
86
-
87
-
88
-
89
-
90
-
91
-
92
-
93
-
94
-
95
-
96
-
97
-
98
-
99
-
100
-
101
-
102
-
103
-
104
-
105
-
106
-
107
-
108
-
109
-
110
-
111
-
 112
112 -
 113
113 -
 114
114 -
 115
115 -
 116
116 -
 117
117 -
 118
118 -
 119
119 -
 120
120 -
 121
121 -
 122
122 -
123
-
124
-
125
-
126
-
127
-
128
-
129
-
130
-
131
-
132
-
133
-
134
-
135
-
136
 |
 |