Netgear R8500 User Manual - Page 127
Back Up Windows Computers With ReadySHARE Vault, To access the device from a Mac
 |
View all Netgear R8500 manuals
Add to My Manuals
Save this manual to your list of manuals |
Page 127 highlights
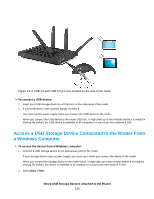
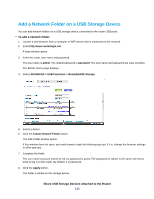
To access the device from a Mac: 1. Connect a USB storage device to the appropriate port on the router. If your storage device uses a power supply, you must use it when you connect the device to the router. When you connect the storage device to the router's port, it might take up to two minutes before it is ready for sharing. By default, the device is available to all computers on your local area network (LAN) 2. On a Mac that is connected to the network, select Go > Connect to Server. 3. In the Server Address field, enter smb://readyshare. 4. When prompted, select the Guest radio button. If you set up access control on the router and you allowed your Mac to access the network, select the Registered User radio button and enter admin for the name and password for the password. For more information about access control, see the user manual, which is available online at http://downloadcenter.netgear.com or through a link in the router's user interface. 5. Click the Connect button. A window automatically opens and displays the files and folders on the device. Back Up Windows Computers With ReadySHARE Vault Your router comes with free backup software for all the Windows computers in your home. Connect a USB hard disk drive (HDD) to the router for centralized, continuous, and automatic backup. The following operating systems support ReadySHARE Vault: • Windows XP SP3 • Windows 7 • Windows 8 • Windows 8.1 To back up your Windows computer: 1. Connect a USB HDD to a USB port on therouter. 2. Download ReadySHARE Vault from http://www.netgear.com/readyshare and install it on each Windows computer. 3. Launch ReadySHARE Vault. 4. Use the dashboard or the Backup tab to set up and run your backup. Share USB Storage Devices Attached to the Router 127
-
 1
1 -
2
-
3
-
4
-
5
-
6
-
7
-
8
-
9
-
10
-
11
-
12
-
13
-
14
-
15
-
16
-
17
-
18
-
19
-
20
-
21
-
22
-
23
-
24
-
25
-
26
-
27
-
28
-
29
-
30
-
31
-
32
-
33
-
34
-
35
-
36
-
37
-
38
-
39
-
40
-
41
-
42
-
43
-
44
-
45
-
46
-
47
-
48
-
49
-
50
-
51
-
52
-
53
-
54
-
55
-
56
-
57
-
58
-
59
-
60
-
61
-
62
-
63
-
64
-
65
-
66
-
67
-
68
-
69
-
70
-
71
-
72
-
73
-
74
-
75
-
76
-
77
-
78
-
79
-
80
-
81
-
82
-
83
-
84
-
85
-
86
-
87
-
88
-
89
-
90
-
91
-
92
-
93
-
94
-
95
-
96
-
97
-
98
-
99
-
100
-
101
-
102
-
103
-
104
-
105
-
106
-
107
-
108
-
109
-
110
-
111
-
112
-
113
-
114
-
115
-
116
-
117
-
118
-
119
-
120
-
121
-
 122
122 -
 123
123 -
 124
124 -
 125
125 -
 126
126 -
 127
127 -
 128
128 -
 129
129 -
 130
130 -
 131
131 -
 132
132 -
133
-
134
-
135
-
136
-
137
-
138
-
139
-
140
-
141
-
142
-
143
-
144
-
145
-
146
-
147
-
148
-
149
-
150
-
151
-
152
-
153
-
154
-
155
-
156
-
157
-
158
-
159
-
160
-
161
-
162
-
163
-
164
-
165
-
166
-
167
-
168
-
169
-
170
-
171
-
172
-
173
-
174
-
175
-
176
-
177
-
178
-
179
-
180
-
181
-
182
-
183
-
184
-
185
-
186
-
187
-
188
-
189
-
190
-
191
-
192
-
193
 |
 |