Netgear WAC730-Business User Manual - Page 129
Con a Default or Custom Captive Portal Splash To con a captive portal splash
 |
View all Netgear WAC730-Business manuals
Add to My Manuals
Save this manual to your list of manuals |
Page 129 highlights
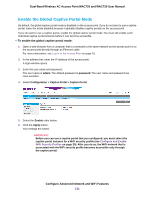
Dual-Band Wireless AC Access Point WAC720 and WAC730 User Manual Configure a Default or Custom Captive Portal Splash Page The splash page (also referred to as web locale) is the page that users see when they access the captive portal. You can use the default splash page that the access point provides or set up a custom splash page. You can create up to six splash pages (three per captive portal instance). However, for each captive portal instance, only one splash page can be active at any time. To configure a captive portal splash page: 1. Open a web browser from a computer that is connected to the same network as the access point or to the access point directly through an Ethernet cable. For more information, see Log In to the Access Point on page 16. 2. In the address bar, enter the IP address of the access point. A login window opens. 3. Enter the user name and password. The user name is admin. The default password is password. The user name and password are case-sensitive. 4. Select Configuration > Captive Portal > Web Customization. 5. From the Captive Portal Web Locale menu, select Create. 6. In the Web Local Name field, enter a name for the splash page. A splash page is also referred to as web locale. This name that you specify is for internal management purposes only. A user does not see this name. 7. From the Captive Portal Instances menu, select the captive instance (NETGEAR or NETGEAR-1) with which the splash page must be associated. Note You can configure up to three splash pages for the same captive portal instance but only one splash page can be the active page for a captive portal instance. 8. Click the Apply button. Configure Advanced Network and WiFi Features 129
-
 1
1 -
2
-
3
-
4
-
5
-
6
-
7
-
8
-
9
-
10
-
11
-
12
-
13
-
14
-
15
-
16
-
17
-
18
-
19
-
20
-
21
-
22
-
23
-
24
-
25
-
26
-
27
-
28
-
29
-
30
-
31
-
32
-
33
-
34
-
35
-
36
-
37
-
38
-
39
-
40
-
41
-
42
-
43
-
44
-
45
-
46
-
47
-
48
-
49
-
50
-
51
-
52
-
53
-
54
-
55
-
56
-
57
-
58
-
59
-
60
-
61
-
62
-
63
-
64
-
65
-
66
-
67
-
68
-
69
-
70
-
71
-
72
-
73
-
74
-
75
-
76
-
77
-
78
-
79
-
80
-
81
-
82
-
83
-
84
-
85
-
86
-
87
-
88
-
89
-
90
-
91
-
92
-
93
-
94
-
95
-
96
-
97
-
98
-
99
-
100
-
101
-
102
-
103
-
104
-
105
-
106
-
107
-
108
-
109
-
110
-
111
-
112
-
113
-
114
-
115
-
116
-
117
-
118
-
119
-
120
-
121
-
122
-
123
-
 124
124 -
 125
125 -
 126
126 -
 127
127 -
 128
128 -
 129
129 -
 130
130 -
 131
131 -
 132
132 -
 133
133 -
 134
134 -
135
-
136
-
137
-
138
-
139
-
140
-
141
-
142
-
143
-
144
-
145
-
146
-
147
-
148
-
149
-
150
-
151
-
152
-
153
-
154
-
155
-
156
-
157
-
158
-
159
-
160
-
161
-
162
-
163
 |
 |
