Netgear WAC730-Business User Manual - Page 33
Mount the Access Point to a Wall, Initial Setup
 |
View all Netgear WAC730-Business manuals
Add to My Manuals
Save this manual to your list of manuals |
Page 33 highlights
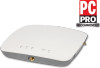
Dual-Band Wireless AC Access Point WAC720 and WAC730 User Manual Mount the Access Point to a Wall The best location for wall installation is at the center of your WiFi coverage area, and within line of sight of all mobile devices. Make sure that the top (the dome side) of the access point is directed toward the users and not the wall. To mount the access point to a wall: 1. Locate the wall mounting bracket, access point bracket, four mounting screws, and wall anchors and screws in the product package. 2. Place the wall mounting bracket on the wall where you want to mount the access point. 3. Mark the wall where the two mounting holes are (see the figure in step 6). 4. Attach the access point mounting bracket to the access point using the four mounting screws as shown. 5. So you can see how the brackets fit together, attach the wall mounting bracket to the access point mounting bracket as shown in the following figure. The three hooks on the wall mounting bracket fit into the three holes on the access point mounting bracket. The handle on the wall mounting bracket also fits into a hole on the access point bracket. Release the wall mounting bracket by moving the handle. Initial Setup 33
-
 1
1 -
2
-
3
-
4
-
5
-
6
-
7
-
8
-
9
-
10
-
11
-
12
-
13
-
14
-
15
-
16
-
17
-
18
-
19
-
20
-
21
-
22
-
23
-
24
-
25
-
26
-
27
-
 28
28 -
 29
29 -
 30
30 -
 31
31 -
 32
32 -
 33
33 -
 34
34 -
 35
35 -
 36
36 -
 37
37 -
 38
38 -
39
-
40
-
41
-
42
-
43
-
44
-
45
-
46
-
47
-
48
-
49
-
50
-
51
-
52
-
53
-
54
-
55
-
56
-
57
-
58
-
59
-
60
-
61
-
62
-
63
-
64
-
65
-
66
-
67
-
68
-
69
-
70
-
71
-
72
-
73
-
74
-
75
-
76
-
77
-
78
-
79
-
80
-
81
-
82
-
83
-
84
-
85
-
86
-
87
-
88
-
89
-
90
-
91
-
92
-
93
-
94
-
95
-
96
-
97
-
98
-
99
-
100
-
101
-
102
-
103
-
104
-
105
-
106
-
107
-
108
-
109
-
110
-
111
-
112
-
113
-
114
-
115
-
116
-
117
-
118
-
119
-
120
-
121
-
122
-
123
-
124
-
125
-
126
-
127
-
128
-
129
-
130
-
131
-
132
-
133
-
134
-
135
-
136
-
137
-
138
-
139
-
140
-
141
-
142
-
143
-
144
-
145
-
146
-
147
-
148
-
149
-
150
-
151
-
152
-
153
-
154
-
155
-
156
-
157
-
158
-
159
-
160
-
161
-
162
-
163
 |
 |
