Netgear WNR3500Lv2 User Manual - Page 65
Dynamic DNS, Service Provider, Use a Dynamic DNS Service, Apply, To con Dynamic DNS
 |
View all Netgear WNR3500Lv2 manuals
Add to My Manuals
Save this manual to your list of manuals |
Page 65 highlights
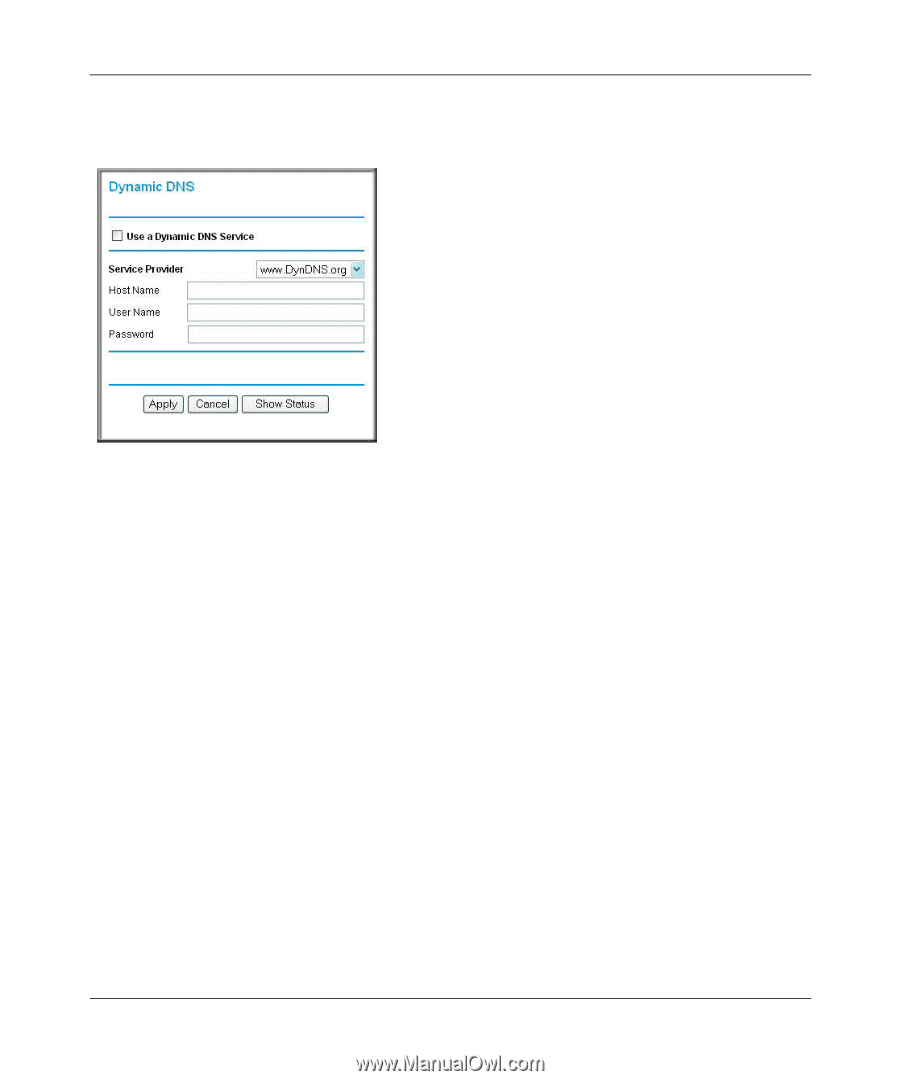
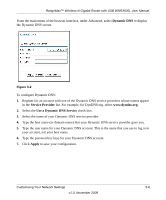
RangeMax™ Wireless-N Gigabit Router with USB WNR3500L User Manual From the main menu of the browser interface, under Advanced, select Dynamic DNS to display the Dynamic DNS screen. Figure 5-2 To configure Dynamic DNS: 1. Register for an account with one of the Dynamic DNS service providers whose names appear in the Service Provider list. For example, for DynDNS.org, select www.dyndns.org. 2. Select the Use a Dynamic DNS Service check box. 3. Select the name of your Dynamic DNS service provider. 4. Type the host name (or domain name) that your Dynamic DNS service provider gave you. 5. Type the user name for your Dynamic DNS account. This is the name that you use to log in to your account, not your host name. 6. Type the password (or key) for your Dynamic DNS account. 7. Click Apply to save your configuration. Customizing Your Network Settings 5-6 v1.0, November 2009
-
 1
1 -
2
-
3
-
4
-
5
-
6
-
7
-
8
-
9
-
10
-
11
-
12
-
13
-
14
-
15
-
16
-
17
-
18
-
19
-
20
-
21
-
22
-
23
-
24
-
25
-
26
-
27
-
28
-
29
-
30
-
31
-
32
-
33
-
34
-
35
-
36
-
37
-
38
-
39
-
40
-
41
-
42
-
43
-
44
-
45
-
46
-
47
-
48
-
49
-
50
-
51
-
52
-
53
-
54
-
55
-
56
-
57
-
58
-
59
-
 60
60 -
 61
61 -
 62
62 -
 63
63 -
 64
64 -
 65
65 -
 66
66 -
 67
67 -
 68
68 -
 69
69 -
 70
70 -
71
-
72
-
73
-
74
-
75
-
76
-
77
-
78
-
79
-
80
-
81
-
82
-
83
-
84
-
85
-
86
-
87
-
88
-
89
-
90
-
91
-
92
-
93
-
94
-
95
-
96
-
97
-
98
-
99
-
100
-
101
-
102
-
103
-
104
-
105
-
106
-
107
-
108
-
109
-
110
-
111
-
112
-
113
-
114
-
115
-
116
-
117
-
118
-
119
-
120
-
121
-
122
-
123
-
124
-
125
-
126
-
127
-
128
-
129
-
130
-
131
-
132
-
133
 |
 |