Nikon VSA78203 User Guide - Page 13
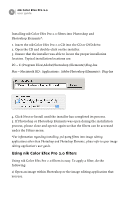
Using nik Color Efex Pro 2.0 filters with the nik Color, Efex Pro 2.0 Selective tool
 |
UPC - 018208253111
View all Nikon VSA78203 manuals
Add to My Manuals
Save this manual to your list of manuals |
Page 13 highlights
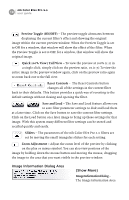
nik Color Efex Pro 2.0 user guide 7 2) Navigate to the Filters or Effects menu, and select the filter you wish to apply to the image. 3) Experiment with the sliders until you find a suitable setting for the image and apply the changes by selecting OK. If you make changes on the screen that you do not wish to apply to your image, simply click the Cancel button. Using nik Color Efex Pro 2.0 filters with the nik Color Efex Pro 2.0 Selective tool The nik Color Efex Pro 2.0 Selective tool provides a powerful and easy to use technique to selectively apply any nik Color Efex Pro 2.0 filter to an image. To apply a filter selectively, do the following: 1) Open an image within Photoshop or Photoshop Elements. 2) Navigate to the Automate or Automation Tools menu under the File menu and select nik Color Efex Pro 2.0 Selective. 3) Select one of the filters from within the nik Color Efex Pro 2.0 Selective palette. 4) Experiment with the sliders until you find a suitable setting for the image and apply the changes by selecting OK. 5) Select one of the editing tools to begin applying the effect to the image. Click on the Paint button to selectively paint the effect into the image, or click on the Fill button to apply the effect to the entire image. By clicking on the Fill button and then clicking on the Erase button, the effect can be selectively removed from the image. 6) Once you are satisfied with the result, click on the Apply button to save the changes. This prepares the image to have another nik Color Efex Pro 2.0 filter applied to it.
-
 1
1 -
2
-
3
-
4
-
5
-
6
-
7
-
 8
8 -
 9
9 -
 10
10 -
 11
11 -
 12
12 -
 13
13 -
 14
14 -
 15
15 -
 16
16 -
 17
17 -
 18
18 -
19
-
20
-
21
-
22
-
23
-
24
-
25
-
26
-
27
-
28
-
29
-
30
-
31
-
32
-
33
-
34
-
35
-
36
-
37
-
38
-
39
-
40
-
41
-
42
-
43
-
44
-
45
-
46
-
47
-
48
-
49
-
50
-
51
-
52
-
53
-
54
-
55
-
56
-
57
-
58
-
59
-
60
-
61
-
62
-
63
-
64
-
65
-
66
-
67
-
68
-
69
 |
 |
