Nikon VSA78203 User Guide - Page 22
Clear, Custom Tab, Discard, Erase, Filter Buttons, Filter Selection Tabs
 |
UPC - 018208253111
View all Nikon VSA78203 manuals
Add to My Manuals
Save this manual to your list of manuals |
Page 22 highlights
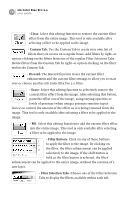
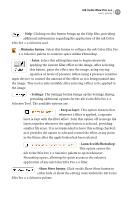
16 nik Color Efex Pro 2.0 user guide - Clear: Select this editing function to remove the current filter effect from the entire image. This tool is only available after selecting a filter to be applied to the image. - Custom Tab: Use the Custom Tab to create your own list of filters that you access on a regular basis. Add filters by right- or option-clicking on the filters from one of the regular Filter Selection Tabs. Delete filters from the Custom Tab by right- or option-clicking on the filter within the Custom Tab. - Discard: The Discard function clears the current filter enhancement and the current filter settings to allow you to start over or choose another nik Color Efex Pro 2.0 filter. - Erase: Select this editing function to selectively remove the current filter effect from the image. After selecting this button, paint the effect out of the image, using varying opacities or levels of pressure (when using a pressure sensitive input device) to control the amount of the effect as it is being removed from the image. This tool is only available after selecting a filter to be applied to the image. - Fill: Select this editing function to add the current filter effect into the entire image. This tool is only available after selecting a filter to be applied to the image. - Filter Buttons: Click on any of these buttons to apply the filter to the image. By clicking on the filter, the filter enhancement can be applied selectively to the image. If the shift button is held as the filter button is selected, the filter enhancement can be applied to the entire image, without the creation of a new layer. - Filter Selection Tabs: Choose one of the Filter Selection Tabs to display the filters available within each tab.
-
 1
1 -
2
-
3
-
4
-
5
-
6
-
7
-
8
-
9
-
10
-
11
-
12
-
13
-
14
-
15
-
16
-
 17
17 -
 18
18 -
 19
19 -
 20
20 -
 21
21 -
 22
22 -
 23
23 -
 24
24 -
 25
25 -
 26
26 -
 27
27 -
28
-
29
-
30
-
31
-
32
-
33
-
34
-
35
-
36
-
37
-
38
-
39
-
40
-
41
-
42
-
43
-
44
-
45
-
46
-
47
-
48
-
49
-
50
-
51
-
52
-
53
-
54
-
55
-
56
-
57
-
58
-
59
-
60
-
61
-
62
-
63
-
64
-
65
-
66
-
67
-
68
-
69
 |
 |
