Nokia 6205 Nokia 6205 Phone User Guide in US English - Page 52
Send a group message, Add contacts to groups, Rename a group
 |
View all Nokia 6205 manuals
Add to My Manuals
Save this manual to your list of manuals |
Page 52 highlights
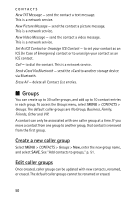
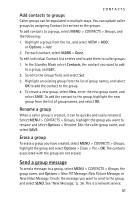
CONTACTS Add contacts to groups Caller groups can be populated in multiple ways. You can update caller groups by assigning Contact List entries to the groups. To add contacts to a group, select MENU > CONTACTS > Groups, and the following: 1. Highlight a group from the list, and select VIEW > ADD; or Options > Add. 2. For each contact, select MARK > Done. To edit individual Contact List entries and to add them to caller groups: 1. In the Standby Mode select Contacts, the contact you want to add to a group, and Edit. 2. Scroll to the Group: field, and select Set. 3. Highlight an existing group from the list of group names, and select OK to add the contact to the group. 4. To create a new group, select New, enter the new group name, and select SAVE. To add the contact to the group, highlight the new group from the list of group names, and select OK. Rename a group When a caller group is created, it can be quickly and easily renamed. Select MENU > CONTACTS > Groups, highlight the group you want to rename and select Options > Rename. Edit the caller group name, and select SAVE. Erase a group To erase a group you have created, select MENU > CONTACTS > Groups, highlight the group and select Options > Erase > Yes > OK. The contacts associated with the group are not erased. Send a group message To send a message to a group, select MENU > CONTACTS > Groups, the group name, and Options > New TXT Message, New Picture Message, or New Video Message. Create the message you want to send to the group, and select SEND. See "New Message," p. 36. This is a network service. 51
-
 1
1 -
2
-
3
-
4
-
5
-
6
-
7
-
8
-
9
-
10
-
11
-
12
-
13
-
14
-
15
-
16
-
17
-
18
-
19
-
20
-
21
-
22
-
23
-
24
-
25
-
26
-
27
-
28
-
29
-
30
-
31
-
32
-
33
-
34
-
35
-
36
-
37
-
38
-
39
-
40
-
41
-
42
-
43
-
44
-
45
-
46
-
 47
47 -
 48
48 -
 49
49 -
 50
50 -
 51
51 -
 52
52 -
 53
53 -
 54
54 -
 55
55 -
 56
56 -
 57
57 -
58
-
59
-
60
-
61
-
62
-
63
-
64
-
65
-
66
-
67
-
68
-
69
-
70
-
71
-
72
-
73
-
74
-
75
-
76
-
77
-
78
-
79
-
80
-
81
-
82
-
83
-
84
-
85
-
86
-
87
-
88
-
89
-
90
-
91
-
92
-
93
-
94
-
95
 |
 |
