Oki PRO8432WT Pro8432WT - User Guide - Page 13
How to Use the Function Key, Names of Components, Function Menu List
 |
View all Oki PRO8432WT manuals
Add to My Manuals
Save this manual to your list of manuals |
Page 13 highlights
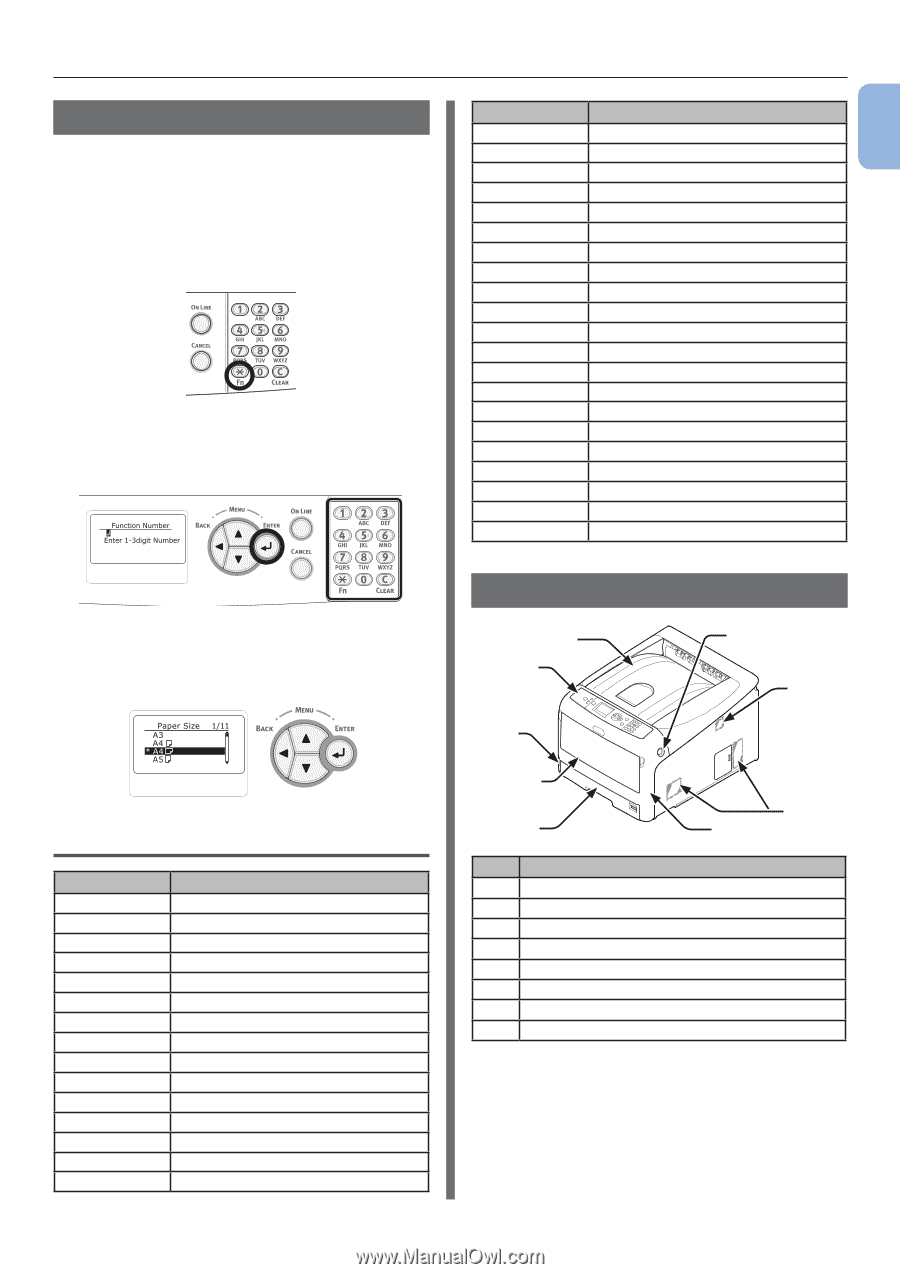
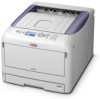
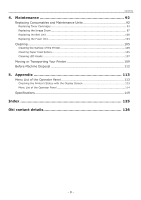
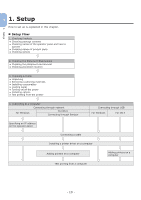
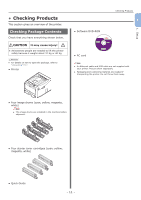
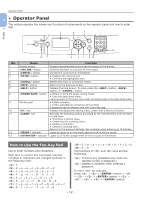
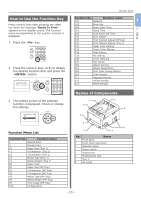
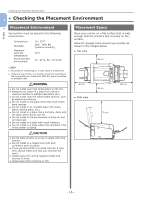
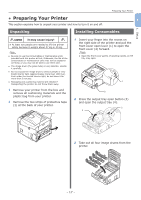
How to Use the Function Key Press numeric keys after pressing the key when the message "Ready To Print" appears on the display screen. The function menu corresponding to the number entered is displayed. 1 Press the key. 2 Press the numeric keys (0-9) to display the desired function item and press the button. Operator Panel Function No. Function menu 101 Network 1 103 Error Log 200 Power Save Time 1. Setup 201 Sleep Time 202 Auto Power Off Time 210 Error Report 220 Print Position Adjust (MPTray) 221 Print Position Adjust (Tray 1) 231 Paper Color Setting 233 Trans. Color Setting 234 SMR Setting 235 BG Setting 236 Drum Cleaning 237 Hex Dump 300 Adjust Density 301 Adjust Registration 302 Print Color Tuning Pattern 310 Cyan Density 311 Magenta Density 312 Yellow Density 313 White Density 3 The setting screen of the selected function is displayed. Check or change the settings. Names of Components 5 3 2 8 4 Function Menu List Function No. Function menu 1 Shared Print 2 Private Print 10 Paper Size (Tray 1) 11 X Dimension (Tray 1) 12 Y Dimension (Tray 1) 13 Media Type (Tray 1) 14 Media Weight (Tray 1) 80 Paper Feed 90 Paper Size (MP Tray) 91 X Dimension (MP Tray) 92 Y Dimension (MP Tray) 93 Media Type (MP Tray) 94 Media Weight (MP Tray) 95 Tray Usage (MP Tray) 100 Configuration 6 8 7 1 No. 1 2 3 4 5 6 7 8 Name Front cover Front cover open lever Operator panel Power switch Output tray Multipurpose tray Tray 1 Air vents - 13 -
-
 1
1 -
2
-
3
-
4
-
5
-
6
-
7
-
 8
8 -
 9
9 -
 10
10 -
 11
11 -
 12
12 -
 13
13 -
 14
14 -
 15
15 -
 16
16 -
 17
17 -
 18
18 -
19
-
20
-
21
-
22
-
23
-
24
-
25
-
26
-
27
-
28
-
29
-
30
-
31
-
32
-
33
-
34
-
35
-
36
-
37
-
38
-
39
-
40
-
41
-
42
-
43
-
44
-
45
-
46
-
47
-
48
-
49
-
50
-
51
-
52
-
53
-
54
-
55
-
56
-
57
-
58
-
59
-
60
-
61
-
62
-
63
-
64
-
65
-
66
-
67
-
68
-
69
-
70
-
71
-
72
-
73
-
74
-
75
-
76
-
77
-
78
-
79
-
80
-
81
-
82
-
83
-
84
-
85
-
86
-
87
-
88
-
89
-
90
-
91
-
92
-
93
-
94
-
95
-
96
-
97
-
98
-
99
-
100
-
101
-
102
-
103
-
104
-
105
-
106
-
107
-
108
-
109
-
110
-
111
-
112
-
113
-
114
-
115
-
116
-
117
-
118
-
119
-
120
-
121
-
122
-
123
-
124
-
125
-
126
-
127
-
128
 |
 |