Pantech Element English - Manual - Page 10
Installing the microSD™ card, Charging battery - cases
 |
View all Pantech Element manuals
Add to My Manuals
Save this manual to your list of manuals |
Page 10 highlights
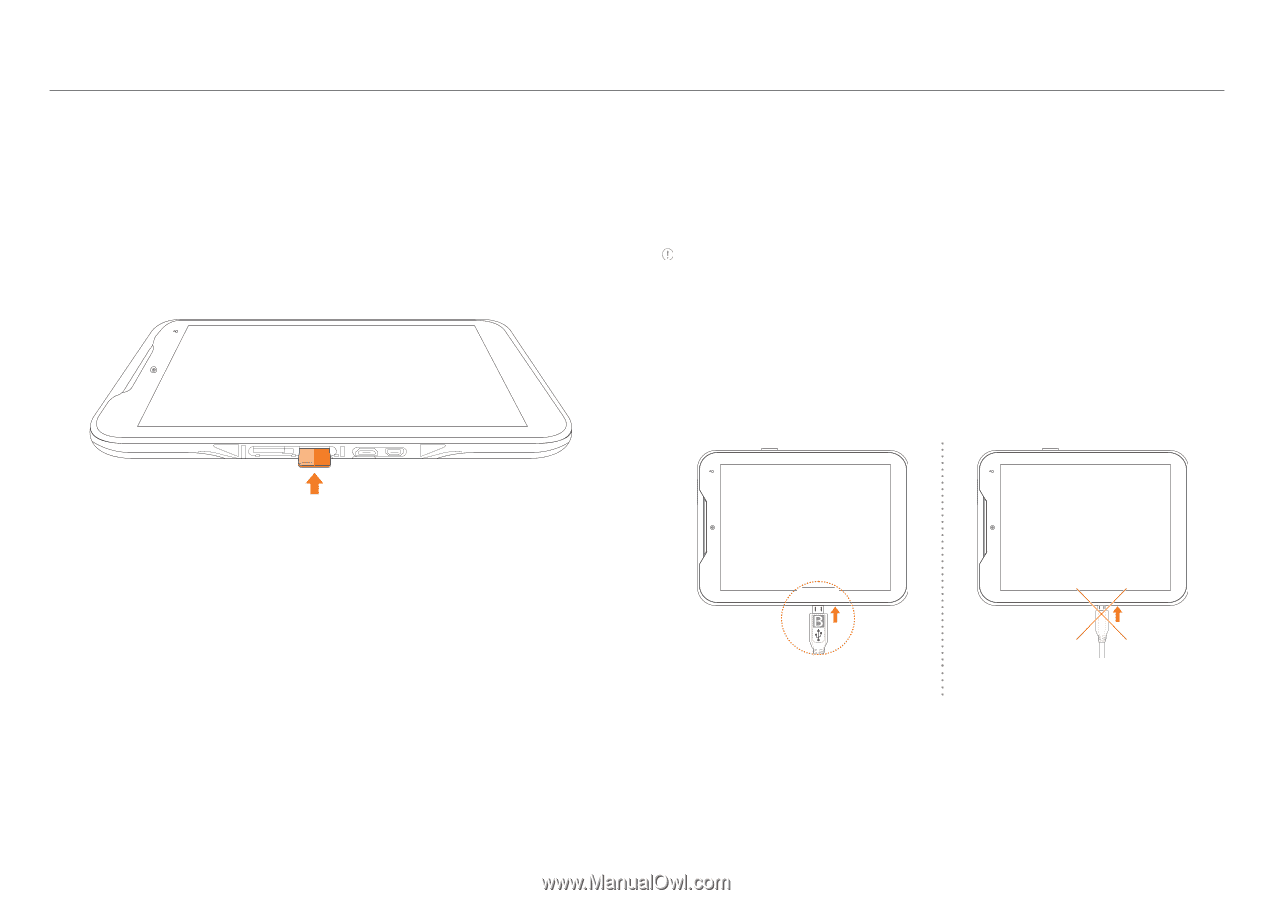
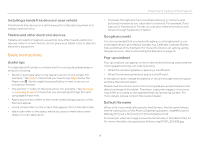
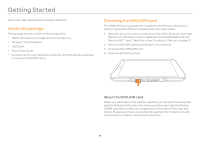
Getting Started Installing the microSD™ card 1. Open the protective cover on the down side of the Element and insert the microSD™ card into the slot. Note that the left one of the two covers is dedicated to the SIM card and the microSD™ card. Check the correct location of the slot on page 13. Ensure that the logo of the microSD™ card is facing upward. 2. Close the protective cover. Charging battery Power might not turn on if the battery voltage is too low or battery is discharged. In that case, charge the battery with the included charger for more than ten minutes. It is recommended that you charge the battery fully before you use the Element. Note A red light blinks once if you press the LOCK/PWR key when there is not enough battery power to turn on the device. If so, charge the battery for at least ten minutes before you turn on the power. 1. Open the protective cover on the down side of the Element and connect the USB connector to the Element. Note that the right one of the two covers is dedicated to the USB connector and HDMI port. Make sure to align the connector as indicated in the image. Otherwise, the charging connector will be damaged and the battery will not charge. About the microSD™ card A microSD™ card is a removable flash memory card where you can save data. Save pictures and contacts, and download applications to the SD card. A memory space of 16GB is embedded in the Element: you can expand memory by up to 32GB using the external microSD™ card. It is recommended that you format the microSD™ card before using the Element. Correct Incorrect 2. Connect the other end of the USB data cable to the USB charger. 3. Plug in the USB charger to an electrical outlet. The battery will start charging. 4. Disconnect the USB charger from the Element when the battery is fully charged. 10
-
 1
1 -
2
-
3
-
4
-
 5
5 -
 6
6 -
 7
7 -
 8
8 -
 9
9 -
 10
10 -
 11
11 -
 12
12 -
 13
13 -
 14
14 -
 15
15 -
16
-
17
-
18
-
19
-
20
-
21
-
22
-
23
-
24
-
25
-
26
-
27
-
28
-
29
-
30
-
31
-
32
-
33
-
34
-
35
-
36
-
37
-
38
-
39
-
40
-
41
-
42
-
43
-
44
-
45
-
46
-
47
-
48
-
49
-
50
-
51
-
52
-
53
-
54
-
55
-
56
-
57
-
58
-
59
-
60
-
61
-
62
-
63
-
64
-
65
-
66
-
67
-
68
-
69
-
70
-
71
-
72
-
73
-
74
-
75
-
76
 |
 |