Pioneer AVH-4200NEX Owner s Manual - Page 43
MIXTRAX, iDatalink
 |
View all Pioneer AVH-4200NEX manuals
Add to My Manuals
Save this manual to your list of manuals |
Page 43 highlights
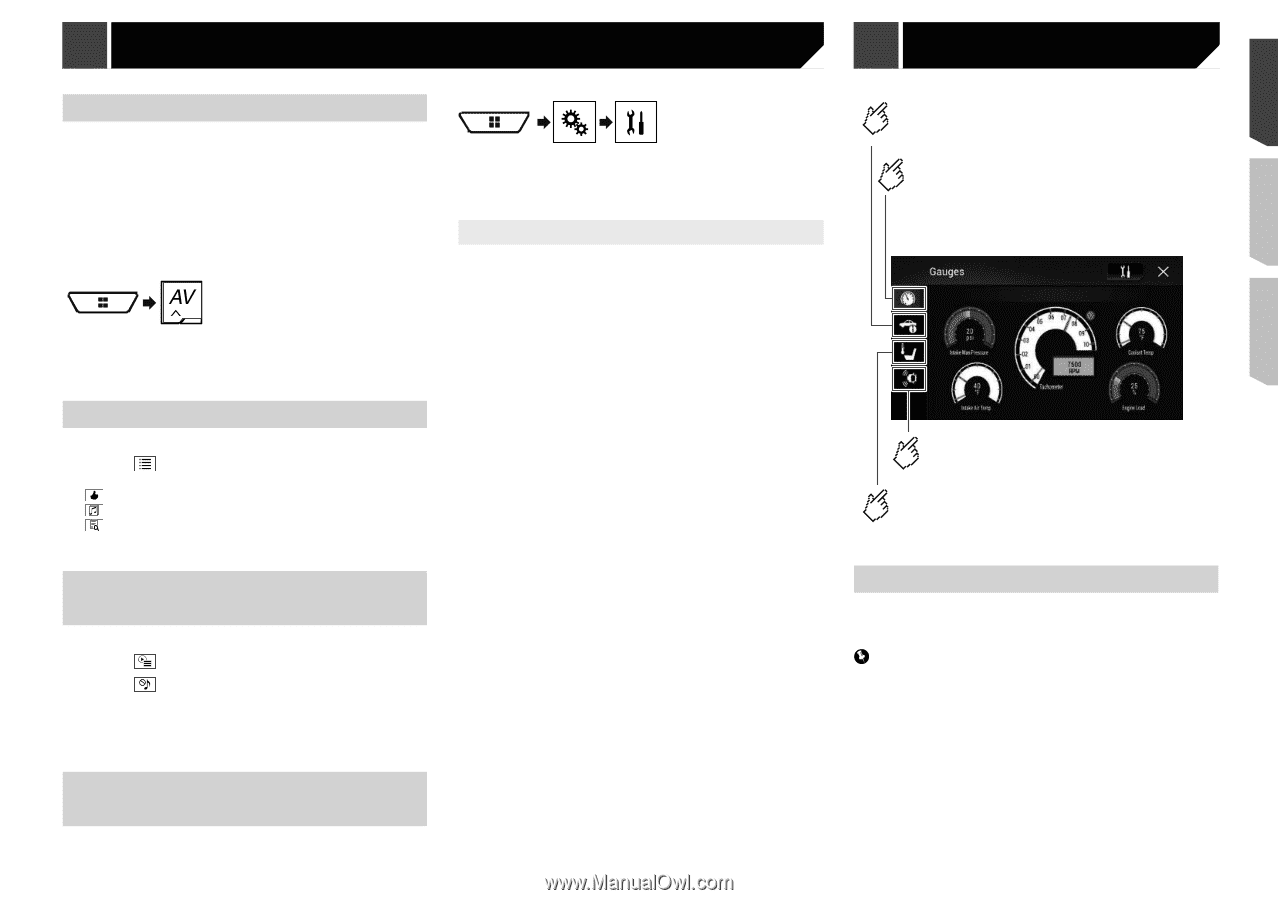
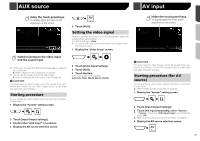
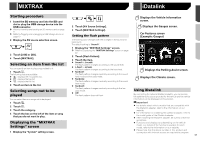
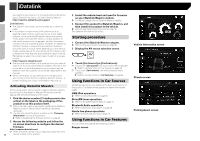
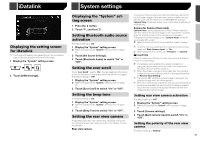
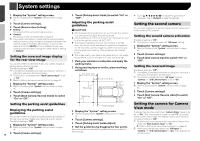
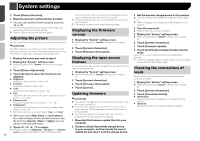
MIXTRAX Starting procedure 1 Insert the SD memory card into the SD card slot or plug the USB storage device into the USB connector. Refer to Inserting and ejecting an SD memory card on page 9 Refer to Plugging and unplugging a USB storage device on page 10 2 Display the AV source selection screen. 3 Touch [USB] or [SD]. 4 Touch [MIXTRAX]. Selecting an item from the list You can specify an item to play songs related to it. 1 Touch . The following lists are available: : displays the mix pattern list. : displays the tag list. : displays the file list. 2 Touch an item in the list. Selecting songs not to be played You can select items or songs not to be played. 1 Touch . 2 Touch . 3 Touch the category. 4 Touch the box on the left of the item or song that you do not want to play. Displaying the "MIXTRAX Settings" screen 1 Display the "System" setting screen. iDatalink 2 Touch [AV Source Settings]. 3 Touch [MIXTRAX Settings]. Setting the flash pattern The flashing color changes with the changes in the sound and bass levels. The default setting is "Sound1". 1 Display the "MIXTRAX Settings" screen. Refer to Displaying the "MIXTRAX Settings" screen on page 43 2 Touch [Flash Pattern]. 3 Touch the item. Sound1 to Sound6: The flash pattern changes according to the sound level. L-Pass1 to L-Pass6: The flash pattern changes according to the bass level. Random1: The flash pattern changes randomly according to the sound level mode and low pass mode. Random2: The flash pattern changes randomly according to the sound level mode. Random3: The flash pattern changes randomly according to the low pass mode. Off: The flash pattern does not flash. Displays the Vehicle Information screen. Displays the Gauges screen. Car Features screen (Example: Gauges) Displays the Parking Assist screen. Displays the Climate screen. Using iDatalink By connecting the optional iDatalink adapter, you can access the satellite radio source provided for the vehicle and the vehicle information can be displayed on this product. Important For details about vehicle models that are compatible with the iDatalink adapter, refer to the information on our website. For information on installing the iDatalink adapter, refer to the install guide of the iDatalink adapter. After installing the iDatalink adapter, be sure to check the operations. Functions and displays vary depending on the vehicle model. For details of the functions available for each model, refer to the information on our website. Please note that the device number of this product and a computer with internet access are required to program 43
-
 1
1 -
2
-
3
-
4
-
5
-
6
-
7
-
8
-
9
-
10
-
11
-
12
-
13
-
14
-
15
-
16
-
17
-
18
-
19
-
20
-
21
-
22
-
23
-
24
-
25
-
26
-
27
-
28
-
29
-
30
-
31
-
32
-
33
-
34
-
35
-
36
-
37
-
 38
38 -
 39
39 -
 40
40 -
 41
41 -
 42
42 -
 43
43 -
 44
44 -
 45
45 -
 46
46 -
 47
47 -
 48
48 -
49
-
50
-
51
-
52
-
53
-
54
-
55
-
56
-
57
-
58
-
59
-
60
-
61
-
62
-
63
-
64
-
65
-
66
-
67
-
68
-
69
-
70
-
71
-
72
-
73
-
74
-
75
-
76
-
77
-
78
-
79
-
80
-
81
-
82
-
83
-
84
-
85
-
86
-
87
-
88
-
89
-
90
-
91
-
92
-
93
-
94
-
95
-
96
-
97
-
98
-
99
-
100
-
101
-
102
-
103
-
104
-
105
-
106
-
107
-
108
-
109
-
110
-
111
-
112
-
113
-
114
-
115
-
116
-
117
-
118
-
119
-
120
-
121
-
122
-
123
-
124
-
125
-
126
-
127
-
128
-
129
-
130
-
131
-
132
-
133
-
134
-
135
-
136
-
137
-
138
-
139
-
140
-
141
-
142
-
143
-
144
-
145
-
146
-
147
-
148
-
149
-
150
-
151
-
152
-
153
-
154
-
155
-
156
-
157
-
158
-
159
-
160
-
161
-
162
-
163
-
164
-
165
-
166
-
167
-
168
-
169
-
170
-
171
-
172
-
173
-
174
-
175
-
176
-
177
-
178
-
179
-
180
-
181
-
182
-
183
-
184
-
185
-
186
-
187
-
188
-
189
-
190
-
191
-
192
-
193
-
194
-
195
-
196
-
197
-
198
-
199
-
200
-
201
-
202
-
203
-
204
-
205
-
206
-
207
-
208
-
209
-
210
-
211
-
212
-
213
-
214
-
215
-
216
-
217
-
218
-
219
-
220
-
221
-
222
-
223
-
224
-
225
-
226
-
227
-
228
-
229
-
230
-
231
-
232
-
233
-
234
-
235
-
236
-
237
-
238
-
239
-
240
-
241
-
242
-
243
-
244
 |
 |