Pioneer AVIC-X910BT Owner's Manual - Page 157
Adjusting the response, positions of the touch panel, touch panel calibration, Adjusting the screen
 |
UPC - 000125629513
View all Pioneer AVIC-X910BT manuals
Add to My Manuals
Save this manual to your list of manuals |
Page 157 highlights
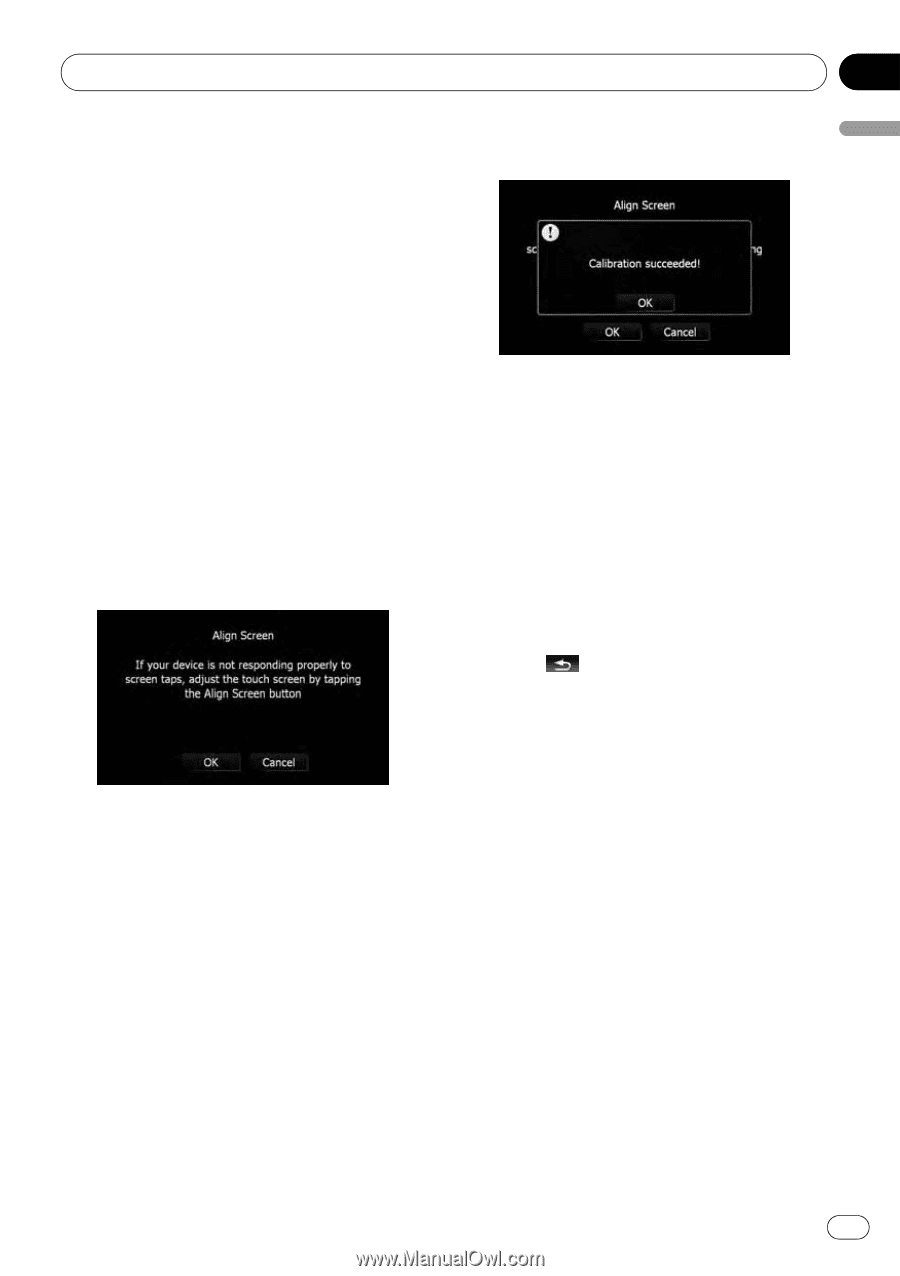
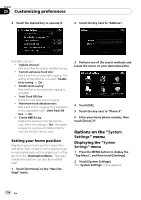
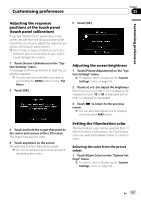
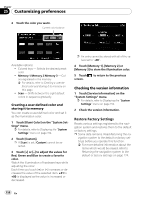
Customizing preferences Chapter 25 Customizing preferences Adjusting the response positions of the touch panel (touch panel calibration) If you feel that the touch panel keys on the screen deviate from the actual positions that respond to your touch, adjust the response positions of the touch panel screen. p Do not use a sharp pointed tool such as a ballpoint pen or a mechanical pen, which could damage the screen. 1 Touch [Screen Calibration] on the "System Settings" menu. A message confirming whether to start the calibration appears. p You can also start calibration by pressing and holding the MENU button on the "Top Menu". 2 Touch [OK]. 5 Touch [OK]. Adjusting the screen brightness 1 Touch [Picture Adjustment] on the "System Settings" menu. = For details, refer to Displaying the "System Settings" menu on page 154. 2 Touch [+] or [-] to adjust the brightness. Each time you touch [+] or [-] increases or decreases the level. 10 to 00 is displayed as the level is increased or decreased. 3 Touch to return to the previous screen. p You can also start adjustment by pressing and holding the MAP button. 3 Touch and hold the target that point to the center and corners of the LCD screen. The target indicates the order. 4 Touch anywhere on the screen. The adjusted position data will be saved. p Do not turn off the engine while saving the adjusted position data. Setting the illumination color The illumination color can be selected from 11 different colors. Furthermore, the illumination color can switched between these 11 colors in order. Selecting the color from the preset colors 1 Touch [Illumi Color] on the "System Settings" menu. = For details, refer to Displaying the "System Settings" menu on page 154. En 157
-
 1
1 -
2
-
3
-
4
-
5
-
6
-
7
-
8
-
9
-
10
-
11
-
12
-
13
-
14
-
15
-
16
-
17
-
18
-
19
-
20
-
21
-
22
-
23
-
24
-
25
-
26
-
27
-
28
-
29
-
30
-
31
-
32
-
33
-
34
-
35
-
36
-
37
-
38
-
39
-
40
-
41
-
42
-
43
-
44
-
45
-
46
-
47
-
48
-
49
-
50
-
51
-
52
-
53
-
54
-
55
-
56
-
57
-
58
-
59
-
60
-
61
-
62
-
63
-
64
-
65
-
66
-
67
-
68
-
69
-
70
-
71
-
72
-
73
-
74
-
75
-
76
-
77
-
78
-
79
-
80
-
81
-
82
-
83
-
84
-
85
-
86
-
87
-
88
-
89
-
90
-
91
-
92
-
93
-
94
-
95
-
96
-
97
-
98
-
99
-
100
-
101
-
102
-
103
-
104
-
105
-
106
-
107
-
108
-
109
-
110
-
111
-
112
-
113
-
114
-
115
-
116
-
117
-
118
-
119
-
120
-
121
-
122
-
123
-
124
-
125
-
126
-
127
-
128
-
129
-
130
-
131
-
132
-
133
-
134
-
135
-
136
-
137
-
138
-
139
-
140
-
141
-
142
-
143
-
144
-
145
-
146
-
147
-
148
-
149
-
150
-
151
-
 152
152 -
 153
153 -
 154
154 -
 155
155 -
 156
156 -
 157
157 -
 158
158 -
 159
159 -
 160
160 -
 161
161 -
 162
162 -
163
-
164
-
165
-
166
-
167
-
168
-
169
-
170
-
171
-
172
-
173
-
174
-
175
-
176
-
177
-
178
-
179
-
180
-
181
-
182
-
183
-
184
-
185
-
186
-
187
-
188
-
189
-
190
-
191
-
192
-
193
-
194
-
195
-
196
-
197
-
198
-
199
-
200
-
201
-
202
-
203
-
204
-
205
-
206
-
207
-
208
-
209
-
210
-
211
-
212
-
213
-
214
 |
 |