Thermador PRG366WH Instructions for Use - Page 12
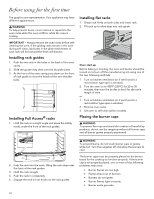
Before using for the first time, Installing rack guides, Installing Full Access® racks
 |
View all Thermador PRG366WH manuals
Add to My Manuals
Save this manual to your list of manuals |
Page 12 highlights
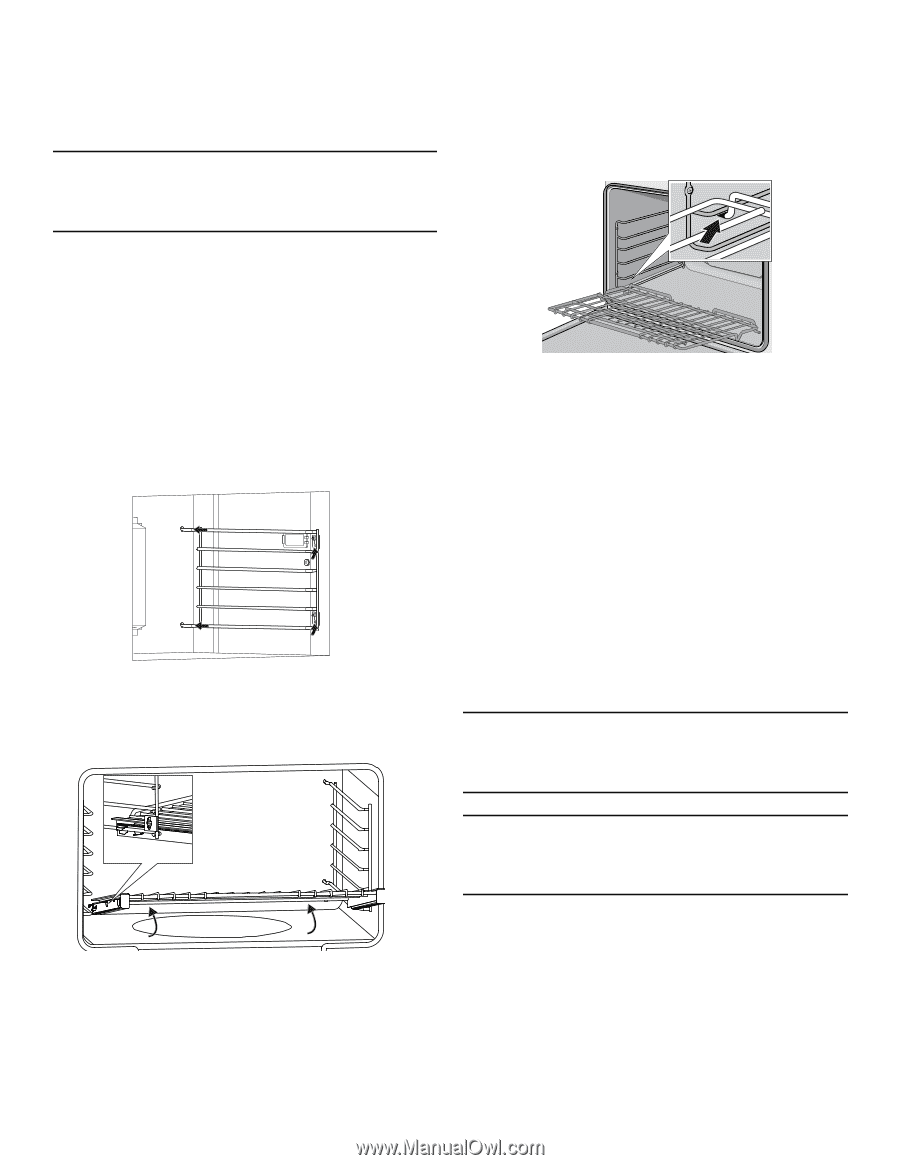
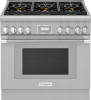
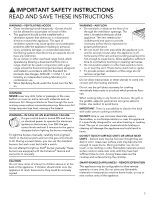
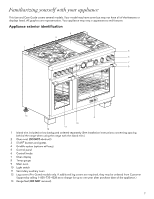
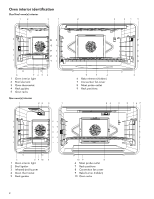
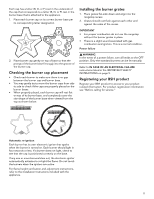
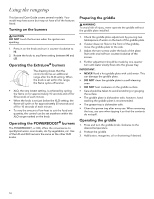
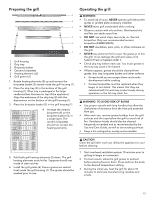
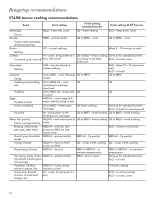
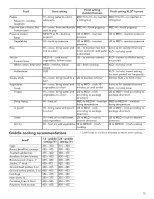
Before using for the first time The graphics are representative. Your appliance may have different appearances. 9 WARNING To help prevent burns, never remove or reposition the oven racks while the oven is ON or while the oven is cooling. Installing flat racks 1. Grasp rack firmly on both sides and insert rack. 2. Tilt rack up to allow stop into rack guide. IMPORTANT - Always remove the oven racks before selfcleaning the oven. If the gliding racks remain in the oven during self-clean, lubricants in the glide mechanisms of each rack will be lost and the finish will discolor. Installing rack guides 1. Push the two rails in the holes in the back of the oven cavity. 2. Slide the guide's key slots over the shoulder bolts. 3. At the front of the oven cavity press down on the front of rack guide to clear the heads of the two shoulder bolts. Installing Full Access® racks 1. Hold the rack on a slight angle and place the safety hooks under the front of the rack guides. Oven start-up Before baking or broiling, the oven and broiler should be turned on to burn off the manufacturing oils using one of the two following methods: 1. Turn on kitchen ventilation (or if vent hood is a recirculation type open a window). 2. Turn the oven on to 450ºF (230ºC) for 20 to 30 minutes; then turn the broiler to broil for the same length of time. or 1. Turn on kitchen ventilation (or if vent hood is a recirculation type open a window). 2. Remove oven racks. 3. Set oven to self-clean (select models). Placing the burner caps 9 WARNING To prevent flare-ups and avoid the creation of harmful byproducts, do not use the rangetop without all burner caps and all burner grates properly positioned. 2. Push the rack into the oven, lifting the rack stops over the front of the rack guides. 3. Hold the rack straight. 4. Push the rack in completely. 5. Engage the rack's front hooks on the rack guides. 9 WARNING To prevent burns, do not touch burner caps or grates while hot. Turn the rangetop off and allow the burners to cool. The burner caps must be properly placed on the burner bases for the cooktop to function properly. If the burner cap is not properly placed, one or more of the following problems may occur: • Burner flames are too high. • Flames shoot out of burners. • Burners do not ignite. • Burner flames light unevenly. • Burner emits gas odor. 10
-
 1
1 -
2
-
3
-
4
-
5
-
6
-
 7
7 -
 8
8 -
 9
9 -
 10
10 -
 11
11 -
 12
12 -
 13
13 -
 14
14 -
 15
15 -
 16
16 -
 17
17 -
18
-
19
-
20
-
21
-
22
-
23
-
24
-
25
-
26
-
27
-
28
-
29
-
30
-
31
-
32
-
33
-
34
-
35
-
36
-
37
-
38
-
39
-
40
-
41
-
42
-
43
-
44
-
45
-
46
-
47
-
48
-
49
-
50
-
51
-
52
-
53
-
54
-
55
-
56
-
57
-
58
-
59
-
60
-
61
-
62
-
63
-
64
-
65
-
66
-
67
-
68
-
69
-
70
-
71
-
72
-
73
 |
 |