Toshiba 50L1350U User's Guide for L1350U and L2300U Series TV's - Page 100
Auto Brightness Sensor (for 39/50L2300U and 39/50L1350U), DynaLight®, Dynamic Contrast, ClearScan® (
 |
View all Toshiba 50L1350U manuals
Add to My Manuals
Save this manual to your list of manuals |
Page 100 highlights
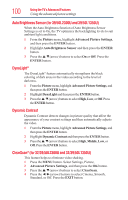
100 Using the TV's Advanced Features Using the advanced picture settings Auto Brightness Sensor (for 39/50L2300U and 39/50L1350U) When the Auto Brightness function of Auto Brightness Sensor Settings is set to On, the TV optimizes the backlighting levels to suit ambient light conditions. 1 From the Picture menu, highlight Advanced Picture Settings, and then press the ENTER button. 2 Highlight Auto Brightness Sensor and then press the ENTER button. 3 Press the /▼(arrow) buttons to select On or Off. Press the ENTER button. DynaLight® The DynaLight® feature automatically strengthens the black coloring of dark areas in the video according to the level of darkness. 1 From the Picture menu, highlight Advanced Picture Settings, and then press the ENTER button. 2 Highlight DynaLight and then press the ENTER button. 3 Press the /▼(arrow) buttons to select High, Low, or Off. Press the ENTER button. Dynamic Contrast Dynamic Contrast detects changes in picture quality that affect the appearance of your contrast settings and then automatically adjusts the video. 1 From the Picture menu, highlight Advanced Picture Settings, and then press the ENTER button. 2 Highlight Dynamic Contrast and then press the ENTER button. 3 Press the /▼(arrow) buttons to select High, Middle, Low, or Off. Press the ENTER button. ClearScan® (for 32/39/50L2300U and 32/39/50L1350U) This feature helps to eliminate video shaking. 1 Press the MENU button. Select Settings, Picture, 2 Advanced Picture Settings, and then press the OK button. 3 Press the /▼(arrow) buttons to select ClearScan. 4 Press the ◄/►(arrow) buttons to select Cinema, Smooth, Standard, or Off. Press the EXIT button.
-
 1
1 -
2
-
3
-
4
-
5
-
6
-
7
-
8
-
9
-
10
-
11
-
12
-
13
-
14
-
15
-
16
-
17
-
18
-
19
-
20
-
21
-
22
-
23
-
24
-
25
-
26
-
27
-
28
-
29
-
30
-
31
-
32
-
33
-
34
-
35
-
36
-
37
-
38
-
39
-
40
-
41
-
42
-
43
-
44
-
45
-
46
-
47
-
48
-
49
-
50
-
51
-
52
-
53
-
54
-
55
-
56
-
57
-
58
-
59
-
60
-
61
-
62
-
63
-
64
-
65
-
66
-
67
-
68
-
69
-
70
-
71
-
72
-
73
-
74
-
75
-
76
-
77
-
78
-
79
-
80
-
81
-
82
-
83
-
84
-
85
-
86
-
87
-
88
-
89
-
90
-
91
-
92
-
93
-
94
-
 95
95 -
 96
96 -
 97
97 -
 98
98 -
 99
99 -
 100
100 -
 101
101 -
 102
102 -
 103
103 -
 104
104 -
 105
105 -
106
-
107
-
108
-
109
-
110
-
111
-
112
-
113
-
114
-
115
-
116
-
117
-
118
 |
 |