Toshiba 50L1350U User's Guide for L1350U and L2300U Series TV's - Page 51
Setting the time zone, Viewing the system status, Resetting Factory Defaults
 |
View all Toshiba 50L1350U manuals
Add to My Manuals
Save this manual to your list of manuals |
Page 51 highlights
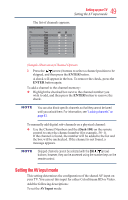
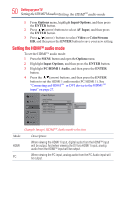
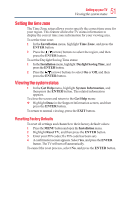
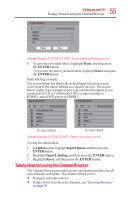
51 Setting up your TV Viewing the system status Setting the time zone The Time Zone setup allows you to specify the correct time zone for your region. This feature allows the TV status information to display the correct time zone information for your viewing area. To set the time zone: 1 In the Installation menu, highlight Time Zone, and press the ENTER button. 2 Press the / (arrow) buttons to select the region, and then press the ENTER button. To set the Daylight Saving Time status: 1 In the Installation menu, highlight Daylight Saving Time, and press the ENTER button. 2 Press the / (arrow) buttons to select On or Off, and then press the ENTER button. Viewing the system status 1 In the Get Help menu, highlight System Information, and then press the ENTER button. The related information appears. To close the screen and return to the Get Help menu: v Highlight Done in the Support Information screen, and then press the ENTER button. To return to normal viewing, press the EXIT button. Resetting Factory Defaults To reset all settings and channels to their factory default values: 1 Press the MENU button and open the Installation menu. 2 Highlight Reset TV, and then press the ENTER button. 3 Enter your PIN code (If a PIN code has been set). 4 A confirmation screen appears. Select Yes, and press the ENTER button. The TV will turn off automatically. To cancel the reset process, select No, and press the ENTER button.
-
 1
1 -
2
-
3
-
4
-
5
-
6
-
7
-
8
-
9
-
10
-
11
-
12
-
13
-
14
-
15
-
16
-
17
-
18
-
19
-
20
-
21
-
22
-
23
-
24
-
25
-
26
-
27
-
28
-
29
-
30
-
31
-
32
-
33
-
34
-
35
-
36
-
37
-
38
-
39
-
40
-
41
-
42
-
43
-
44
-
45
-
 46
46 -
 47
47 -
 48
48 -
 49
49 -
 50
50 -
 51
51 -
 52
52 -
 53
53 -
 54
54 -
 55
55 -
 56
56 -
57
-
58
-
59
-
60
-
61
-
62
-
63
-
64
-
65
-
66
-
67
-
68
-
69
-
70
-
71
-
72
-
73
-
74
-
75
-
76
-
77
-
78
-
79
-
80
-
81
-
82
-
83
-
84
-
85
-
86
-
87
-
88
-
89
-
90
-
91
-
92
-
93
-
94
-
95
-
96
-
97
-
98
-
99
-
100
-
101
-
102
-
103
-
104
-
105
-
106
-
107
-
108
-
109
-
110
-
111
-
112
-
113
-
114
-
115
-
116
-
117
-
118
 |
 |
