Toshiba 50L1350U User's Guide for L1350U and L2300U Series TV's - Page 30
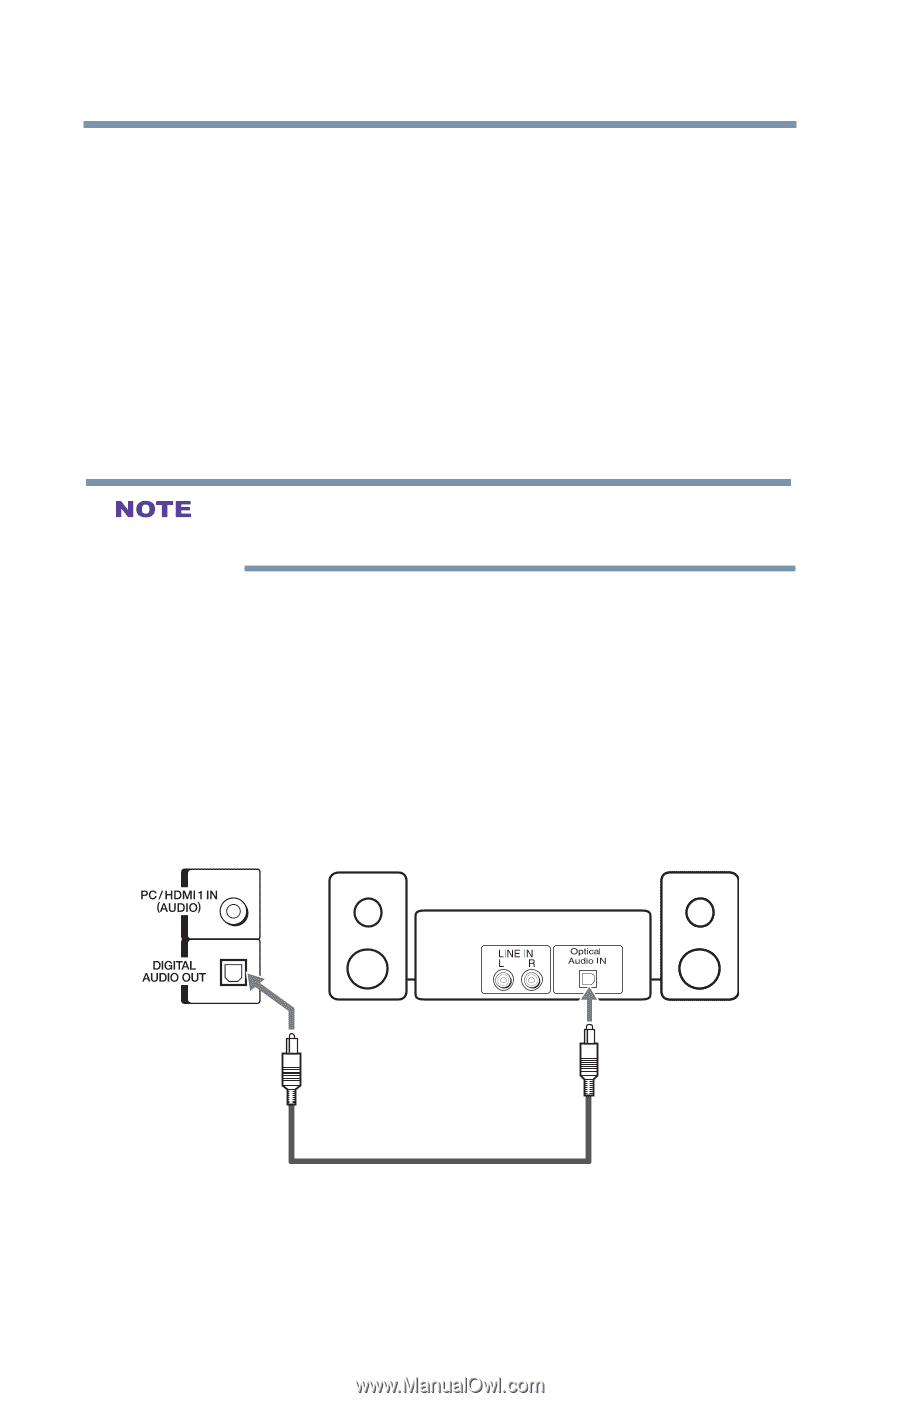
Connecting a digital audio system, Sample Illustration L1350U/L2300U Series-Connecting
 |
View all Toshiba 50L1350U manuals
Add to My Manuals
Save this manual to your list of manuals |
Page 30 highlights
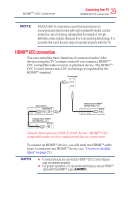
30 ConnectingYourTV Connecting a digital audio system Before controlling the device(s): v After completing the above connections, configure the HDMITM CEC Setup menu with the desired settings, see "Setting up HDMMIITTMM CEC" on page 95 v The connected devices must also be configured. For details, see the operation manual for each device. v This feature uses the CEC technology as regulated by the HDMITM standard. v This feature is limited to models incorporating Toshiba's HDMITM CEC. However, Toshiba is not liable for those operations. Refer to the individual instruction manuals for compatibility information. This feature may not work properly depending on the devices that are connected. Connecting a digital audio system The TV's DIGITAL AUDIO OUT terminal outputs a Dolby® Digital or 2-channel down-mixed PCM (pulse-code modulation) signal for use with an external Dolby® Digital decoder or other external audio system with optical audio input. You will need an optical audio cable (Use an optical audio cable that has the larger "TosLink" connector and not the smaller "mini-optical" connector.) TV back panel Dolby® Digital decoder or other digital audio system (Sample Illustration) L1350U/L2300U Series-Connecting a digital audiosystem To control the audio: 1 Turn on the TV and the digital audio device.
-
 1
1 -
2
-
3
-
4
-
5
-
6
-
7
-
8
-
9
-
10
-
11
-
12
-
13
-
14
-
15
-
16
-
17
-
18
-
19
-
20
-
21
-
22
-
23
-
24
-
 25
25 -
 26
26 -
 27
27 -
 28
28 -
 29
29 -
 30
30 -
 31
31 -
 32
32 -
 33
33 -
 34
34 -
 35
35 -
36
-
37
-
38
-
39
-
40
-
41
-
42
-
43
-
44
-
45
-
46
-
47
-
48
-
49
-
50
-
51
-
52
-
53
-
54
-
55
-
56
-
57
-
58
-
59
-
60
-
61
-
62
-
63
-
64
-
65
-
66
-
67
-
68
-
69
-
70
-
71
-
72
-
73
-
74
-
75
-
76
-
77
-
78
-
79
-
80
-
81
-
82
-
83
-
84
-
85
-
86
-
87
-
88
-
89
-
90
-
91
-
92
-
93
-
94
-
95
-
96
-
97
-
98
-
99
-
100
-
101
-
102
-
103
-
104
-
105
-
106
-
107
-
108
-
109
-
110
-
111
-
112
-
113
-
114
-
115
-
116
-
117
-
118
 |
 |