Toshiba Tecra Z40-A1401 User Manual - Page 91
Realtek HD Audio Manager, Video mode, Information, Power Management, Speaker Configuration
 |
View all Toshiba Tecra Z40-A1401 manuals
Add to My Manuals
Save this manual to your list of manuals |
Page 91 highlights
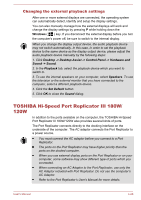
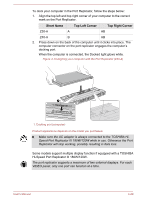
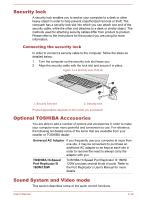
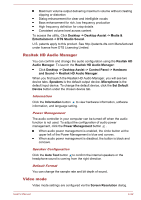
Maximum volume output delivering maximum volume without creating clipping or distortion Dialog enhancement for clear and intelligible vocals Bass enhancement for rich, low frequency production High frequency definition for crisp details Consistent volume level across content To access the utility, Click Desktop -> Desktop Assist -> Media & Entertainment -> DTS Studio Sound. U.S. patents apply to this product. See http://patents.dts.com.Manufactured under license from DTS Licensing Limited. Realtek HD Audio Manager You can confirm and change the audio configuration using the Realtek HD Audio Manager. To launch the Realtek HD Audio Manager: Click Desktop -> Desktop Assist -> Control Panel -> Hardware and Sound -> Realtek HD Audio Manager. When you first launch the Realtek HD Audio Manager, you will see two device tabs. Speakers is the default output device. Microphone is the default input device. To change the default device, click the Set Default Device button under the chosen device tab. Information Click the Information button to view hardware information, software information, and language setting. Power Management The audio controller in your computer can be turned off when the audio function is not used. To adjust the configuration of audio power management, click the Power Management button . When audio power management is enabled, the circle button at the upper left of the Power Management is blue and convex. When audio power management is disabled, the button is black and concave. Speaker Configuration Click the Auto Test button to confirm the internal speakers or the headphone sound is coming from the right direction. Default Format You can change the sample rate and bit depth of sound. Video mode Video mode settings are configured via the Screen Resolution dialog. User's Manual 4-32
-
 1
1 -
2
-
3
-
4
-
5
-
6
-
7
-
8
-
9
-
10
-
11
-
12
-
13
-
14
-
15
-
16
-
17
-
18
-
19
-
20
-
21
-
22
-
23
-
24
-
25
-
26
-
27
-
28
-
29
-
30
-
31
-
32
-
33
-
34
-
35
-
36
-
37
-
38
-
39
-
40
-
41
-
42
-
43
-
44
-
45
-
46
-
47
-
48
-
49
-
50
-
51
-
52
-
53
-
54
-
55
-
56
-
57
-
58
-
59
-
60
-
61
-
62
-
63
-
64
-
65
-
66
-
67
-
68
-
69
-
70
-
71
-
72
-
73
-
74
-
75
-
76
-
77
-
78
-
79
-
80
-
81
-
82
-
83
-
84
-
85
-
 86
86 -
 87
87 -
 88
88 -
 89
89 -
 90
90 -
 91
91 -
 92
92 -
 93
93 -
 94
94 -
 95
95 -
 96
96 -
97
-
98
-
99
-
100
-
101
-
102
-
103
-
104
-
105
-
106
-
107
-
108
-
109
-
110
-
111
-
112
-
113
-
114
-
115
-
116
-
117
-
118
-
119
-
120
-
121
-
122
-
123
-
124
-
125
-
126
-
127
-
128
-
129
-
130
-
131
-
132
-
133
-
134
-
135
-
136
-
137
-
138
-
139
-
140
-
141
-
142
-
143
-
144
-
145
-
146
-
147
-
148
-
149
-
150
-
151
-
152
 |
 |