Vivitar DVR 949HD User Manual - Page 51
Photo Playback Mode Menus, Delete All Images Menu - instructions
 |
View all Vivitar DVR 949HD manuals
Add to My Manuals
Save this manual to your list of manuals |
Page 51 highlights
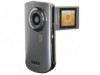
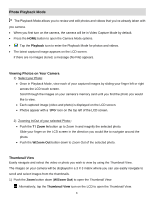
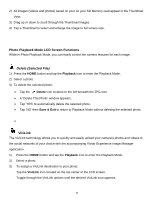
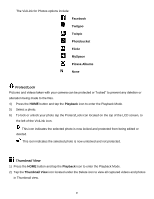
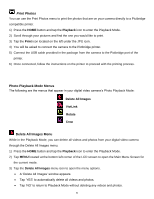
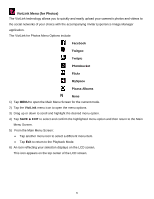
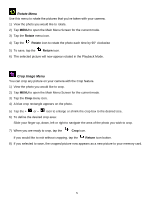
Print Photos You can use the Print Photos menu to print the photos that are on your camera directly to a Pictbridge compatible printer. 1) Press the HOME button and tap the Playback icon to enter the Playback Mode. 2) Scroll through your pictures and find the one you would like to print. 3) Tap the Print icon located on the left under the JPG icon. 4) You will be asked to connect the camera to the Pictbridge printer. 5) Connect the USB cable provided in the package from the camera to the Pictbridge port of the printer. 6) Once connected, follow the instructions on the printer to proceed with the printing process. Photo Playback Mode Menus The following are the menus that appear in your digital video camera's Photo Playback Mode: Delete All Images ViviLink Rotate Crop Delete All Images Menu While in the Playback Mode, you can delete all videos and photos from your digital video camera through the Delete All Images menu. 1) Press the HOME button and tap the Playback icon to enter the Playback Mode. 2) Tap MENU located at the bottom left corner of the LCD screen to open the Main Menu Screen for the current mode. 3) Tap the Delete All Images menu icon to open the menu options. A 'Delete All Images' window appears. Tap 'YES' to automatically delete all videos and photos. Tap 'NO' to return to Playback Mode without deleting any videos and photos. 50
-
 1
1 -
2
-
3
-
4
-
5
-
6
-
7
-
8
-
9
-
10
-
11
-
12
-
13
-
14
-
15
-
16
-
17
-
18
-
19
-
20
-
21
-
22
-
23
-
24
-
25
-
26
-
27
-
28
-
29
-
30
-
31
-
32
-
33
-
34
-
35
-
36
-
37
-
38
-
39
-
40
-
41
-
42
-
43
-
44
-
45
-
 46
46 -
 47
47 -
 48
48 -
 49
49 -
 50
50 -
 51
51 -
 52
52 -
 53
53 -
 54
54 -
 55
55 -
 56
56 -
57
-
58
-
59
-
60
-
61
-
62
-
63
-
64
-
65
-
66
-
67
-
68
 |
 |