Vivitar DVR 949HD User Manual - Page 8
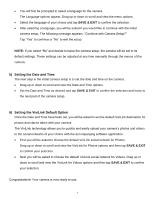
Setting the Date and Time, Setting the ViviLink Default Option
 |
View all Vivitar DVR 949HD manuals
Add to My Manuals
Save this manual to your list of manuals |
Page 8 highlights
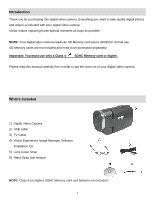
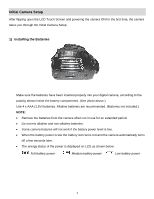
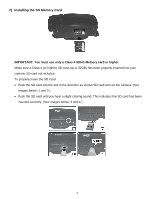
You will first be prompted to select a language for the camera. The Language options appear. Drag up or down to scroll and view the menu options. Select the language of your choice and tap SAVE & EXIT to confirm the selection. After selecting a language, you will be asked if you would like to continue with the initial camera setup. The following message appears: "Continue with Camera Setup?" Tap "Yes" to continue or "No" to exit the setup. NOTE: If you select "No" and decide to leave the camera setup, the camera will be set to its default settings. These settings can be adjusted at any time manually through the menus of the camera. 5) Setting the Date and Time The next step in the initial camera setup is to set the date and time on the camera. Drag up or down to scroll and view the Date and Time options. Set the Date and Time as desired and tap SAVE & EXIT to confirm the selection and move to the next part of the camera setup. 6) Setting the ViviLink Default Option Once the Date and Time have been set, you will be asked to set the default ViviLink destination for photos and videos taken with your camera. The ViviLink technology allows you to quickly and easily upload your camera's photos and videos to the social networks of your choice with the accompanying software application. First you will be asked to choose the default ViviLink social network for Photos. Drag up or down to scroll and view the ViviLink for Photos options and then tap SAVE & EXIT to confirm your selection. Next you will be asked to choose the default ViviLink social network for Videos. Drag up or down to scroll and view the ViviLink for Videos options and then tap SAVE & EXIT to confirm your selection. Congratulations! Your camera is now ready to use. 7
-
 1
1 -
2
-
 3
3 -
 4
4 -
 5
5 -
 6
6 -
 7
7 -
 8
8 -
 9
9 -
 10
10 -
 11
11 -
 12
12 -
 13
13 -
14
-
15
-
16
-
17
-
18
-
19
-
20
-
21
-
22
-
23
-
24
-
25
-
26
-
27
-
28
-
29
-
30
-
31
-
32
-
33
-
34
-
35
-
36
-
37
-
38
-
39
-
40
-
41
-
42
-
43
-
44
-
45
-
46
-
47
-
48
-
49
-
50
-
51
-
52
-
53
-
54
-
55
-
56
-
57
-
58
-
59
-
60
-
61
-
62
-
63
-
64
-
65
-
66
-
67
-
68
 |
 |
