Vivitar DVR 949HD User Manual - Page 9
Main Camera Modes - memory card
 |
View all Vivitar DVR 949HD manuals
Add to My Manuals
Save this manual to your list of manuals |
Page 9 highlights
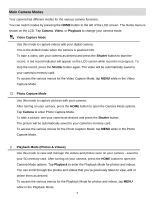
Main Camera Modes Your camera has different modes for the various camera functions. You can switch modes by pressing the HOME button to the left of the LCD screen. The Home menu is shown on the LCD. Tap Camera, Video, or Playback to change your camera mode. Video Capture Mode Use this mode to capture videos with your digital camera. This is the default mode when the camera is powered ON. To take a video, aim your camera as desired and press the Shutter button to start the record. A red record indicator will appear on the LCD screen while record is in progress. To stop the record, press the Shutter button again. The video will be automatically saved to your camera's memory card. To access the various menus for the Video Capture Mode, tap MENU while in the Video Capture Mode. Photo Capture Mode Use this mode to capture pictures with your camera. After turning on your camera, press the HOME button to open the Camera Mode options. Tap Camera to enter Photo Capture Mode. To take a picture, aim your camera as desired and press the Shutter button. The picture will be automatically saved to your camera's memory card. To access the various menus for the Photo Capture Mode, tap MENU while in the Photo Capture Mode. Playback Mode (Photos & Videos) Use this mode to view and manage the videos and photos seen on your camera - saved to your SD memory card. After turning on your camera, press the HOME button to open the Camera Mode options. Tap Playback to enter the Playback Mode for photos and videos. You can scroll through the photos and videos that you've previously taken to view, edit or delete them as desired. To access the various menus for the Playback Mode for photos and videos, tap MENU while in the Playback Mode. 8
-
 1
1 -
2
-
3
-
 4
4 -
 5
5 -
 6
6 -
 7
7 -
 8
8 -
 9
9 -
 10
10 -
 11
11 -
 12
12 -
 13
13 -
 14
14 -
15
-
16
-
17
-
18
-
19
-
20
-
21
-
22
-
23
-
24
-
25
-
26
-
27
-
28
-
29
-
30
-
31
-
32
-
33
-
34
-
35
-
36
-
37
-
38
-
39
-
40
-
41
-
42
-
43
-
44
-
45
-
46
-
47
-
48
-
49
-
50
-
51
-
52
-
53
-
54
-
55
-
56
-
57
-
58
-
59
-
60
-
61
-
62
-
63
-
64
-
65
-
66
-
67
-
68
 |
 |
