Brother International IntelliFax-2820 Users Manual - English - Page 112
Cleaning the corona wire, Replacing the toner cartridge (TN-350), local regulations - replace toner
 |
UPC - 012502613251
View all Brother International IntelliFax-2820 manuals
Add to My Manuals
Save this manual to your list of manuals |
Page 112 highlights
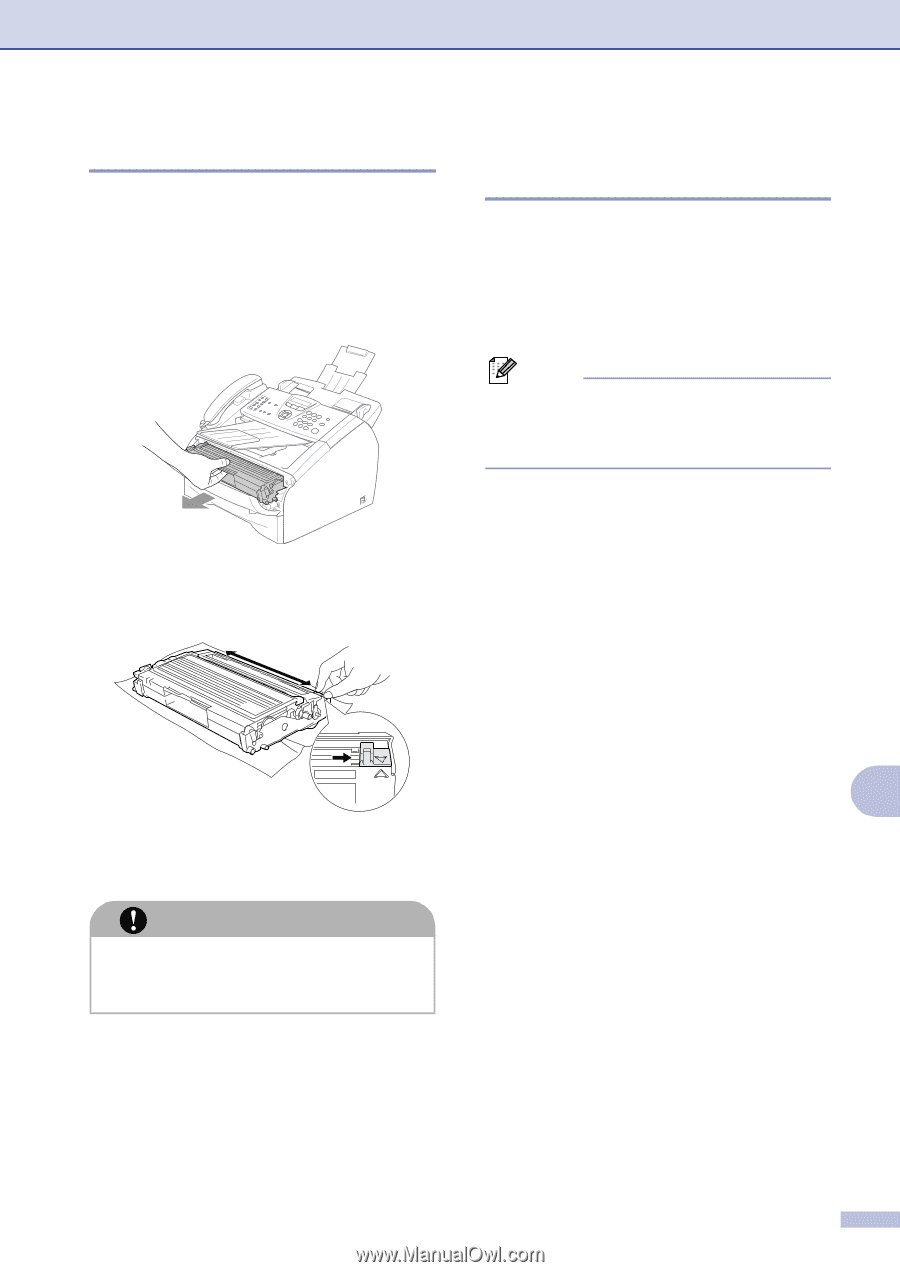
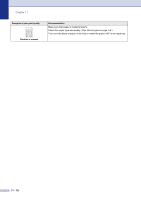
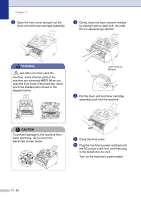
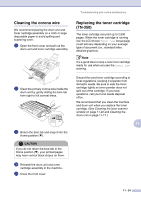
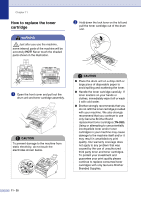
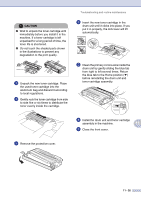
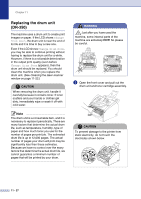
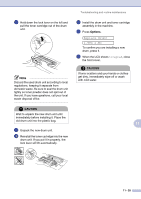
Troubleshooting and routine maintenance Cleaning the corona wire We recommend placing the drum unit and toner cartridge assembly on a cloth or large disposable paper to avoid spilling and scattering toner. 1 Open the front cover and pull out the drum unit and toner cartridge assembly. 2 Clean the primary corona wire inside the drum unit by gently sliding the blue tab from right to left several times. 3 Return the blue tab and snap it into the Home position (▼). CAUTION If you do not return the blue tab to the Home position (▼), your printed pages may have vertical black stripes on them. 4 Reinstall the drum unit and toner cartridge assembly in the machine. 5 Close the front cover. Replacing the toner cartridge (TN-350) The toner cartridge can print up to 2,500 pages. When the toner cartridge is running low, the LCD shows Toner Low. Actual page count will vary depending on your average type of document (i.e., standard letter, detailed graphics). Note It is a good idea to keep a new toner cartridge ready for use when you see the Toner Low warning. Discard the used toner cartridge according to local regulations, keeping it separate from domestic waste. Be sure to seal the toner cartridge tightly so toner powder does not spill out of the cartridge. If you have questions, call your local waste disposal office. We recommend that you clean the machine and drum unit when you replace the toner cartridge. (See Cleaning the laser scanner window on page 11-22 and Cleaning the drum unit on page 11-17.) 11 11 - 24
-
 1
1 -
2
-
3
-
4
-
5
-
6
-
7
-
8
-
9
-
10
-
11
-
12
-
13
-
14
-
15
-
16
-
17
-
18
-
19
-
20
-
21
-
22
-
23
-
24
-
25
-
26
-
27
-
28
-
29
-
30
-
31
-
32
-
33
-
34
-
35
-
36
-
37
-
38
-
39
-
40
-
41
-
42
-
43
-
44
-
45
-
46
-
47
-
48
-
49
-
50
-
51
-
52
-
53
-
54
-
55
-
56
-
57
-
58
-
59
-
60
-
61
-
62
-
63
-
64
-
65
-
66
-
67
-
68
-
69
-
70
-
71
-
72
-
73
-
74
-
75
-
76
-
77
-
78
-
79
-
80
-
81
-
82
-
83
-
84
-
85
-
86
-
87
-
88
-
89
-
90
-
91
-
92
-
93
-
94
-
95
-
96
-
97
-
98
-
99
-
100
-
101
-
102
-
103
-
104
-
105
-
106
-
 107
107 -
 108
108 -
 109
109 -
 110
110 -
 111
111 -
 112
112 -
 113
113 -
 114
114 -
 115
115 -
 116
116 -
 117
117 -
118
-
119
-
120
-
121
-
122
-
123
-
124
-
125
-
126
-
127
-
128
-
129
-
130
-
131
-
132
-
133
-
134
-
135
-
136
-
137
-
138
-
139
-
140
-
141
-
142
-
143
-
144
-
145
-
146
-
147
-
148
-
149
-
150
-
151
-
152
-
153
-
154
-
155
-
156
-
157
-
158
-
159
 |
 |