Canon MultiPASS F80 MultiPASS F80 Basic Guide - Page 67
Step 1, Step 2, Step 3 - print head
 |
View all Canon MultiPASS F80 manuals
Add to My Manuals
Save this manual to your list of manuals |
Page 67 highlights
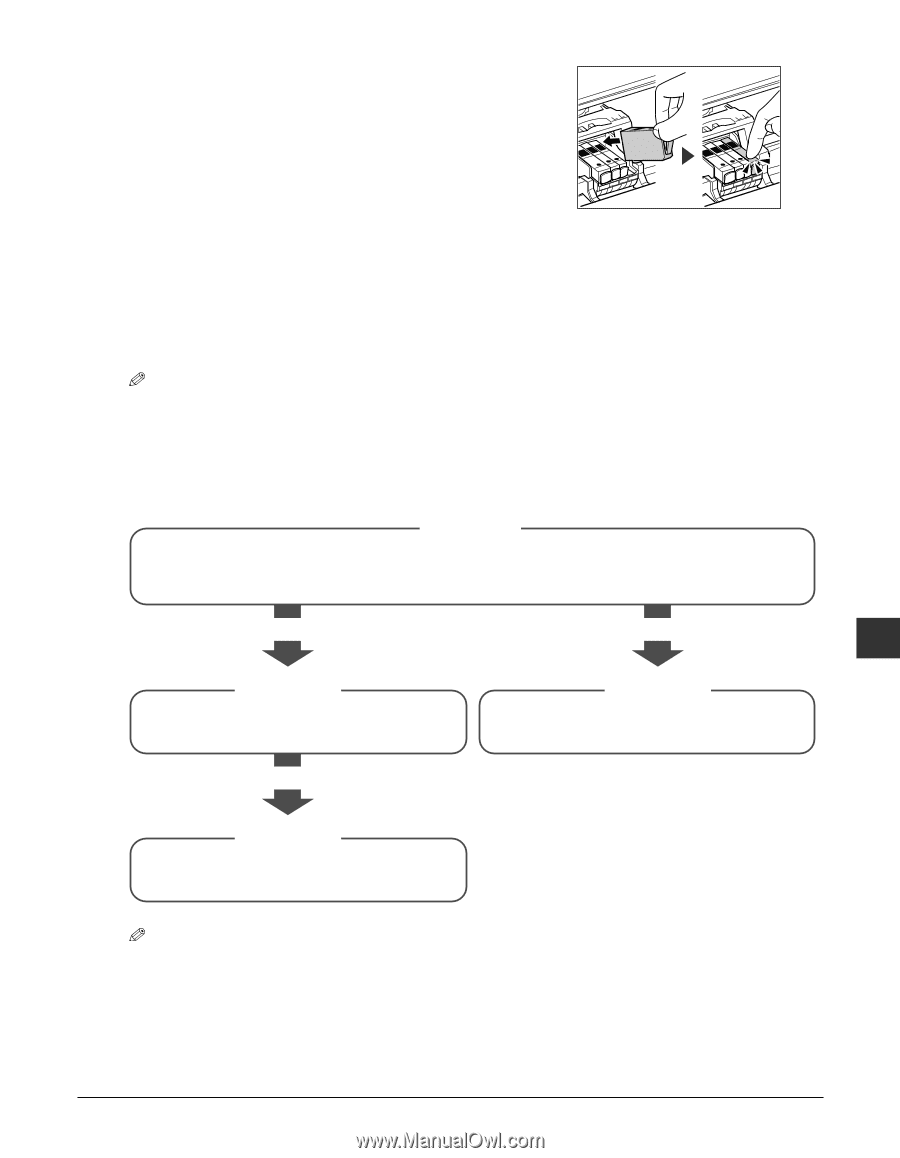
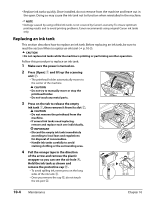
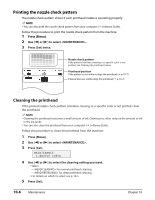
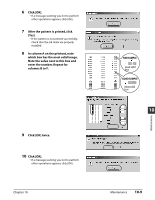
5 Insert the ink tank into the empty slot on the printhead. Press down gently on the ink tank until an audible click is heard. • Make sure the ink tank is the correct color for the slot. 6 Close the scanning unit until it locks into place. Maintaining the printhead After you have printed the nozzle check pattern and checked the state of the nozzle, clean the printhead and align it. NOTE • Before doing the following, open the scanning unit, press "PUSH" on the ink tanks and check that they are securely inserted. Check how much ink is left and if there is none, replace the ink tank ( p. 10-4). Flowchart of printhead maintenance Step 1 Print the nozzle check pattern ( p. 10-6). This pattern allows you to check if the ink is coming out of the printhead nozzles correctly and if the printhead is aligned. The ink is not coming out correctly. The printhead is misaligned. 10 Maintenance Step 2 Perform normal printhead cleaning ( setting) ( p. 10-6). Step 2 Align the printhead ( p. 10-7). If there is no improvement. Step 3 Perform deep printhead cleaning ( setting) ( p. 10-6). NOTE • If the problem is still not solved If you have followed steps 1 to 3 above and there is no improvement, the printhead may be damaged. Contact the Canon Customer Care Center. Chapter 10 Maintenance 10-5
-
 1
1 -
2
-
3
-
4
-
5
-
6
-
7
-
8
-
9
-
10
-
11
-
12
-
13
-
14
-
15
-
16
-
17
-
18
-
19
-
20
-
21
-
22
-
23
-
24
-
25
-
26
-
27
-
28
-
29
-
30
-
31
-
32
-
33
-
34
-
35
-
36
-
37
-
38
-
39
-
40
-
41
-
42
-
43
-
44
-
45
-
46
-
47
-
48
-
49
-
50
-
51
-
52
-
53
-
54
-
55
-
56
-
57
-
58
-
59
-
60
-
61
-
 62
62 -
 63
63 -
 64
64 -
 65
65 -
 66
66 -
 67
67 -
 68
68 -
 69
69 -
 70
70 -
 71
71 -
 72
72 -
73
-
74
-
75
-
76
-
77
-
78
-
79
-
80
-
81
-
82
-
83
-
84
-
85
-
86
-
87
-
88
-
89
-
90
-
91
-
92
-
93
-
94
-
95
-
96
-
97
-
98
-
99
-
100
-
101
-
102
-
103
-
104
-
105
-
106
-
107
-
108
-
109
-
110
-
111
-
112
-
113
-
114
-
115
 |
 |