HP D5970A HP Netserver LXr 8000 to LXr 8500 Upgrade Guide - Page 64
Apply Labels, Gaskets and Install Power Supplies
 |
View all HP D5970A manuals
Add to My Manuals
Save this manual to your list of manuals |
Page 64 highlights
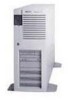
Chapter 5 Assembling the LXr 8500 Apply Labels, Gaskets and Install Power Supplies 21a. Apply UPGRADED TO LXr 8500 label to chassis below serial number label. 21b. Apply second UPGRADED label to pull-out card. Figure 5-18. Apply Labels to Side of Chassis 21. Locate the two "UPGRADED TO LXr 8500" labels shipped in the Documentation and Miscellaneous kit, and apply them as follows (see Figure 5-18): a. Apply one label just below the serial number on the chassis. b. Apply the second label to the pull-out card that can be read when the NetServer is installed in the rack. 58
-
 1
1 -
2
-
3
-
4
-
5
-
6
-
7
-
8
-
9
-
10
-
11
-
12
-
13
-
14
-
15
-
16
-
17
-
18
-
19
-
20
-
21
-
22
-
23
-
24
-
25
-
26
-
27
-
28
-
29
-
30
-
31
-
32
-
33
-
34
-
35
-
36
-
37
-
38
-
39
-
40
-
41
-
42
-
43
-
44
-
45
-
46
-
47
-
48
-
49
-
50
-
51
-
52
-
53
-
54
-
55
-
56
-
57
-
58
-
 59
59 -
 60
60 -
 61
61 -
 62
62 -
 63
63 -
 64
64 -
 65
65 -
 66
66 -
 67
67 -
 68
68 -
 69
69 -
70
-
71
-
72
-
73
-
74
-
75
-
76
-
77
-
78
-
79
-
80
-
81
-
82
-
83
-
84
-
85
-
86
-
87
-
88
-
89
-
90
-
91
-
92
-
93
-
94
-
95
-
96
-
97
 |
 |

Chapter 5
Assembling the LXr 8500
58
Apply Labels, Gaskets and Install Power Supplies
21a. Apply UPGRADED TO LXr 8500
label to chassis below serial number label.
21b. Apply second UPGRADED
label to pull-out card.
Figure 5-18. Apply Labels to Side of Chassis
21.
Locate the two "UPGRADED TO LXr 8500" labels shipped in the
Documentation and Miscellaneous kit, and apply them as follows (see
Figure 5-18):
a.
Apply one label just below the serial number on the chassis.
b.
Apply the second label to the pull-out card that can be read when the
NetServer is installed in the rack.