Dell B1160W User Manual - Page 94
Items to prepare, Setup using Macintosh
 |
View all Dell B1160W manuals
Add to My Manuals
Save this manual to your list of manuals |
Page 94 highlights
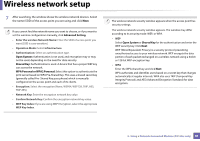
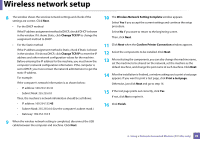
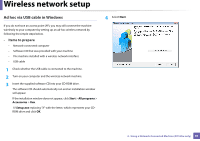
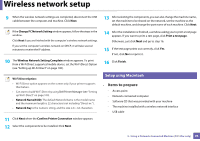
Wireless network setup 9 When the wireless network settings are completed, disconnect the USB cable between the computer and machine. Click Next. If the Change PC Network Setting window appears, follow the steps in the window. Click Next if you are finished with the computer's wireless network settings. If you set the computer's wireless network on DHCP, it will take several minutes to receive the IP address. 10 The Wireless Network Setting Complete window appears. To print from a Wi-Fi Direct supported mobile device, set the Wi-Fi Direct Option (see "Setting up Wi-Fi Direct" on page 100). Wi-Fi Direct Option: • Wi-Fi Direct option appears on the screen only if your printer supports this feature. • Can start to build Wi-Fi Direct by using Dell Printer Manager (see "Setting up Wi-Fi Direct" on page 100). • Network Name(SSID): The default Network Name is the model name and the maximum length is 22 characters (not including "Direct-xx-"). • Network Key is the numeric string, and the size is 8 ~ 64 characters. 11 Click Next when the Confirm Printer Connection window appears. 12 Select the components to be installed. Click Next. 13 After selecting the components, you can also change the machine name, set the machine to be shared on the network, set the machine as the default machine, and change the port name of each machine. Click Next. 14 After the installation is finished, a window asking you to print a test page appears. If you want to print a test page, click Print a test page. Otherwise, just click Next and go to step 16. 15 If the test page prints out correctly, click Yes. If not, click No to reprint it. 16 Click Finish. 10 Setup using Macintosh • Items to prepare - Access point - Network-connected computer - Software CD that was provided with your machine - The machine installed with a wireless network interface - USB cable 2. Using a Network-Connected Machine (B1160w only) 94
-
 1
1 -
2
-
3
-
4
-
5
-
6
-
7
-
8
-
9
-
10
-
11
-
12
-
13
-
14
-
15
-
16
-
17
-
18
-
19
-
20
-
21
-
22
-
23
-
24
-
25
-
26
-
27
-
28
-
29
-
30
-
31
-
32
-
33
-
34
-
35
-
36
-
37
-
38
-
39
-
40
-
41
-
42
-
43
-
44
-
45
-
46
-
47
-
48
-
49
-
50
-
51
-
52
-
53
-
54
-
55
-
56
-
57
-
58
-
59
-
60
-
61
-
62
-
63
-
64
-
65
-
66
-
67
-
68
-
69
-
70
-
71
-
72
-
73
-
74
-
75
-
76
-
77
-
78
-
79
-
80
-
81
-
82
-
83
-
84
-
85
-
86
-
87
-
88
-
 89
89 -
 90
90 -
 91
91 -
 92
92 -
 93
93 -
 94
94 -
 95
95 -
 96
96 -
 97
97 -
 98
98 -
 99
99 -
100
-
101
-
102
-
103
-
104
-
105
-
106
-
107
-
108
-
109
-
110
-
111
-
112
-
113
-
114
-
115
-
116
-
117
-
118
-
119
-
120
-
121
-
122
-
123
-
124
-
125
-
126
-
127
-
128
-
129
-
130
-
131
-
132
-
133
-
134
-
135
-
136
-
137
-
138
-
139
-
140
-
141
-
142
-
143
-
144
-
145
-
146
-
147
-
148
-
149
-
150
-
151
-
152
-
153
-
154
-
155
-
156
-
157
-
158
-
159
-
160
-
161
-
162
-
163
-
164
-
165
 |
 |