Epson Expression 10000XL User Manual - Page 13
Scanning Your Image, Unsharp Mask, Backlight Correction, Descreening, Dust Removal, and when
 |
View all Epson Expression 10000XL manuals
Add to My Manuals
Save this manual to your list of manuals |
Page 13 highlights
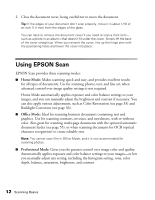
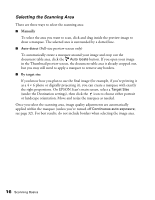
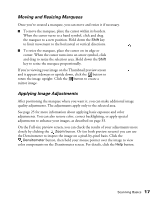
If you have faded photos, you can restore their color using Color Restoration. You can also use these additional adjustments and choose how strongly they're applied: Unsharp Mask, Backlight Correction, Descreening, Dust Removal, and (when scanning film with the optional transparency unit) Grain Reduction. See page 33 for details. Scanning Your Image You can open EPSON Scan from any TWAIN-compliant imaging application, such as Adobe Photoshop Elements, and then scan images into your application, as described below. Note: The examples in this chapter assume that you're using EPSON Scan with an imaging application. You can also use EPSON Scan in "standalone" mode to scan images directly to a file on your computer's hard drive (see page 27). First, place your document on the scanner as described on page 11. Then follow these steps to start EPSON Scan and scan an image: 1. Turn on the scanner, and wait about 30 seconds for it to initialize. The green Ready light stops flashing and stays on. 2. Open your imaging application, then choose the Import (or Acquire) option in the application and select Epson Expression 10000XL. Note: If you are using Microsoft Windows® Vista™ or XP and choose WIA-EPSON Expression 10000XL, certain features won't be available. Scanning Basics 13
-
 1
1 -
2
-
3
-
4
-
5
-
6
-
7
-
 8
8 -
 9
9 -
 10
10 -
 11
11 -
 12
12 -
 13
13 -
 14
14 -
 15
15 -
 16
16 -
 17
17 -
 18
18 -
19
-
20
-
21
-
22
-
23
-
24
-
25
-
26
-
27
-
28
-
29
-
30
-
31
-
32
-
33
-
34
-
35
-
36
-
37
-
38
-
39
-
40
-
41
-
42
-
43
-
44
-
45
-
46
-
47
-
48
-
49
-
50
-
51
-
52
-
53
-
54
-
55
-
56
-
57
-
58
-
59
-
60
-
61
-
62
-
63
-
64
-
65
-
66
-
67
-
68
-
69
-
70
-
71
-
72
-
73
-
74
-
75
-
76
-
77
-
78
-
79
-
80
-
81
-
82
-
83
-
84
-
85
-
86
-
87
-
88
-
89
-
90
-
91
-
92
-
93
-
94
-
95
-
96
 |
 |
