Epson Expression 10000XL User Manual - Page 74
Quality Problems, Your scanned image is blank, or it's
 |
View all Epson Expression 10000XL manuals
Add to My Manuals
Save this manual to your list of manuals |
Page 74 highlights
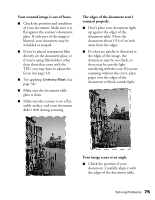
The file size is too big. Select a lower resolution (dpi), or scan only part of the image. Quality Problems Make sure your original photo or document is in good condition. If it's damaged, dirty, or wrinkled, these imperfections will show up in your scan. If the original looks okay, check for solutions in the sections below. Note: You can use features such as Color Restoration, Backlight Correction, or Dust Removal to clean up your original images (see page 33). The colors in your scanned image look different from the colors in the original document. ■ Make sure the Image Type setting in EPSON Scan is correct. In Professional Mode, try selecting an Image Type setting that offers greater color depth (if your imaging application supports it). ■ In Home Mode, select a Document Type that matches what you're scanning. ■ Marquee-select only the area in your image that you want to scan. Avoid selecting any borders. ■ You can adjust individual color tones in Professional Mode by using the Histogram Adjustment Tone Correction, or Color Palette controls. ■ Select suitable color control settings in EPSON Scan (see page 31). ■ For the greatest color accuracy, use a color management tool such as MonacoEZcolor (included with your scanner). Note: Your printer and monitor may not always match the colors in the original exactly, because the technologies produce color in different ways. Your scanned image is blank, or it's too light or too dark. ■ Adjust the Brightness and Contrast settings in EPSON Scan. ■ Make sure the document is facedown on the document table. ■ If you're using the optional ADF, make sure the original document is inserted face-up. ■ If scanning text or line art, select Black&White for the Image Type and adjust the Threshold setting. 74 Solving Problems
-
 1
1 -
2
-
3
-
4
-
5
-
6
-
7
-
8
-
9
-
10
-
11
-
12
-
13
-
14
-
15
-
16
-
17
-
18
-
19
-
20
-
21
-
22
-
23
-
24
-
25
-
26
-
27
-
28
-
29
-
30
-
31
-
32
-
33
-
34
-
35
-
36
-
37
-
38
-
39
-
40
-
41
-
42
-
43
-
44
-
45
-
46
-
47
-
48
-
49
-
50
-
51
-
52
-
53
-
54
-
55
-
56
-
57
-
58
-
59
-
60
-
61
-
62
-
63
-
64
-
65
-
66
-
67
-
68
-
 69
69 -
 70
70 -
 71
71 -
 72
72 -
 73
73 -
 74
74 -
 75
75 -
 76
76 -
 77
77 -
 78
78 -
 79
79 -
80
-
81
-
82
-
83
-
84
-
85
-
86
-
87
-
88
-
89
-
90
-
91
-
92
-
93
-
94
-
95
-
96
 |
 |
