Epson Expression 10000XL User Manual - Page 37
Using Dust Removal
 |
View all Epson Expression 10000XL manuals
Add to My Manuals
Save this manual to your list of manuals |
Page 37 highlights
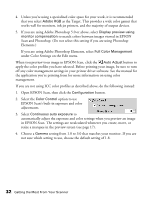
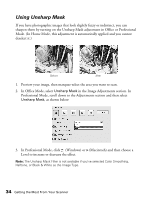
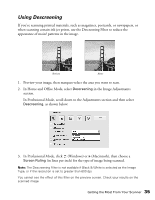
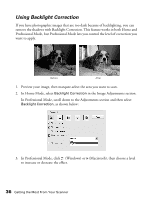
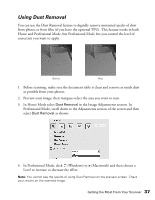
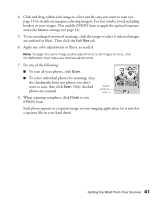
Using Dust Removal You can use the Dust Removal feature to digitally remove unwanted specks of dust from photos or from film (if you have the optional TPU). This feature works in both Home and Professional Mode, but Professional Mode lets you control the level of correction you want to apply. Before After 1. Before scanning, make sure the document table is clean and remove as much dust as possible from your photos. 2. Preview your image, then marquee-select the area you want to scan. 3. In Home Mode select Dust Removal in the Image Adjustments section. In Professional Mode, scroll down to the Adjustments section of the screen and then select Dust Removal as shown: 4. In Professional Mode, click (Windows) or (Macintosh) and then choose a Level to increase or decrease the effect. Note: You cannot see the results of using Dust Removal on the preview screen. Check your results on the scanned image. Getting the Most From Your Scanner 37
-
 1
1 -
2
-
3
-
4
-
5
-
6
-
7
-
8
-
9
-
10
-
11
-
12
-
13
-
14
-
15
-
16
-
17
-
18
-
19
-
20
-
21
-
22
-
23
-
24
-
25
-
26
-
27
-
28
-
29
-
30
-
31
-
 32
32 -
 33
33 -
 34
34 -
 35
35 -
 36
36 -
 37
37 -
 38
38 -
 39
39 -
 40
40 -
 41
41 -
 42
42 -
43
-
44
-
45
-
46
-
47
-
48
-
49
-
50
-
51
-
52
-
53
-
54
-
55
-
56
-
57
-
58
-
59
-
60
-
61
-
62
-
63
-
64
-
65
-
66
-
67
-
68
-
69
-
70
-
71
-
72
-
73
-
74
-
75
-
76
-
77
-
78
-
79
-
80
-
81
-
82
-
83
-
84
-
85
-
86
-
87
-
88
-
89
-
90
-
91
-
92
-
93
-
94
-
95
-
96
 |
 |
