Epson Expression 10000XL User Manual - Page 49
Placing Standard Film Sizes on the Scanner, filmstrips, negatives, 4 × 5 inch film
 |
View all Epson Expression 10000XL manuals
Add to My Manuals
Save this manual to your list of manuals |
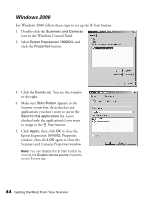
Page 49 highlights
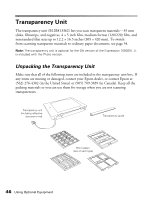
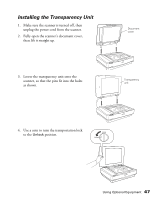
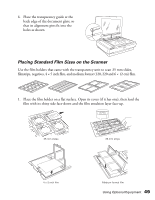
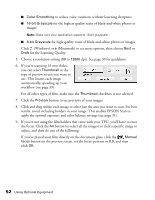
6. Place the transparency guide at the back edge of the document glass, so that its alignment pins fit into the holes as shown. Placing Standard Film Sizes on the Scanner Use the film holders that came with the transparency unit to scan 35 mm slides, filmstrips, negatives, 4 × 5 inch film, and medium format (120, 220 and 6 × 12 cm) film. 1. Place the film holder on a flat surface. Open its cover (if it has one), then load the film with its shiny side face-down and the film emulsion layer face-up. L400 16 35 mm slides 35 mm strips 4 × 5 inch film Medium format film Using Optional Equipment 49
-
 1
1 -
2
-
3
-
4
-
5
-
6
-
7
-
8
-
9
-
10
-
11
-
12
-
13
-
14
-
15
-
16
-
17
-
18
-
19
-
20
-
21
-
22
-
23
-
24
-
25
-
26
-
27
-
28
-
29
-
30
-
31
-
32
-
33
-
34
-
35
-
36
-
37
-
38
-
39
-
40
-
41
-
42
-
43
-
 44
44 -
 45
45 -
 46
46 -
 47
47 -
 48
48 -
 49
49 -
 50
50 -
 51
51 -
 52
52 -
 53
53 -
 54
54 -
55
-
56
-
57
-
58
-
59
-
60
-
61
-
62
-
63
-
64
-
65
-
66
-
67
-
68
-
69
-
70
-
71
-
72
-
73
-
74
-
75
-
76
-
77
-
78
-
79
-
80
-
81
-
82
-
83
-
84
-
85
-
86
-
87
-
88
-
89
-
90
-
91
-
92
-
93
-
94
-
95
-
96
 |
 |

Using Optional Equipment
49
6.
Place the transparency guide at the
back edge of the document glass, so
that its alignment pins fit into the
holes as shown.
Placing Standard Film Sizes on the Scanner
Use the film holders that came with the transparency unit to scan 35 mm slides,
filmstrips, negatives, 4 × 5 inch film, and medium format (120, 220 and 6 × 12 cm) film.
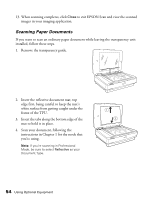
1.
Place the film holder on a flat surface. Open its cover (if it has one), then load the
film with its shiny side face-down and the film emulsion layer face-up.
L400
16
35 mm slides
35 mm strips
Medium format film
4 × 5 inch film