Epson Expression 10000XL User Manual - Page 24
Auto Exposure Type, Professional Mode, Photo, Document, bit Color, Color Smoothing, bit Grayscale
 |
View all Epson Expression 10000XL manuals
Add to My Manuals
Save this manual to your list of manuals |
Page 24 highlights
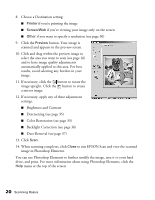
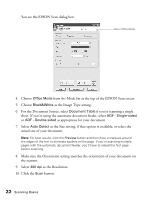
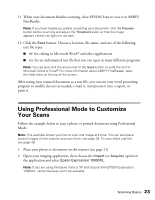
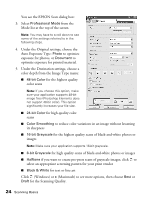
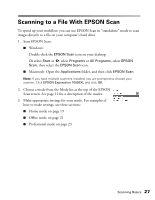
You see the EPSON Scan dialog box: 3. Select Professional Mode from the Mode list at the top of the screen. Note: You may have to scroll down to see some of the settings referred to in the following steps. 4. Under the Original settings, choose the Auto Exposure Type: Photo to optimize exposure for photos, or Document to optimize exposure for printed material. 5. Under the Destination settings, choose a color depth from the Image Type menu: ■ 48-bit Color for the highest quality color scans Note: If you choose this option, make sure your application supports 48-bit image files (Photoshop Elements does not support 48-bit color). This option significantly increases your file size. ■ 24-bit Color for high quality color scans ■ Color Smoothing to reduce color variations in an image without lessening its sharpness ■ 16-bit Grayscale for the highest quality scans of black-and-white photos or images Note: Make sure your application supports 16-bit grayscale. ■ 8-bit Grayscale for high quality scans of black-and-white photos or images ■ Halftone if you want to create pre-press scans of grayscale images; click to select an appropriate screening pattern for your print vendor ■ Black & White for text or line art Click (Windows) or (Macintosh) to see more options, then choose Best or Draft for the Scanning Quality. 24 Scanning Basics
-
 1
1 -
2
-
3
-
4
-
5
-
6
-
7
-
8
-
9
-
10
-
11
-
12
-
13
-
14
-
15
-
16
-
17
-
18
-
 19
19 -
 20
20 -
 21
21 -
 22
22 -
 23
23 -
 24
24 -
 25
25 -
 26
26 -
 27
27 -
 28
28 -
 29
29 -
30
-
31
-
32
-
33
-
34
-
35
-
36
-
37
-
38
-
39
-
40
-
41
-
42
-
43
-
44
-
45
-
46
-
47
-
48
-
49
-
50
-
51
-
52
-
53
-
54
-
55
-
56
-
57
-
58
-
59
-
60
-
61
-
62
-
63
-
64
-
65
-
66
-
67
-
68
-
69
-
70
-
71
-
72
-
73
-
74
-
75
-
76
-
77
-
78
-
79
-
80
-
81
-
82
-
83
-
84
-
85
-
86
-
87
-
88
-
89
-
90
-
91
-
92
-
93
-
94
-
95
-
96
 |
 |
