Epson Stylus Pro 7800 Professional Edition Printer Guide - Page 122
Checking and Cleaning the Print Head
 |
View all Epson Stylus Pro 7800 Professional Edition manuals
Add to My Manuals
Save this manual to your list of manuals |
Page 122 highlights
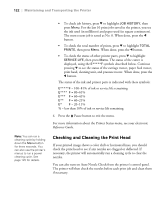
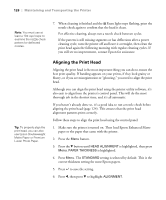
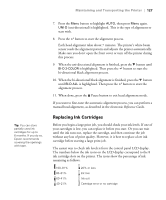
122 | Maintaining and Transporting the Printer Note: You can run a cleaning cycle by holding down the Menu button for three seconds. You can also use the printer's menus to run a power cleaning cycle. See page 125 for details. • To check job history, press d to highlight JOB HISTORY, then press Menu. For the last 10 print jobs saved in the printer, you see the ink used (in milliliters) and paper used (in square centimeters). The most recent job is saved as No. 0. When done, press the l button. • To check the total number of prints, press d to highlight TOTAL PRINTS, then press Menu. When done, press the l button. • To check the status of other printer parts, press d to highlight SERVICE LIFE, then press Menu. The status of the cutter is displayed, using the E*****F symbols described below. Continue pressing d to see the status of the carriage motor, paper feed motor, print head, cleaning unit, and pressure motor. When done, press the l button. The status of the ink and printer parts is indicated with these symbols: E*****F = 100-81% of ink or service life remaining E**** F = 80-61% E*** F = 60-41% E** F = 40-21% E* F = 20-11% % = less than 10% of ink or service life remaining 4. Press the Pause button to exit the menu. For more information about the Printer Status menu, see your electronic Reference Guide. Checking and Cleaning the Print Head If your printed image shows a color shift or horizontal lines, you should check the print head to see if any nozzles are clogged or deflected. If necessary, the printer will automatically run a cleaning cycle to clear the nozzles. You can also turn on Auto Nozzle Check from the printer's control panel. The printer will then check the nozzles before each print job and clean them if necessary. 5-122
-
 1
1 -
2
-
3
-
4
-
5
-
6
-
7
-
8
-
9
-
10
-
11
-
12
-
13
-
14
-
15
-
16
-
17
-
18
-
19
-
20
-
21
-
22
-
23
-
24
-
25
-
26
-
27
-
28
-
29
-
30
-
31
-
32
-
33
-
34
-
35
-
36
-
37
-
38
-
39
-
40
-
41
-
42
-
43
-
44
-
45
-
46
-
47
-
48
-
49
-
50
-
51
-
52
-
53
-
54
-
55
-
56
-
57
-
58
-
59
-
60
-
61
-
62
-
63
-
64
-
65
-
66
-
67
-
68
-
69
-
70
-
71
-
72
-
73
-
74
-
75
-
76
-
77
-
78
-
79
-
80
-
81
-
82
-
83
-
84
-
85
-
86
-
87
-
88
-
89
-
90
-
91
-
92
-
93
-
94
-
95
-
96
-
97
-
98
-
99
-
100
-
101
-
102
-
103
-
104
-
105
-
106
-
107
-
108
-
109
-
110
-
111
-
112
-
113
-
114
-
115
-
116
-
 117
117 -
 118
118 -
 119
119 -
 120
120 -
 121
121 -
 122
122 -
 123
123 -
 124
124 -
 125
125 -
 126
126 -
 127
127 -
128
-
129
-
130
-
131
-
132
-
133
-
134
-
135
-
136
-
137
-
138
-
139
-
140
-
141
-
142
-
143
-
144
-
145
-
146
-
147
-
148
-
149
-
150
-
151
-
152
-
153
-
154
-
155
-
156
-
157
-
158
-
159
-
160
-
161
-
162
-
163
-
164
-
165
-
166
-
167
-
168
-
169
-
170
-
171
-
172
-
173
-
174
-
175
-
176
 |
 |
