Epson Stylus Pro 7800 Professional Edition Printer Guide - Page 17
Chap 1-Setting Up the Printer, Unpacking and Assembling the Epson Stylus Pro 7800
 |
View all Epson Stylus Pro 7800 Professional Edition manuals
Add to My Manuals
Save this manual to your list of manuals |
Page 17 highlights
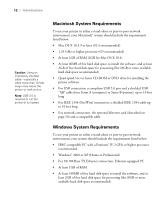
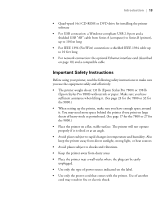
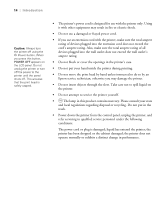
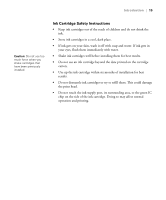
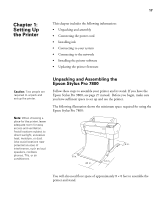
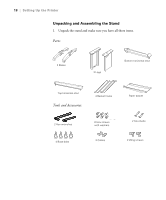
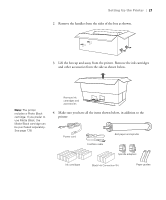
17 Chapter 1: Setting Up the Printer This chapter includes the following information: • Unpacking and assembly • Connecting the power cord • Installing ink • Connecting to your system • Connecting to the network • Installing the printer software • Updating the printer firmware Caution: Two people are required to unpack and set up the printer. Note: When choosing a place for the printer, leave adequate room for easy access and ventilation. Avoid locations subject to direct sunlight, excessive heat, moisture, or dust. Also avoid locations near potential sources of interference, such as loud speakers, cordless phones, TVs, or air conditioners. Unpacking and Assembling the Epson Stylus Pro 7800 Follow these steps to assemble your printer and its stand. If you have the Epson Stylus Pro 9800, see page 27 instead. Before you begin, make sure you have sufficient space to set up and use the printer. The following illustration shows the minimum space required for using the Epson Stylus Pro 7800: 8 in. 6 in. 24 in. 12 in. You will also need floor space of approximately 8 × 8 feet to assemble the printer and stand. 17
-
 1
1 -
2
-
3
-
4
-
5
-
6
-
7
-
8
-
9
-
10
-
11
-
 12
12 -
 13
13 -
 14
14 -
 15
15 -
 16
16 -
 17
17 -
 18
18 -
 19
19 -
 20
20 -
 21
21 -
 22
22 -
23
-
24
-
25
-
26
-
27
-
28
-
29
-
30
-
31
-
32
-
33
-
34
-
35
-
36
-
37
-
38
-
39
-
40
-
41
-
42
-
43
-
44
-
45
-
46
-
47
-
48
-
49
-
50
-
51
-
52
-
53
-
54
-
55
-
56
-
57
-
58
-
59
-
60
-
61
-
62
-
63
-
64
-
65
-
66
-
67
-
68
-
69
-
70
-
71
-
72
-
73
-
74
-
75
-
76
-
77
-
78
-
79
-
80
-
81
-
82
-
83
-
84
-
85
-
86
-
87
-
88
-
89
-
90
-
91
-
92
-
93
-
94
-
95
-
96
-
97
-
98
-
99
-
100
-
101
-
102
-
103
-
104
-
105
-
106
-
107
-
108
-
109
-
110
-
111
-
112
-
113
-
114
-
115
-
116
-
117
-
118
-
119
-
120
-
121
-
122
-
123
-
124
-
125
-
126
-
127
-
128
-
129
-
130
-
131
-
132
-
133
-
134
-
135
-
136
-
137
-
138
-
139
-
140
-
141
-
142
-
143
-
144
-
145
-
146
-
147
-
148
-
149
-
150
-
151
-
152
-
153
-
154
-
155
-
156
-
157
-
158
-
159
-
160
-
161
-
162
-
163
-
164
-
165
-
166
-
167
-
168
-
169
-
170
-
171
-
172
-
173
-
174
-
175
-
176
 |
 |
