HP Deskwriter 600 DeskWriter 600 User's Guide - Not Orderable - Page 10
What the Buttons and Lights - troubleshooting
 |
View all HP Deskwriter 600 manuals
Add to My Manuals
Save this manual to your list of manuals |
Page 10 highlights
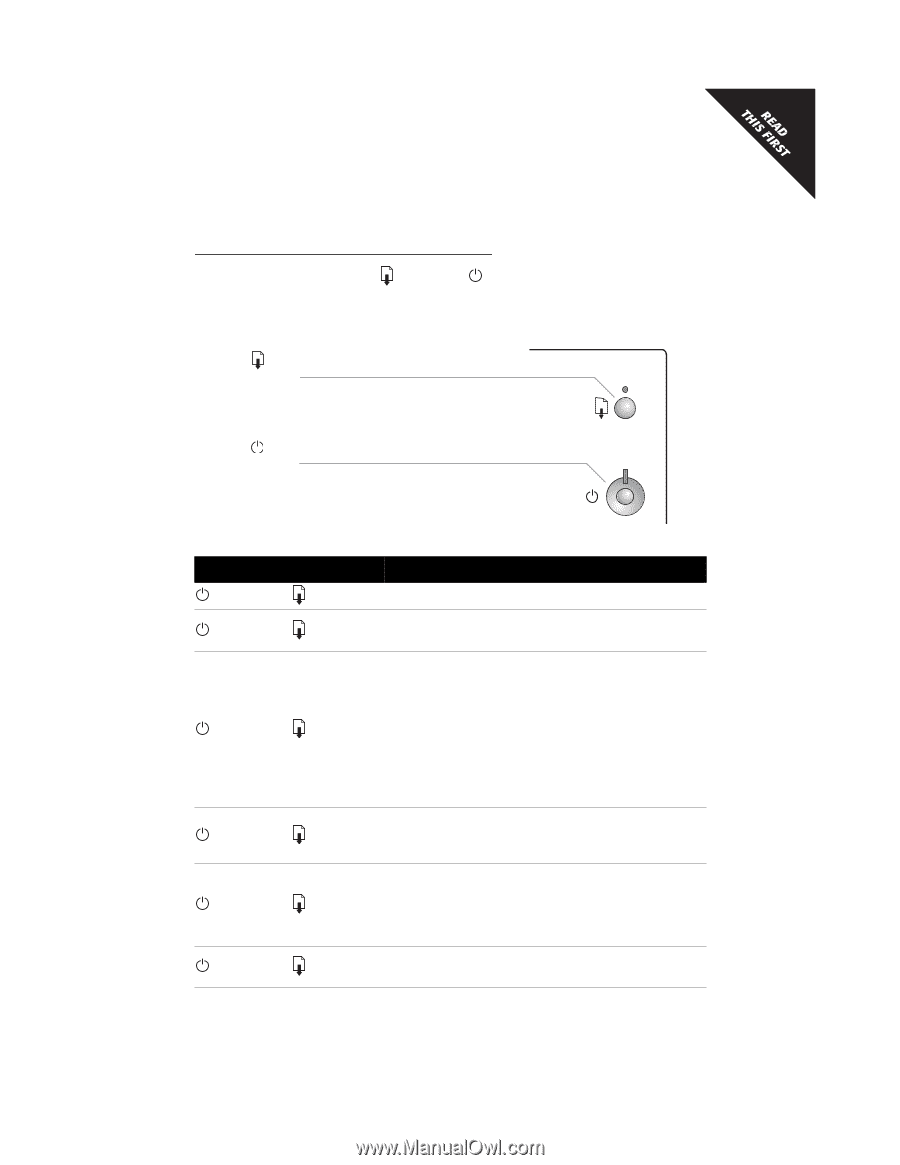
FIRST TIME SETUP What the Buttons and Lights Do The resume and power buttons and lights are on the front of the printer. In general, the lights indicate when the printer is operating correctly and when it needs attention from you; the buttons are used to control the printer. Resume Light and Button Power Light and Button This table summarizes what the lights indicate: When the Lights are... You Need to... Turned off and Turned off Press the power button to turn on the printer. Steadily lit and Turned off Send a document to the printer. The printer is in the ready-toprint state. Steadily lit and Blinking If you just installed a print cartridge, make sure the print cartridge is securely snapped into the printer with the arrow aligned with the dot on the top of the print cartridge cradle. Close the top cover of the printer if it is open. Check the IN tray to be sure it contains paper and that the paper is correctly loaded in the tray. Press the resume button to clear the error condition. Then check your computer screen for any reported error message and corrective action instructions. Blinking and Turned off No action required. This indicates that either the computer is sending a document to the printer or that the printer is currently busy printing a document. Blinking and Blinking Press the power button to turn off the printer. At the computer, cancel any documents awaiting printing. Then press the power button again to turn the printer back on. If the lights continue to blink alternately, see the troubleshooting information in Section 5 of this User's Guide. Steadily lit and Steadily lit See the troubleshooting information in Section 5 of this User's Guide. 5
-
 1
1 -
2
-
3
-
4
-
 5
5 -
 6
6 -
 7
7 -
 8
8 -
 9
9 -
 10
10 -
 11
11 -
 12
12 -
 13
13 -
 14
14 -
 15
15 -
16
-
17
-
18
-
19
-
20
-
21
-
22
-
23
-
24
-
25
-
26
-
27
-
28
-
29
-
30
-
31
-
32
-
33
-
34
-
35
-
36
-
37
-
38
-
39
-
40
-
41
-
42
-
43
-
44
-
45
-
46
-
47
-
48
-
49
-
50
-
51
-
52
-
53
-
54
-
55
-
56
-
57
-
58
-
59
-
60
-
61
-
62
-
63
-
64
-
65
-
66
-
67
-
68
-
69
-
70
-
71
-
72
-
73
-
74
-
75
-
76
-
77
-
78
-
79
-
80
-
81
-
82
-
83
-
84
-
85
-
86
-
87
-
88
-
89
-
90
-
91
-
92
-
93
-
94
-
95
 |
 |