HP Deskwriter 600 DeskWriter 600 User's Guide - Not Orderable - Page 57
The paper in the printer is damaged, wrinkled, or curled. Remove - printer manual
 |
View all HP Deskwriter 600 manuals
Add to My Manuals
Save this manual to your list of manuals |
Page 57 highlights
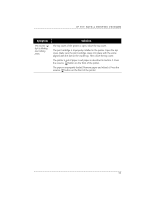
IF YOU HAVE A PRINTING PROBLEM Symptom Paper does not advance into the printer. Paper does not eject from the printer. Paper does not fully eject from the printer and the resume and power lights blink alternately. Solution You are printing on a transparency or special paper and the automatic dry timer is operating correctly. Wait for the page to drop into the OUT tray. Paper is improperly loaded. Remove the paper stack from the IN tray. Make sure the stack is even and does not contain curled or damaged paper. Reload the stack evenly in the IN tray so the stack's right side aligns with the printer's right side. If the paper is less than 8 2/3 inches (22 cm) in length, release the handle of the paper length adjuster. (This reduces the paper capacity of the IN tray to a maximum stack height of 5/16 inch (0.8 cm).) Push the paper length adjuster toward the printer until it stops. Do not bend the paper. The OUT tray is improperly installed in the printer. Make sure the OUT tray is fully installed into the printer and rests evenly on the IN tray. If necessary, lift the top cover, insert the OUT tray, and lower the top cover. Different paper types, sizes, or weights are loaded in the IN tray at the same time. Remove the stack and reload paper of only one type, size, and weight. The exception to this is when you are printing on Avery paper labels: be sure the stack of Avery paper labels is placed print side down on top of 25 sheets of paper before the combined stack is inserted into the IN tray. The paper in the printer is damaged, wrinkled, or curled. Remove damaged paper from the IN tray. Always store paper in its packaging. You are printing on a transparency or special paper and the automatic dry timer is operating correctly. Wait for the page to drop into the OUT tray. The computer was turned off while the printer was printing. Turn off the printer. Turn on the computer and printer in the sequence described in your computer manual. The paper is jammed in the printer. Turn off the printer, open the top cover, and remove the OUT tray. Pull the jammed paper out of the printer. Remove all torn pieces of paper from the printer. Small scraps of paper left within the printer can cause further paper jams. Remove wrinkled or torn paper from the IN tray. Reload the paper stack. Replace the OUT tray and close the top cover. Turn on the printer. 53
-
 1
1 -
2
-
3
-
4
-
5
-
6
-
7
-
8
-
9
-
10
-
11
-
12
-
13
-
14
-
15
-
16
-
17
-
18
-
19
-
20
-
21
-
22
-
23
-
24
-
25
-
26
-
27
-
28
-
29
-
30
-
31
-
32
-
33
-
34
-
35
-
36
-
37
-
38
-
39
-
40
-
41
-
42
-
43
-
44
-
45
-
46
-
47
-
48
-
49
-
50
-
51
-
 52
52 -
 53
53 -
 54
54 -
 55
55 -
 56
56 -
 57
57 -
 58
58 -
 59
59 -
 60
60 -
 61
61 -
 62
62 -
63
-
64
-
65
-
66
-
67
-
68
-
69
-
70
-
71
-
72
-
73
-
74
-
75
-
76
-
77
-
78
-
79
-
80
-
81
-
82
-
83
-
84
-
85
-
86
-
87
-
88
-
89
-
90
-
91
-
92
-
93
-
94
-
95
 |
 |
