HP Deskwriter 600 DeskWriter 600 User's Guide - Not Orderable - Page 47
Adding Paper, Envelopes, Cards, or, Transparencies, Removing Paper, Envelopes, Cards, or
 |
View all HP Deskwriter 600 manuals
Add to My Manuals
Save this manual to your list of manuals |
Page 47 highlights
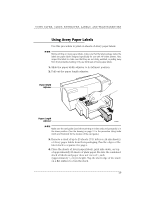
SECTION THREE Adding Paper, Envelopes, Cards, or Transparencies If the printer runs out of paper, envelopes, cards, or transparencies while it is printing, the resume light flashes and an alert box appears on your computer screen prompting you to add in more paper. To add items to the IN tray, remove all remaining paper from the IN tray and combine it with a new stack of the same paper. Tap the stack on a flat surface to even the stack. The stack should not exceed 1/2 inch (1 cm) for paper, envelopes, or transparencies and should not exceed 1/4 inch (1/2 cm) for cards or Avery paper labels. Push the resume button to continue printing. Removing Paper, Envelopes, Cards, or Transparencies 1. Remove the OUT tray. 2. Remove the paper, envelopes, cards, or transparencies. 3. Replace the OUT tray. If you encounter difficulty replacing the OUT tray, lift the top cover, wait a few moments for the print cartridge cradle to move to its center position, replace the OUT tray, then lower the top cover. 2184029 N OT E Except when printing on index cards and postcards, make sure the card guide is in the down position. (See the drawing on page 31 in the procedure Using Index Cards and Postcards for the location of the card guide.) If you have any problems while loading or removing items from the IN tray, see the troubleshooting information in Section 5. 42
-
 1
1 -
2
-
3
-
4
-
5
-
6
-
7
-
8
-
9
-
10
-
11
-
12
-
13
-
14
-
15
-
16
-
17
-
18
-
19
-
20
-
21
-
22
-
23
-
24
-
25
-
26
-
27
-
28
-
29
-
30
-
31
-
32
-
33
-
34
-
35
-
36
-
37
-
38
-
39
-
40
-
41
-
 42
42 -
 43
43 -
 44
44 -
 45
45 -
 46
46 -
 47
47 -
 48
48 -
 49
49 -
 50
50 -
 51
51 -
 52
52 -
53
-
54
-
55
-
56
-
57
-
58
-
59
-
60
-
61
-
62
-
63
-
64
-
65
-
66
-
67
-
68
-
69
-
70
-
71
-
72
-
73
-
74
-
75
-
76
-
77
-
78
-
79
-
80
-
81
-
82
-
83
-
84
-
85
-
86
-
87
-
88
-
89
-
90
-
91
-
92
-
93
-
94
-
95
 |
 |
