HP LaserJet Enterprise 700 HP LaserJet Enterprise 700 M712 - User Guide
HP LaserJet Enterprise 700 Manual
 |
View all HP LaserJet Enterprise 700 manuals
Add to My Manuals
Save this manual to your list of manuals |
HP LaserJet Enterprise 700 manual content summary:
- HP LaserJet Enterprise 700 | HP LaserJet Enterprise 700 M712 - User Guide - Page 1
LASERJET ENTERPRISE 700 User Guide 2 3 M712 - HP LaserJet Enterprise 700 | HP LaserJet Enterprise 700 M712 - User Guide - Page 2
- HP LaserJet Enterprise 700 | HP LaserJet Enterprise 700 M712 - User Guide - Page 3
HP LaserJet Enterprise 700 M712 User Guide - HP LaserJet Enterprise 700 | HP LaserJet Enterprise 700 M712 - User Guide - Page 4
to change without notice. The only warranties for HP products and services are set forth in the express warranty statements accompanying such products and services. Nothing herein should be construed as constituting an additional warranty. HP shall not be liable for technical or editorial errors - HP LaserJet Enterprise 700 | HP LaserJet Enterprise 700 M712 - User Guide - Page 5
the software (Mac OS X) ..... 17 Configure the IP address 17 Install the software 18 3 Input trays and output bins 21 Supported paper sizes ...22 Supported paper types ...26 Configure trays ...27 Configure a tray when loading paper 27 Configure a tray to match print job settings 27 Configure - HP LaserJet Enterprise 700 | HP LaserJet Enterprise 700 M712 - User Guide - Page 6
34 500-sheet trays ...36 500-sheet tray capacity and paper orientation 36 Load the 500-sheet trays 37 3,500-sheet high-capacity tray 39 3,500-sheet HP policy on non-HP toner cartridges 54 Replace the toner cartridge 55 5 Print ...59 Supported print drivers (Windows 60 HP Universal Print Driver - HP LaserJet Enterprise 700 | HP LaserJet Enterprise 700 M712 - User Guide - Page 7
X 87 Create a printing preset (Mac OS X 87 Automatically print on both sides (Mac OS X 87 Manually print on both sides (Mac OS X 87 Print multiple pages per sheet (Mac OS X 88 Select the 97 Add a job-separator page (Windows 99 Use HP ePrint ...100 Use the HP ePrint Mobile Driver 101 ENWW v - HP LaserJet Enterprise 700 | HP LaserJet Enterprise 700 M712 - User Guide - Page 8
panel 110 Manually configure IPv6 TCP/IP parameters from the control panel 111 HP Embedded Web Server 112 Open the HP Embedded Web Server 112 HP Embedded Web Server features 113 Information tab 113 General tab 113 Print tab 114 Troubleshooting tab 115 Security tab 115 HP Web Services tab - HP LaserJet Enterprise 700 | HP LaserJet Enterprise 700 M712 - User Guide - Page 9
support: HP High-Performance Secure Hard Disks 124 Lock the formatter cage 124 Upgrade the product firmware 125 7 Solve problems ...127 Solve problems in Tray 2 or Tray 3 137 Clear jams in the 500-sheet trays 139 Clear jams in the 3,500-sheet high-capacity tray 140 Clear jams from the toner- - HP LaserJet Enterprise 700 | HP LaserJet Enterprise 700 M712 - User Guide - Page 10
incorrectly 162 The product is disabled, or other network settings are incorrect 162 Solve product software problems (Windows 163 A print driver for the product is not visible in the Printer folder 163 An error message was displayed during the software installation 163 The product is in Ready - HP LaserJet Enterprise 700 | HP LaserJet Enterprise 700 M712 - User Guide - Page 11
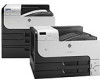
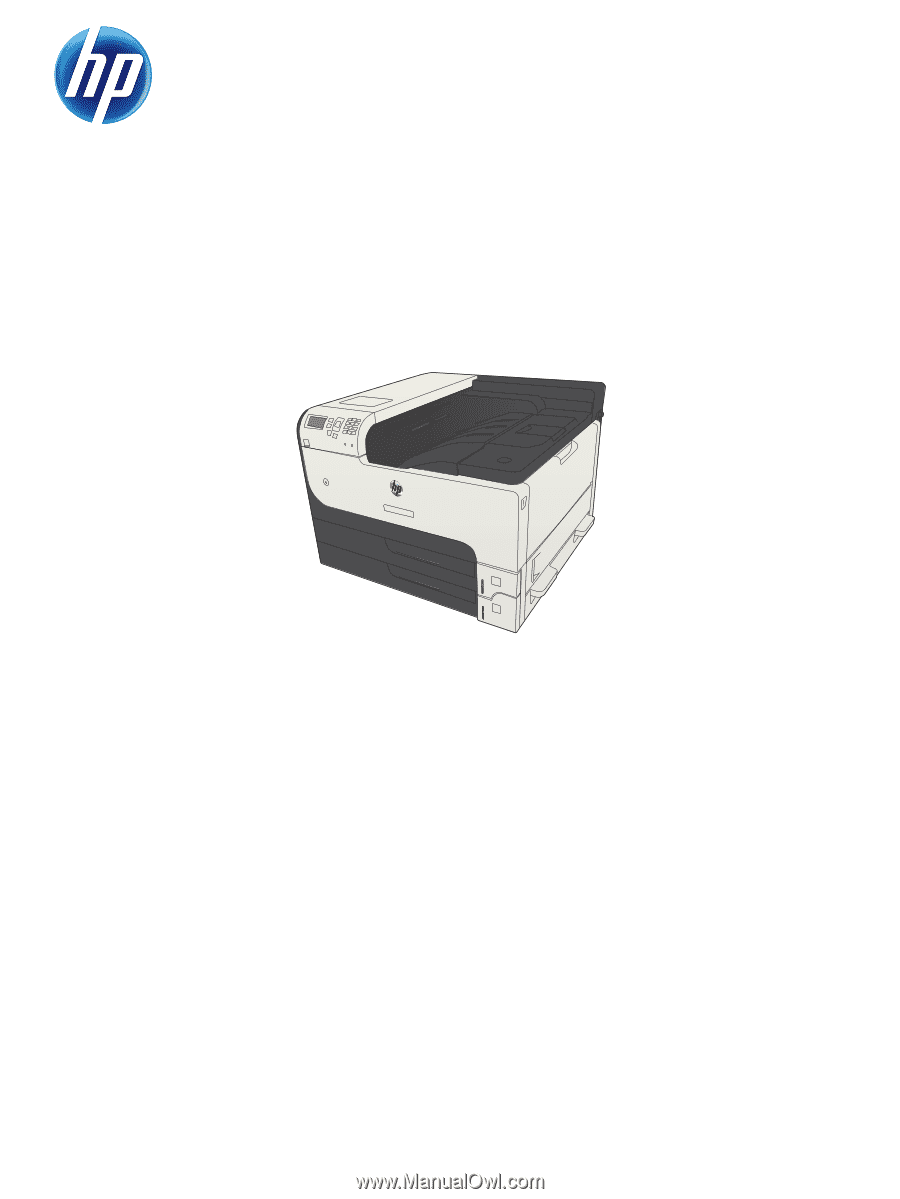
1 Product introduction ● Product comparison ● Product views ● Control panel ● Product reports ENWW 1 - HP LaserJet Enterprise 700 | HP LaserJet Enterprise 700 M712 - User Guide - Page 12
Optional Tray 4 (500-sheet capacity) Standard HP will continue to provide best-effort support for the discontinued XP operating system. Windows Vista, 32-bit and 64-bit NOTE: Windows Vista Starter is not supported by the software installer or the print driver. M712n CF235A M712dn CF236A M712xh - HP LaserJet Enterprise 700 | HP LaserJet Enterprise 700 M712 - User Guide - Page 13
The software installer does not support the 64-bit version, but the print driver supports it. Windows 2003 Server SP1 or later, 32-bit and 64bit Windows 2008, 32-bit and 64-bit Windows 2008 R2, 64-bit Mac OS X 10.6, 10.7, and 10.8 M712n CF235A M712dn CF236A M712xh CF238A ENWW Product comparison - HP LaserJet Enterprise 700 | HP LaserJet Enterprise 700 M712 - User Guide - Page 14
contains the interface ports) 6 Right-side access door 7 Handles for lifting the product 8 500-sheet tray jam-access door 9 Handles for lifting the product 10 500-sheet tray (included with the M712xh model) 11 Tray 3 12 Tray 2 13 On/off button 4 Chapter 1 Product introduction ENWW - HP LaserJet Enterprise 700 | HP LaserJet Enterprise 700 M712 - User Guide - Page 15
a computer and for upgrading the firmware) 4 Handles for lifting the product 5 Handles for lifting the product 6 Lever to lock the 500-sheet tray to the product 7 Power connection 8 Duplexer (included with the M712dn and M712xh models) 9 Fuser jam-access cover ENWW Product views 5 - HP LaserJet Enterprise 700 | HP LaserJet Enterprise 700 M712 - User Guide - Page 16
Interface ports 1 Local area network (LAN) Ethernet (RJ-45) network port 2 Hi-Speed USB 2.0 printing port 3 USB port for connecting external USB devices 6 Chapter 1 Product introduction ENWW - HP LaserJet Enterprise 700 | HP LaserJet Enterprise 700 M712 - User Guide - Page 17
. The serial number contains information about the country/region of origin, the product version, production code, and the production number of the product. Model name M712n M712dn M712xh Model number CF235A CF236A CF238A ENWW Product views 7 - HP LaserJet Enterprise 700 | HP LaserJet Enterprise 700 M712 - User Guide - Page 18
Returns values to their defaults and closes the help screen Provides quick access to the Retrieve Job menu ● On: The product has experienced a problem. See the control-panel display. ● Off: The product is functioning without error. ● Blinking: Action is required. See the control-panel display. ENWW - HP LaserJet Enterprise 700 | HP LaserJet Enterprise 700 M712 - User Guide - Page 19
Number Button or light 11 Ready light 12 Home button 13 Back button 14 Easy-access USB Function ● On: The product is online and ready to accept data to print. ● Off: The product cannot accept data because it is offline (paused) or has experienced an error. ● Blinking: The product is going - HP LaserJet Enterprise 700 | HP LaserJet Enterprise 700 M712 - User Guide - Page 20
● Administration ● Reports 3. Select the name of the report you want to review, scroll up to the Print option, and then press the OK button to memory. Shows the detected Web Services for the product. Prints the available PCL fonts. Prints the available HP postscript level 3 emulation fonts. - HP LaserJet Enterprise 700 | HP LaserJet Enterprise 700 M712 - User Guide - Page 21
2 Connect the product and install software ● Connect the product to a computer by using a USB cable and install the software (Windows) ● Connect the product to a network by using a network cable and install the software (Windows) ● Connect the product to a computer by using a USB cable and install - HP LaserJet Enterprise 700 | HP LaserJet Enterprise 700 M712 - User Guide - Page 22
and install the software (Windows) This product supports a USB 2.0 connection. Use an A-to-B type USB cable. HP recommends using a cable that is no 3. Install the software from the CD, and follow the on-screen instructions. 4. When prompted, select the Directly connect to this computer using USB - HP LaserJet Enterprise 700 | HP LaserJet Enterprise 700 M712 - User Guide - Page 23
5. When the software prompts you, connect the USB cable to the product and the computer. 6. At the end of the installation, click the Finish button, or click the More Options button to install more software or configure basic digital sending features for the product. 7. Print a page from any program - HP LaserJet Enterprise 700 | HP LaserJet Enterprise 700 M712 - User Guide - Page 24
Connect the product to a network by using a network cable and install the software (Windows) Configure the IP address 1. Make sure the product is turned on and that the Ready message displays on the product controlpanel display. 2. Connect the network cable to the product and to the network. 3. - HP LaserJet Enterprise 700 | HP LaserJet Enterprise 700 M712 - User Guide - Page 25
Page HP Color LaserJet Page 1 5. IPv4: If the IP address is 0.0.0.0, or 192.0.0.192, or 169.254.x.x, you must manually configure manually configure the IP address. Install the software 1. Close all programs on the computer. 2. Install the software from the CD. 3. Follow the on-screen instructions - HP LaserJet Enterprise 700 | HP LaserJet Enterprise 700 M712 - User Guide - Page 26
and install the software (Mac OS X) This product supports a USB 2.0 connection. Use an A-to-B type USB cable. HP recommends using a cable that is no longer than from the CD. 4. Click the product icon, and follow the on-screen instructions. 5. Click the Close button. 6. Print a page from any program - HP LaserJet Enterprise 700 | HP LaserJet Enterprise 700 M712 - User Guide - Page 27
Connect the product to a network by using a network cable and install the software (Mac OS X) Configure the IP address 1. Make sure the product is turned on and that the Ready message displays on the product controlpanel display. 2. Connect the network cable to the product and to the network. 3. - HP LaserJet Enterprise 700 | HP LaserJet Enterprise 700 M712 - User Guide - Page 28
e. Find the IP address on the Jetdirect page. Jetdirect Page HP Color LaserJet Page 1 5. IPv4: If the IP address is 0.0.0.0, or 192.0.0.192, or 169.254.x.x, you must manually configure the IP address. Otherwise, the network configuration was successful. IPv6: If the IP address begins with "fe80 - HP LaserJet Enterprise 700 | HP LaserJet Enterprise 700 M712 - User Guide - Page 29
Jet Direct - Socket from the Protocol drop-down menu. This is the recommended setting for HP products. c. Type the IP address into the Address field on the add printer screen. d. The Name, Location, and Print Using information are automatically filled in. If the product PPD is not in the Print Using - HP LaserJet Enterprise 700 | HP LaserJet Enterprise 700 M712 - User Guide - Page 30
20 Chapter 2 Connect the product and install software ENWW - HP LaserJet Enterprise 700 | HP LaserJet Enterprise 700 M712 - User Guide - Page 31
3 Input trays and output bins ● Supported paper sizes ● Supported paper types ● Configure trays ● Alternative letterhead mode ● Tray 1 ● Tray 2 and Tray 3 ● 500-sheet trays ● 3,500-sheet high-capacity tray ● Use paper output options ENWW 21 - HP LaserJet Enterprise 700 | HP LaserJet Enterprise 700 M712 - User Guide - Page 32
obtain the best results, select the correct paper size and type in the print driver before printing. Table 3-1 Supported paper sizes Size and dimensions Tray 1 Tray 2 Tray 3 Optional 500-sheet trays 3,500-sheet high-capacity tray Automatic duplex printing Letter 279 x 216 mm (11 x 8.5 in - HP LaserJet Enterprise 700 | HP LaserJet Enterprise 700 M712 - User Guide - Page 33
Table 3-1 Supported paper sizes (continued) Size and dimensions Tray 1 Tray 2 A4 297 x 210 mm (11.7 x 8.3 in) A4 x 13.7 in) 8K 270 x 390 mm 270 x 390 mm (10.6 x 15.4 in) Tray 3 Optional 500-sheet trays 3,500-sheet high-capacity tray Automatic duplex printing ENWW Supported paper sizes 23 - HP LaserJet Enterprise 700 | HP LaserJet Enterprise 700 M712 - User Guide - Page 34
Table 3-1 Supported paper sizes (continued) Size and dimensions Tray 1 Tray 2 16K 195 x 270 x 162 mm (4.5 x 6.4 in) Envelope DL 110 x 220 mm (4.3 x 8.7 in) Tray 3 Optional 500-sheet trays 3,500-sheet high-capacity tray Automatic duplex printing 24 Chapter 3 Input trays and output bins ENWW - HP LaserJet Enterprise 700 | HP LaserJet Enterprise 700 M712 - User Guide - Page 35
Table 3-1 Supported paper sizes (continued) Size and dimensions Tray 1 Tray 2 Custom 76 x 127 mm to 312 x 148 x 210 mm to 432 x 297 mm (5.8 x 8.3 in) to (17 x 12.7 in) Tray 3 Optional 500-sheet trays 3,500-sheet high-capacity tray Automatic duplex printing ENWW Supported paper sizes 25 - HP LaserJet Enterprise 700 | HP LaserJet Enterprise 700 M712 - User Guide - Page 36
, select the correct paper size and type in the print driver before printing. Table 3-2 Supported paper types Paper type Tray 1 Tray 2 and Tray 3 Optional 500sheet trays 3,500-sheet high-capacity tray Automatic duplex printing Plain HP EcoSMART Lite Light 60-74 g Intermediate 85-95 g Bond - HP LaserJet Enterprise 700 | HP LaserJet Enterprise 700 M712 - User Guide - Page 37
in the following situations: ● When you load paper into the tray ● When you specify a particular tray or paper type for a print job through the print driver or a software program and the tray is not configured to match the print-job's settings NOTE: The prompt does not display if you are printing - HP LaserJet Enterprise 700 | HP LaserJet Enterprise 700 M712 - User Guide - Page 38
Configure a tray by using the control panel You can also configure the trays for type and size without a prompt from the product. 1. On the product control panel, press the Home button. 2. Open the Trays menu. 3. Highlight the paper size or type setting for the tray that you want to configure, and - HP LaserJet Enterprise 700 | HP LaserJet Enterprise 700 M712 - User Guide - Page 39
to enable the feature in the print driver and configure the paper type in the print driver. Enable Alternative Letterhead Mode by using the Properties or Preferences button. 3. Click the Advanced tab. 4. Expand the Printer Features list. 5. Open the Alternative Letterhead Mode drop-down list, and - HP LaserJet Enterprise 700 | HP LaserJet Enterprise 700 M712 - User Guide - Page 40
to 10 envelopes Maximum stack height: 13 mm (0.5 in) Maximum stack height: 13 mm (0.5 in) Table 3-4 Tray 1 paper orientation Single-sided printing Manual duplex printing and Alternative Letterhead Mode Face-up Face-down Top edge leading into the product Long edge leading into the product, top - HP LaserJet Enterprise 700 | HP LaserJet Enterprise 700 M712 - User Guide - Page 41
Load Tray 1 1. Open Tray 1. 2. Pull out the paper support. 3. For paper larger than Letter or A4 size, fold out the extension. ENWW Tray 1 31 - HP LaserJet Enterprise 700 | HP LaserJet Enterprise 700 M712 - User Guide - Page 42
. 5. Load the paper into the tray. Make sure that the paper fits under the tabs and below the maximum-height indicators. 6. Adjust the paper-width guides so that they lightly touch the paper stack but do not bend the paper. 32 Chapter 3 Input trays and output bins ENWW - HP LaserJet Enterprise 700 | HP LaserJet Enterprise 700 M712 - User Guide - Page 43
Tray 2 and Tray 3 Tray capacity and paper orientation To prevent jams, do not overfill trays. Be sure the top of the stack is below the tray-full indicator. For short/narrow and heavy/glossy paper, load paper to less than half of the tray-full indicators. Table 3-5 Tray 2 and Tray 3 capacity - HP LaserJet Enterprise 700 | HP LaserJet Enterprise 700 M712 - User Guide - Page 44
Load Tray 2 and Tray 3 1. Open the tray. 2. Adjust the paper-guides to the correct paper size. 34 Chapter 3 Input trays and output bins ENWW - HP LaserJet Enterprise 700 | HP LaserJet Enterprise 700 M712 - User Guide - Page 45
3. Load the paper into the tray. Make sure that the stack is flat at all four corners and that the top of the stack is below the maximum-height indicators. 4. Close the tray. ENWW Tray 2 and Tray 3 35 - HP LaserJet Enterprise 700 | HP LaserJet Enterprise 700 M712 - User Guide - Page 46
tray capacity Paper type Specifications Paper Range: 60 g/m2 (16 lb) to 130 g/m2 (35 lb) Quantity Equivalent to 500 sheets of 75 g/m2 (20 lb) Table 3-8 500-sheet tray paper orientation Single-sided printing Automatic duplex printing and Alternative Letterhead Mode Face-down Face-up Top - HP LaserJet Enterprise 700 | HP LaserJet Enterprise 700 M712 - User Guide - Page 47
Load the 500-sheet trays 1. Open the tray. 2 3 2. Adjust the paper-size guides to the correct paper size. ENWW 500-sheet trays 37 - HP LaserJet Enterprise 700 | HP LaserJet Enterprise 700 M712 - User Guide - Page 48
3. Load the paper into the tray. Make sure that the stack is flat at all four corners and that the top of the stack is below the maximum-height indicators. 4. Close the tray. 2 3 38 Chapter 3 Input trays and output bins ENWW - HP LaserJet Enterprise 700 | HP LaserJet Enterprise 700 M712 - User Guide - Page 49
to less than half of the tray-full indicators. Table 3-9 3,500-sheet high-capacity input tray capacity Paper type Specifications Paper Range: 60 envelopes only from Tray 1. Load the 3,500-sheet high-capacity tray The 3,500-sheet high-capacity tray supports only A4 and Letter-size paper. 1. - HP LaserJet Enterprise 700 | HP LaserJet Enterprise 700 M712 - User Guide - Page 50
to the correct position for the paper you are using. 4 3. Load full reams of paper into each side of the tray. The right side holds 1,500 sheets of paper. The left side holds 2,000 sheets of paper. 4 NOTE: For best results, load full reams of paper. Avoid dividing reams into smaller - HP LaserJet Enterprise 700 | HP LaserJet Enterprise 700 M712 - User Guide - Page 51
Use paper output options Output bin The standard output bin collects paper face-down, in the correct order. The standard output bin holds up to 250 sheets of 75 g/m2 (20 lb) paper. ENWW Use paper output options 41 - HP LaserJet Enterprise 700 | HP LaserJet Enterprise 700 M712 - User Guide - Page 52
42 Chapter 3 Input trays and output bins ENWW - HP LaserJet Enterprise 700 | HP LaserJet Enterprise 700 M712 - User Guide - Page 53
4 Parts, supplies, and accessories ● Order parts, accessories, and supplies ● HP policy on non-HP supplies ● HP anticounterfeit Web site ● Print when a toner cartridge is at estimated end of life ● Enable or disable the Very Low Settings options from the control panel ● - HP LaserJet Enterprise 700 | HP LaserJet Enterprise 700 M712 - User Guide - Page 54
, and supplies Order supplies and paper Order genuine HP parts or accessories Order through service or support providers Order using HP software www.hp.com/go/suresupply www.hp.com/buy/parts Contact an HP-authorized service or support provider. The HP Embedded Web Server contains a link to the - HP LaserJet Enterprise 700 | HP LaserJet Enterprise 700 M712 - User Guide - Page 55
Company cannot recommend the use of non-HP toner cartridges, either new or remanufactured. NOTE: For HP printer products, the use of a non-HP toner cartridge or a refilled toner cartridge does not affect either the warranty to the customer or any HP support contract with the customer. However, if - HP LaserJet Enterprise 700 | HP LaserJet Enterprise 700 M712 - User Guide - Page 56
toner cartridge and the control-panel message says the cartridge is non-HP. HP will help determine if the cartridge is genuine and take steps to resolve the problem. Your toner cartridge might not be a genuine HP toner cartridge if you notice the following: ● The supplies status page indicates that - HP LaserJet Enterprise 700 | HP LaserJet Enterprise 700 M712 - User Guide - Page 57
a supply is nearing the estimated end of its useful life. This message displays when a supply is at its estimated end of useful life. Print-quality problems can occur when using a supply that is at its estimated end of life. ENWW Print when a toner cartridge is at estimated end of life 47 - HP LaserJet Enterprise 700 | HP LaserJet Enterprise 700 M712 - User Guide - Page 58
interruption when it passes the Very Low threshold if you select the Continue option for color and black cartridges, but print quality might degrade. Once an HP supply has reached Very Low, HP's premium Protection Warranty on that supply has ended. 48 Chapter 4 Parts, supplies, and accessories - HP LaserJet Enterprise 700 | HP LaserJet Enterprise 700 M712 - User Guide - Page 59
-depot support is not provided under the HP product warranty. ● Parts listed as Optional self-replacement can be installed by HP service personnel at kit Tray assembly Mandatory 1x500-sheet feeder with stand kit Optional 500-sheet feeder with stand Mandatory 3x500-sheet feeder with stand kit - HP LaserJet Enterprise 700 | HP LaserJet Enterprise 700 M712 - User Guide - Page 60
high-capacity input feeder right tray assembly Right tray for the 3,500-sheet highcapacity input feeder Mandatory 3,500-sheet tray roller kit Replacement pickup, feed, and separation rollers for the 3,500-sheet high-capacity input feeder Mandatory Transfer-roller kit Replacement transfer - HP LaserJet Enterprise 700 | HP LaserJet Enterprise 700 M712 - User Guide - Page 61
Table 4-1 Customer self-repair parts (continued) Item Description Power cable 220V - 10A Replacement cable - UK/Asia Pacific Power cable 220V - 10A Replacement cable - Australia/New Zealand Power cable 220V - 10A Replacement cable - Israel Power cable 220V - 10A Replacement cable - Denmark - HP LaserJet Enterprise 700 | HP LaserJet Enterprise 700 M712 - User Guide - Page 62
sheet feeder and stand Optional tray to increase paper capacity CF242A 3,500-sheet high-capacity input and stand Optional tray to increase paper sides of the paper CF240A HP Jetdirect print servers HP Jetdirect ew2500 Wireless Print Server J8021A HP Jetdirect 2700w USB Wireless Print Server - HP LaserJet Enterprise 700 | HP LaserJet Enterprise 700 M712 - User Guide - Page 63
Toner cartridge Toner-cartridge view 1 Imaging drum CAUTION: Do not touch the shutter or the surface of the roller. Doing so can damage the cartridge. 2 Memory chip 3 Pull-tab for the sealing tape ENWW Toner cartridge 53 - HP LaserJet Enterprise 700 | HP LaserJet Enterprise 700 M712 - User Guide - Page 64
box in which the new cartridge arrived. Use the enclosed return label to send the used supply to HP for recycling. For complete information, see the recycling guide that is included with each new HP supply item. Toner-cartridge storage Do not remove the toner cartridge from its package until you are - HP LaserJet Enterprise 700 | HP LaserJet Enterprise 700 M712 - User Guide - Page 65
Replace the toner cartridge CAUTION: If toner gets on clothing, wipe it off with a dry cloth and wash the clothes in cold water. Hot water sets toner into fabric. NOTE: Information about recycling used toner cartridges is on the toner-cartridge box. 1. Press the cartridge-door-release button. 2 3 2. - HP LaserJet Enterprise 700 | HP LaserJet Enterprise 700 M712 - User Guide - Page 66
3. Remove the used toner cartridge from the product. 2 3 4. Remove the new toner cartridge from the bag. Place the used toner cartridge in the bag for recycling. 5. Grasp the front and back of the toner cartridge, and distribute the toner by gently rocking the toner cartridge five or six times. - HP LaserJet Enterprise 700 | HP LaserJet Enterprise 700 M712 - User Guide - Page 67
6. Remove the shipping tape from the new toner cartridge. Recycle the tape with the used toner cartridge. 7. Align the toner cartridge with the tracks inside the product, and insert the toner cartridge until it is firmly seated. 8. Close the cartridge door. After a short time, the control panel - HP LaserJet Enterprise 700 | HP LaserJet Enterprise 700 M712 - User Guide - Page 68
58 Chapter 4 Parts, supplies, and accessories ENWW - HP LaserJet Enterprise 700 | HP LaserJet Enterprise 700 M712 - User Guide - Page 69
5 Print ● Supported print drivers (Windows) ● Change print-job settings (Windows) ● Change print-job settings ( the product ● Add a job-separator page (Windows) ● Use HP ePrint ● Use the HP ePrint Mobile Driver ● Use Apple AirPrint ● Use HP Smart Print (Windows) ● Use easy-access USB printing ENWW - HP LaserJet Enterprise 700 | HP LaserJet Enterprise 700 M712 - User Guide - Page 70
, and printer feature support for most users ● Developed to align with Windows Graphic Device Interface (GDI) for best speed in Windows environments ● Might not be fully compatible with third-party and custom software programs that are based on PCL 5 HP Universal Print Driver (UPD) The HP Universal - HP LaserJet Enterprise 700 | HP LaserJet Enterprise 700 M712 - User Guide - Page 71
not need to enable them manually. For more information, go to www.hp.com/go/upd. UPD installation modes Traditional mode Dynamic mode ● To use this mode, download UPD from the Internet. Go to www.hp.com/go/ upd. ● Use this mode if you are installing the driver for a single computer. ● It operates - HP LaserJet Enterprise 700 | HP LaserJet Enterprise 700 M712 - User Guide - Page 72
. Windows 7: Click the Windows icon in the lower-left corner of the screen, and then click Devices and Printers. 2. Right-click the print-driver icon, and then select Printing Preferences. Change the product configuration settings 1. Windows XP, Windows Server 2003, and Windows Server 2008 (using - HP LaserJet Enterprise 700 | HP LaserJet Enterprise 700 M712 - User Guide - Page 73
all print jobs until the software program is closed 1. Click the File menu, and then click the Print option. 2. In the Printer menu, select the product. 3. By default, the print driver displays the Copies & Pages menu. Open the menus drop-down list, and then open a menu for which you want to change - HP LaserJet Enterprise 700 | HP LaserJet Enterprise 700 M712 - User Guide - Page 74
Print tasks (Windows) Use a printing shortcut (Windows) 1. From the software program, select the Print option. 2. Select the product, and then click the Properties or Preferences button. 3. Click the Printing Shortcuts tab. 64 Chapter 5 Print ENWW - HP LaserJet Enterprise 700 | HP LaserJet Enterprise 700 M712 - User Guide - Page 75
OK button to close the Document Properties dialog box. NOTE: When you select a shortcut, the corresponding settings change on the other tabs in the print driver. 5. In the Print dialog box, click the OK button to print the job. ENWW Print tasks (Windows) 65 - HP LaserJet Enterprise 700 | HP LaserJet Enterprise 700 M712 - User Guide - Page 76
Create printing shortcuts (Windows) 1. From the software program, select the Print option. 2. Select the product, and then click the Properties or Preferences button. 3. Click the Printing Shortcuts tab. 4. Select an existing shortcut as a base. NOTE: Always select a shortcut before adjusting any of - HP LaserJet Enterprise 700 | HP LaserJet Enterprise 700 M712 - User Guide - Page 77
5. Select the print options for the new shortcut. 6. Click the Save As button. ENWW Print tasks (Windows) 67 - HP LaserJet Enterprise 700 | HP LaserJet Enterprise 700 M712 - User Guide - Page 78
7. Enter a name for the shortcut, and then click the OK button. 8. Click the OK button to close the Document Properties dialog box. In the Print dialog box, click the OK button to print the job. 68 Chapter 5 Print ENWW - HP LaserJet Enterprise 700 | HP LaserJet Enterprise 700 M712 - User Guide - Page 79
Automatically print on both sides (Windows) 1. From the software program, select the Print option. 2. Select the product, and then click the Properties or Preferences button. 3. Click the Finishing tab. ENWW Print tasks (Windows) 69 - HP LaserJet Enterprise 700 | HP LaserJet Enterprise 700 M712 - User Guide - Page 80
4. Select the Print on both sides check box. Click the OK button to close the Document Properties dialog box. 5. In the Print dialog box, click the OK button to print the job. 70 Chapter 5 Print ENWW - HP LaserJet Enterprise 700 | HP LaserJet Enterprise 700 M712 - User Guide - Page 81
, select the Print option. 2. Select the product, and then click the Properties or Preferences button. 3. Click the Finishing tab. 4. Select the Print on both sides (manually) check box. Click the OK button to print the first side of the job. ENWW Print tasks (Windows) 71 - HP LaserJet Enterprise 700 | HP LaserJet Enterprise 700 M712 - User Guide - Page 82
5. Retrieve the printed stack from the output bin, and place it with the printed-side facing down in Tray 1. 6. If prompted, touch the appropriate control panel button to continue. 72 Chapter 5 Print ENWW - HP LaserJet Enterprise 700 | HP LaserJet Enterprise 700 M712 - User Guide - Page 83
Print multiple pages per sheet (Windows) 1. From the software program, select the Print option. 2. Select the product, and then click the Properties or Preferences button. 3. Click the Finishing tab. 4. Select the number of pages per sheet from the Pages per sheet drop-down list. ENWW Print tasks - HP LaserJet Enterprise 700 | HP LaserJet Enterprise 700 M712 - User Guide - Page 84
5. Select the correct Print page borders, Page order, and Orientation options. Click the OK button to close the Document Properties dialog box. 6. In the Print dialog box, click the OK button to print the job. 74 Chapter 5 Print ENWW - HP LaserJet Enterprise 700 | HP LaserJet Enterprise 700 M712 - User Guide - Page 85
Select the page orientation (Windows) 1. From the software program, select the Print option. 2. Select the product, and then click the Properties or Preferences button. 3. Click the Finishing tab. ENWW Print tasks (Windows) 75 - HP LaserJet Enterprise 700 | HP LaserJet Enterprise 700 M712 - User Guide - Page 86
4. In the Orientation area, select the Portrait or Landscape option. To print the page image upside down, select the Rotate by 180 degrees option. Click the OK button to close the Document Properties dialog box. 5. In the Print dialog box, click the OK button to print the job. 76 Chapter 5 Print - HP LaserJet Enterprise 700 | HP LaserJet Enterprise 700 M712 - User Guide - Page 87
Select the paper type (Windows) 1. From the software program, select the Print option. 2. Select the product, and then click the Properties or Preferences button. 3. Click the Paper/Quality tab. 4. From the Paper type drop-down list, click the More... option. ENWW Print tasks (Windows) 77 - HP LaserJet Enterprise 700 | HP LaserJet Enterprise 700 M712 - User Guide - Page 88
5. Expand the list of Type is: options. 6. Expand the category of paper types that best describes your paper. 78 Chapter 5 Print ENWW - HP LaserJet Enterprise 700 | HP LaserJet Enterprise 700 M712 - User Guide - Page 89
7. Select the option for the type of paper you are using, and click the OK button. 8. Click the OK button to close the Document Properties dialog box. In the Print dialog box, click the OK button to print the job. ENWW Print tasks (Windows) 79 - HP LaserJet Enterprise 700 | HP LaserJet Enterprise 700 M712 - User Guide - Page 90
Print the first or last page on different paper (Windows) 1. From the software program, select the Print option. 2. Select the product, and then click the Properties or Preferences button. 3. Click the Paper/Quality tab. 4. In the Special pages area, click the Print pages on different paper option, - HP LaserJet Enterprise 700 | HP LaserJet Enterprise 700 M712 - User Guide - Page 91
5. In the Pages in document area, select either the First or Last option. 6. Select the correct options from the Paper source and Paper type drop-down lists. Click the Add button. 7. If you are printing both the first and last pages on different paper, repeat steps 5 and 6, selecting the options for - HP LaserJet Enterprise 700 | HP LaserJet Enterprise 700 M712 - User Guide - Page 92
8. Click the OK button. 9. Click the OK button to close the Document Properties dialog box. In the Print dialog box, click the OK button to print the job. 82 Chapter 5 Print ENWW - HP LaserJet Enterprise 700 | HP LaserJet Enterprise 700 M712 - User Guide - Page 93
Scale a document to fit page size (Windows) 1. From the software program, select the Print option. 2. Select the product, and then click the Properties or Preferences button. 3. Click the Effects tab. ENWW Print tasks (Windows) 83 - HP LaserJet Enterprise 700 | HP LaserJet Enterprise 700 M712 - User Guide - Page 94
4. Select the Print document on option, and then select a size from the drop-down list. Click the OK button to close the Document Properties dialog box. 5. In the Print dialog box, click the OK button to print the job. 84 Chapter 5 Print ENWW - HP LaserJet Enterprise 700 | HP LaserJet Enterprise 700 M712 - User Guide - Page 95
Create a booklet (Windows) 1. From the software program, select the Print option. 2. Select the product, and then click the Properties or Preferences button. 3. Click the Finishing tab. 4. Select the Print on both sides check box. ENWW Print tasks (Windows) 85 - HP LaserJet Enterprise 700 | HP LaserJet Enterprise 700 M712 - User Guide - Page 96
5. In the Booklet layout drop-down list, click the Left binding or Right binding option. The Pages per sheet option automatically changes to 2 pages per sheet. Click the OK button to close the Document Properties dialog box. 6. In the Print dialog box, click the OK button to print the job. 86 - HP LaserJet Enterprise 700 | HP LaserJet Enterprise 700 M712 - User Guide - Page 97
option. 2. In the Printer menu, select the product. 3. By default, the print driver displays the Copies & Manually print on both sides (Mac OS X) 1. Click the File menu, and then click the Print option. 2. In the Printer menu, select this product. 3. Open the Manual Duplex menu. 4. Click the Manual - HP LaserJet Enterprise 700 | HP LaserJet Enterprise 700 M712 - User Guide - Page 98
continue. Print multiple pages per sheet (Mac OS X) 1. Click the File menu, and then click the Print option. 2. In the Printer menu, select the product. 3. By default, the print driver displays the Copies & Pages menu. Open the menus drop-down list, and then click the Layout menu. 4. From the Pages - HP LaserJet Enterprise 700 | HP LaserJet Enterprise 700 M712 - User Guide - Page 99
button. Scale a document to fit page size (Mac OS X) 1. Click the File menu, and then click the Print option. 2. In the Printer menu, select the product. 3. By default, the print driver displays the Copies & Pages menu. Open the menus drop-down list, and then click the Paper Handling menu. 4. In the - HP LaserJet Enterprise 700 | HP LaserJet Enterprise 700 M712 - User Guide - Page 100
print queue (computer memory) or print spooler, delete the job there. ◦ Windows XP, Server 2003, or Server 2008: Click Start, click Settings, and then click Printers and Faxes. Double-click the product icon to open the window, right-click the print job that you want to cancel, and then click Cancel - HP LaserJet Enterprise 700 | HP LaserJet Enterprise 700 M712 - User Guide - Page 101
3. Click the Paper/Quality tab. 4. Click the Custom button. 5. Type a name for the custom size and specify the dimensions. ● The width is the short edge of the paper. ● The length is the long edge of the paper. 6. Click the Save button, and then click the Close button. 7. Click the OK button to - HP LaserJet Enterprise 700 | HP LaserJet Enterprise 700 M712 - User Guide - Page 102
the print job, and then click Delete. Select the paper size (Mac OS X) 1. Click the File menu, and then click the Print option. 2. In the Printer menu, select the product. 3. In the Copies & Pages menu, click the Page Setup button. 4. Select a size from the Paper Size drop-down list, and then - HP LaserJet Enterprise 700 | HP LaserJet Enterprise 700 M712 - User Guide - Page 103
Print watermarks (Mac OS X) 1. Click the File menu, and then click the Print option. 2. In the Printer menu, select the product. 3. By default, the print driver displays the Copies & Pages menu. Open the menus drop-down list, and then click the Watermarks menu. 4. From the Mode menu, select the - HP LaserJet Enterprise 700 | HP LaserJet Enterprise 700 M712 - User Guide - Page 104
Store print jobs on the product Create a stored job (Windows) You can store jobs on the product so you can print them at any time. 1. From the software program, select the Print option. 2. Select the product, and then click the Properties or Preferences button. 3. Click the Job Storage tab. 94 - HP LaserJet Enterprise 700 | HP LaserJet Enterprise 700 M712 - User Guide - Page 105
a copy of the job in the product memory so you can print it again later. ● Stored Job: Store a job on the product and allow other users to print the job at any time. For this job-storage mode, you can select one of the Make Job Private/Secure options. If you - HP LaserJet Enterprise 700 | HP LaserJet Enterprise 700 M712 - User Guide - Page 106
name, click the Custom button, and then enter the user name or the job name. Select which option to use Click the File menu, and then click the Print option. 2. In the Printer menu, select the product. 3. By default, the print driver displays the Copies & Pages menu. Open the menus drop-down list, - HP LaserJet Enterprise 700 | HP LaserJet Enterprise 700 M712 - User Guide - Page 107
a copy of the job in the product memory so you can print it again later. ● Stored Job: Store a job on the product and allow other users to print the job at any time. If you assign a personal identification number (PIN) to the job, the person who prints the job must provide - HP LaserJet Enterprise 700 | HP LaserJet Enterprise 700 M712 - User Guide - Page 108
5. If the job is private or encrypted, enter the PIN or the password, and then press the OK button. 6. Highlight the Delete option, and then press the OK button. 98 Chapter 5 Print ENWW - HP LaserJet Enterprise 700 | HP LaserJet Enterprise 700 M712 - User Guide - Page 109
Windows 7: Click the Windows icon in the lower-left corner of the screen, and then click Devices and Printers. 2. Right-click the driver icon, and then select Properties or Printer properties. 3. Click the Device Settings tab. 4. Expand the Installable Options list. 5. In the Job Separator drop-down - HP LaserJet Enterprise 700 | HP LaserJet Enterprise 700 M712 - User Guide - Page 110
the product, you need the printer code, which is the segment of the product email address that is before the @ symbol. NOTE: This code is valid for only 24 hours from the time you enable HP Web Services. If it expires, follow the instructions to enable HP Web Services again, and obtain a new code - HP LaserJet Enterprise 700 | HP LaserJet Enterprise 700 M712 - User Guide - Page 111
and 10.8 NOTE: The HP ePrint Mobile Driver is a PDF workflow utility for Mac, and is not technically a print driver. HP ePrint Mobile for Mac supports print paths only through ePrintcenter and does not support direct IP printing to local network printers. ENWW Use the HP ePrint Mobile Driver 101 - HP LaserJet Enterprise 700 | HP LaserJet Enterprise 700 M712 - User Guide - Page 112
the same wireless network as the Apple device. For more information about using AirPrint and about which HP products are compatible with AirPrint, go to www.hp.com/go/airprint. NOTE: AirPrint does not support USB connections. You might need to upgrade the product firmware to use AirPrint. Go to www - HP LaserJet Enterprise 700 | HP LaserJet Enterprise 700 M712 - User Guide - Page 113
In the Bonjour Service Name field, type a new name. 4. Click the Apply button. Solve AirPrint problems Verify the product supports AirPrint. Upgrade the product firmware to use AirPrint. Make sure the product is connected to the same wireless network as the Apple device. Verify the HP Embedded Web - HP LaserJet Enterprise 700 | HP LaserJet Enterprise 700 M712 - User Guide - Page 114
from Sleep mode whenever it receives a print job. 1. In a supported Web browser on your computer, enter the product IP address or host name in the address/ URL field to open the HP Embedded Web Server. 2. Click the General tab, and then click the Energy - HP LaserJet Enterprise 700 | HP LaserJet Enterprise 700 M712 - User Guide - Page 115
Print (Windows) Use HP Smart Print to print a particular section of a Web site. You can remove headers print. You can edit the selected area before you print. Download HP Smart Print from this Web site: www.hp.com/go/smartweb. NOTE: HP Smart Print is compatible with Windows browsers only. ENWW Use - HP LaserJet Enterprise 700 | HP LaserJet Enterprise 700 M712 - User Guide - Page 116
. The product accepts standard USB flash drives in the USB port on the front of the product. You can print the following types of files: ● .pdf ● .prn ● .pcl ● .ps ● .cht Before you can use this feature, you must enable the USB port. Use the following procedure to enable the port from - HP LaserJet Enterprise 700 | HP LaserJet Enterprise 700 M712 - User Guide - Page 117
Print easy-access USB documents 1. Insert the USB flash drive into the USB port on the left side of the product control panel. NOTE: You might need to remove the cover from the USB port. 2. The USB storage device detected screen opens. Select the OK option to access the USB device. 3. Highlight the - HP LaserJet Enterprise 700 | HP LaserJet Enterprise 700 M712 - User Guide - Page 118
108 Chapter 5 Print ENWW - HP LaserJet Enterprise 700 | HP LaserJet Enterprise 700 M712 - User Guide - Page 119
6 Manage the product ● Configure IP network settings ● HP Embedded Web Server ● HP Utility (Mac OS X) ● Use HP Web Jetadmin software ● Economy settings ● Product security features ● Upgrade the product firmware ENWW 109 - HP LaserJet Enterprise 700 | HP LaserJet Enterprise 700 M712 - User Guide - Page 120
Configure IP network settings Printer sharing disclaimer HP does not support peer-to-peer networking, as the feature is a function of Microsoft operating systems and not of the HP print drivers. Go to Microsoft at www.microsoft.com. View or change network settings Use the HP Embedded Web Server to - HP LaserJet Enterprise 700 | HP LaserJet Enterprise 700 M712 - User Guide - Page 121
press the OK button. 7. Repeat the process for each field, and then press the OK button. Manually configure IPv6 TCP/IP parameters from the control panel Use the control-panel Administration menus to manually set an IPv6 address. 1. On the product control panel, press the Home button. 2. To enable - HP LaserJet Enterprise 700 | HP LaserJet Enterprise 700 M712 - User Guide - Page 122
using Bonjour or an IP address ● Linux: Netscape Navigator only ● HP-UX 10 and HP-UX 11: Netscape Navigator 4.7 The HP Embedded Web Server works when the product is connected to an IP-based network. The HP Embedded Web Server does not support IPX-based product connections. You do not have to have - HP LaserJet Enterprise 700 | HP LaserJet Enterprise 700 M712 - User Guide - Page 123
of all product events and errors. Use the HP Instant Support link (in the Other Links area on all HP Embedded Web Server pages) to connect to a set of dynamic Web pages that help you solve problems. These pages also show additional services available for the product. Usage Page Shows a summary - HP LaserJet Enterprise 700 | HP LaserJet Enterprise 700 M712 - User Guide - Page 124
Create a backup file that contains product and user data. If necessary, you can use this Services Provides connection information about third-party job-statistics services. Print tab Table 6-3 HP options. Adjust Paper Types If print quality problems occur when using a specific paper type - HP LaserJet Enterprise 700 | HP LaserJet Enterprise 700 M712 - User Guide - Page 125
tab Table 6-4 HP Embedded Web Server Troubleshooting tab Menu Description General Troubleshooting Select from a variety of reports and tests to help solve problems with the product. Retrieve Diagnostic Data Export product information to a file that can be useful for detailed problem analysis - HP LaserJet Enterprise 700 | HP LaserJet Enterprise 700 M712 - User Guide - Page 126
tab. The following are the default links. Table 6-6 HP Embedded Web Server Other Links list Menu Description HP Instant Support Connects you to the HP Web site to help you find solutions to product problems. Shop for Supplies Connects to the HP SureSupply Web site, where you can receive - HP LaserJet Enterprise 700 | HP LaserJet Enterprise 700 M712 - User Guide - Page 127
& Supplies button. 4. Click the Utility tab. 5. Click the Open Printer Utility button. HP Utility features HP Utility consists of pages that you open by clicking in the All Settings HP Utility. Menu Information And Support Item Supplies Status Device Information File Upload Upload Fonts HP - HP LaserJet Enterprise 700 | HP LaserJet Enterprise 700 M712 - User Guide - Page 128
Menu Printer Settings Item Commands Supplies Management Trays Configuration Output Devices Duplex Mode Protect Direct Ports Stored Jobs disk. Configures the network settings, such as the IPv4 and IPv6 settings. Provides access to the HP Embedded Web Server. 118 Chapter 6 Manage the product ENWW - HP LaserJet Enterprise 700 | HP LaserJet Enterprise 700 M712 - User Guide - Page 129
HP products, including printers, multifunction products, and digital senders. This single solution allows you to remotely install, monitor, maintain, troubleshoot investment. HP Web Jetadmin upgrades are periodically made available to provide support for specific product features. Go to www.hp.com/go - HP LaserJet Enterprise 700 | HP LaserJet Enterprise 700 M712 - User Guide - Page 130
acceptable, consider replacing the toner cartridge. NOTE: This feature is available with the PCL 6 print driver for Windows. If you are not using that driver, you can enable the feature by using the HP Embedded Web Server. 1. From the software program, select the Print option. 2. Select the product - HP LaserJet Enterprise 700 | HP LaserJet Enterprise 700 M712 - User Guide - Page 131
● Energy Settings ● Sleep Timer Settings 3. Open the Sleep Mode/Auto Off After menu, and then use the keypad to set the appropriate time. Press the OK button. 4. Open the Sleep Mode/Auto Off Timer menu, and select the Enabled option. Press the OK button. NOTE: The sleep-mode default time is 45 - HP LaserJet Enterprise 700 | HP LaserJet Enterprise 700 M712 - User Guide - Page 132
8. Open the following menus: ● General Settings ● Energy Settings ● Sleep Schedule 9. Select the Add option, and then select the type of event to schedule: Wake or Sleep. 10. Configure the following settings: ● Time ● Event Days 11. To save the changes, press the OK button. 122 Chapter 6 Manage the - HP LaserJet Enterprise 700 | HP LaserJet Enterprise 700 M712 - User Guide - Page 133
the product. Assign a system password Assign an administrator password for access to the product and the HP Embedded Web Server so that unauthorized users cannot change the product settings. 1. Open the HP Embedded Web Server by entering the product IP address into the address line of a Web browser - HP LaserJet Enterprise 700 | HP LaserJet Enterprise 700 M712 - User Guide - Page 134
about the encrypted hard disk, see the HP High-Performance Secure Hard Disk Setup Guide. 1. Go to www.hp.com/support. 2. Enter Secure Hard Disk into the search field and press Enter. 3. Click the HP High-Performance Secure Hard Disk Drive link. 4. Click the Manuals link. Lock the formatter cage The - HP LaserJet Enterprise 700 | HP LaserJet Enterprise 700 M712 - User Guide - Page 135
Upgrade the product firmware Software and firmware upgrades and installation instructions for this product are available at www.hp.com/support/lj700M712. Click Support & Drivers, click the operating system, and then select the download for the product. ENWW Upgrade the product firmware 125 - HP LaserJet Enterprise 700 | HP LaserJet Enterprise 700 M712 - User Guide - Page 136
126 Chapter 6 Manage the product ENWW - HP LaserJet Enterprise 700 | HP LaserJet Enterprise 700 M712 - User Guide - Page 137
not print or it prints slowly ● Solve easy-access USB printing problems ● Solve USB connection problems ● Solve wired network problems ● Solve product software problems (Windows) ● Solve product software problems (Mac OS X) ● Remove software (Windows) ● Remove the print driver (Mac OS X) ENWW 127 - HP LaserJet Enterprise 700 | HP LaserJet Enterprise 700 M712 - User Guide - Page 138
different outlet. d. If none of these measures restores power, contact HP Customer Care. 2. The control panel should indicate a Ready status. the instructions on the control panel to clear the jam. If the page does not print correctly, the problem is with the product hardware. Contact HP Customer - HP LaserJet Enterprise 700 | HP LaserJet Enterprise 700 M712 - User Guide - Page 139
that came with the product. You can also download the print driver from this Web site: www.hp.com/go/ lj700M712_software. 7. Print a short document from a different program that has worked in the past. If this solution works, then the problem is with the program. If this solution does not work (the - HP LaserJet Enterprise 700 | HP LaserJet Enterprise 700 M712 - User Guide - Page 140
graphics ● The speed of the computer you are using ● The USB connection ● The product I/O configuration ● The network operating system and configuration (if applicable) ● The print driver that you are using 130 Chapter 7 Solve problems ENWW - HP LaserJet Enterprise 700 | HP LaserJet Enterprise 700 M712 - User Guide - Page 141
Restore factory-set defaults 1. On the product control panel, press the Home button. 2. Open the following menus: ● Administration ● General Settings ● Restore Factory Settings 3. Select one or more categories of settings from the list, and then select the Reset option, and then press the OK button. - HP LaserJet Enterprise 700 | HP LaserJet Enterprise 700 M712 - User Guide - Page 142
control panel. For screens that contain settings for individual jobs, the Help opens to a topic that explains the options for that screen. 132 Chapter 7 Solve problems ENWW - HP LaserJet Enterprise 700 | HP LaserJet Enterprise 700 M712 - User Guide - Page 143
guides to the appropriate indentation in the tray. 5. Check the product control panel to see if the product is waiting for you to acknowledge a prompt to feed the paper manually of paper to the tray. 2. Use only paper that meets HP specifications for this product. 3. Use paper that is not wrinkled, - HP LaserJet Enterprise 700 | HP LaserJet Enterprise 700 M712 - User Guide - Page 144
solutions. 1. Use only paper that meets HP specifications for this product. 2. Use guides so they are touching the paper stack without bending it. 6. Make sure that the tray is fully inserted in the product. 7. If you are printing on heavy, embossed, or perforated paper, use the manual problems ENWW - HP LaserJet Enterprise 700 | HP LaserJet Enterprise 700 M712 - User Guide - Page 145
toner cartridge) 5 Tray 1 6 Tray 2 jam-access door 7 Jam-access for the 500-sheet input tray Auto-navigation for clearing jams The auto-navigation feature assists you in clearing jams by providing step-by-step instructions on the control panel. When you complete a step, the product displays - HP LaserJet Enterprise 700 | HP LaserJet Enterprise 700 M712 - User Guide - Page 146
Clear jams in the output-bin area 1. If paper is visible from the output bin, grasp the leading edge and remove it. 2 3 Clear jams in Tray 1 1. Slowly pull the jammed paper out of the product. 136 Chapter 7 Solve problems ENWW - HP LaserJet Enterprise 700 | HP LaserJet Enterprise 700 M712 - User Guide - Page 147
Clear jams in Tray 2 or Tray 3 1. Open the right-side access door. If the jammed page is visible, gently pull it out of the product. 2 3 2. If you were not able to clear the jam by using the right-side access door, slide the tray out of the product. 3. Remove any damaged paper from the tray. ENWW - HP LaserJet Enterprise 700 | HP LaserJet Enterprise 700 M712 - User Guide - Page 148
tray. NOTE: Before replacing the tray, make sure the paper is flat in the tray at all four corners and below the tabs on the guides. 6. Close the right-side access door. 138 Chapter 7 Solve problems 2 3 ENWW - HP LaserJet Enterprise 700 | HP LaserJet Enterprise 700 M712 - User Guide - Page 149
trays 1. Open the right-side access door and the 500sheet tray jam-access door. 2. Remove the 500-sheet tray. 2 3 4 2 3 3. If the edge of the paper is visible in the feed area, slowly pull the paper toward the right side and out of - HP LaserJet Enterprise 700 | HP LaserJet Enterprise 700 M712 - User Guide - Page 150
4. Close the 500-sheet tray. 2 3 5. Close the right-side access door and the 500sheet tray jam-access door. 2 3 4 Clear jams in the 3,500-sheet high-capacity tray 1. Open the right and left sides of the tray. 4 140 Chapter 7 Solve problems ENWW - HP LaserJet Enterprise 700 | HP LaserJet Enterprise 700 M712 - User Guide - Page 151
2. Remove any damaged sheets of paper. 4 3. Above the right-side tray, press the green button to release the jam-access plate. 4 4. If jammed paper is in the feed area, pull it down to remove it. 4 ENWW Clear jams 141 - HP LaserJet Enterprise 700 | HP LaserJet Enterprise 700 M712 - User Guide - Page 152
5. Push up on the jam-access plate to close it. 4 6. Close the right and left sides of the tray. 4 7. Open the jam-access door on the right side of the high-capacity tray cabinet. 142 Chapter 7 Solve problems ENWW - HP LaserJet Enterprise 700 | HP LaserJet Enterprise 700 M712 - User Guide - Page 153
8. Lift up the jam-release plate and remove any jammed paper. 9. Close the jam-access door on the right side of the high-capacity tray cabinet. Clear jams from the toner-cartridge area 1. Press the cartridge-door-release button. ENWW 2 3 Clear jams 143 - HP LaserJet Enterprise 700 | HP LaserJet Enterprise 700 M712 - User Guide - Page 154
2. Open the cartridge door. 3. Remove the toner cartridge. CAUTION: To prevent damage to the toner cartridge, do not expose it to light for more than a few minutes. 4. Pull the green tab down to open the metal plate inside the product. 2 3 2 3 144 Chapter 7 Solve problems ENWW - HP LaserJet Enterprise 700 | HP LaserJet Enterprise 700 M712 - User Guide - Page 155
, lint-free cloth to clean any toner that might have fallen into the product. If loose toner falls into the product, it might cause temporary problems with print quality. Loose toner should clear from the paper path after a few pages are printed. If toner gets on your clothing, wipe it off - HP LaserJet Enterprise 700 | HP LaserJet Enterprise 700 M712 - User Guide - Page 156
Clear jams in the fuser 1. Open the fuser door on the left side of the product. CAUTION: The fuser can be hot while the product is in use. 2. Push down on the green tab to open the fuser jam-access cover. 3. Remove any paper from the fuser. 146 Chapter 7 Solve problems ENWW - HP LaserJet Enterprise 700 | HP LaserJet Enterprise 700 M712 - User Guide - Page 157
4. Close the fuser jam-access cover. 5. Close the fuser door. ENWW Clear jams 147 - HP LaserJet Enterprise 700 | HP LaserJet Enterprise 700 M712 - User Guide - Page 158
Clear jams from the duplexer 1. Remove the duplexer. 2. Remove any paper from the duplexer. 3. Reinstall the duplexer. 148 Chapter 7 Solve problems ENWW - HP LaserJet Enterprise 700 | HP LaserJet Enterprise 700 M712 - User Guide - Page 159
Change jam recovery This product provides a jam recovery feature that reprints jammed pages. 1. On the product control panel, press the Home button. 2. Open the following menus: ● Administration ● General Settings ● Jam Recovery 3. Select one of the following options: ● Auto: The product attempts to - HP LaserJet Enterprise 700 | HP LaserJet Enterprise 700 M712 - User Guide - Page 160
you are printing from a software program and the pages have any of these problems: ● smeared print ● fuzzy print ● dark print ● curled paper ● and then click the Print option. 2. In the Printer menu, select the product. 3. By default, the print driver displays the Copies & Pages menu. Open the menus - HP LaserJet Enterprise 700 | HP LaserJet Enterprise 700 M712 - User Guide - Page 161
if applicable, the status of other replaceable maintenance parts. Print quality problems can occur when using a toner cartridge that is at its estimated when a supply level is very low. After an HP supply has reached the very low threshold, HP's premium protection warranty on that supply has ended. - HP LaserJet Enterprise 700 | HP LaserJet Enterprise 700 M712 - User Guide - Page 162
several times and reinstall it. Print a few pages to see if the problem has resolved. Check paper and the printing environment Use paper that meets HP specifications Use different paper if you are having any of the following problems: ● The printing is too light or seems faded in areas. ● Specks of - HP LaserJet Enterprise 700 | HP LaserJet Enterprise 700 M712 - User Guide - Page 163
is no longer acceptable, consider replacing the toner cartridge. NOTE: This feature is available with the PCL 6 print driver for Windows. If you are not using that driver, you can enable the feature by using the HP Embedded Web Server. Follow these steps if the entire page is too dark or too light - HP LaserJet Enterprise 700 | HP LaserJet Enterprise 700 M712 - User Guide - Page 164
600 HP PCL 6 driver HP UPD PS driver ● Provided as the default driver on the product CD. This driver is automatically installed unless you select a different one. ● Recommended for all Windows environments ● Provides the overall best speed, print quality, and product-feature support for most users - HP LaserJet Enterprise 700 | HP LaserJet Enterprise 700 M712 - User Guide - Page 165
HP LaserJet products driver for use with multiple product models ● Preferred when printing to multiple product models from a mobile Windows computer ● Recommended for printing in all Windows environments ● Provides the overall best speed, print quality, and printer feature support for most users - HP LaserJet Enterprise 700 | HP LaserJet Enterprise 700 M712 - User Guide - Page 166
HP software from the CD that came with the product or use the UPD print driver. Using generic print drivers can cause delays clearing jobs from the print queue. 5. From the list of printers the firewall to see if it is the source of the problem. 7. If your computer or the product is connected to a - HP LaserJet Enterprise 700 | HP LaserJet Enterprise 700 M712 - User Guide - Page 167
following solutions. 1. Make sure the computer meets the minimum specifications for this product. For a list of specifications, go to this Web site: www.hp.com/support/lj700M712. 2. When you configure the product to print on some paper types, such as heavy paper, the product prints more slowly so it - HP LaserJet Enterprise 700 | HP LaserJet Enterprise 700 M712 - User Guide - Page 168
Solve easy-access USB printing problems ● The Retrieve From USB menu does not open when you insert the might be using a USB flash drive or a file system that this product does not support. Save the files on a standard USB flash drive that uses File Allocation Table (FAT) file systems. The product - HP LaserJet Enterprise 700 | HP LaserJet Enterprise 700 M712 - User Guide - Page 169
type that the USB printing feature does not support. The product supports .pdf, .prn, .pcl, .ps, and . support. In this case, the product replaces the file names with characters from a different character set. Rename the files using ASCII characters. ENWW Solve easy-access USB printing problems - HP LaserJet Enterprise 700 | HP LaserJet Enterprise 700 M712 - User Guide - Page 170
Solve USB connection problems If you have connected the product directly to a computer, configure the following setting so the product wakes from sleep mode that the cable is working correctly by connecting it to another product. Replace the cable if necessary. 160 Chapter 7 Solve problems ENWW - HP LaserJet Enterprise 700 | HP LaserJet Enterprise 700 M712 - User Guide - Page 171
the problem continues, try a different cable or port on the hub. The computer is using the incorrect IP address for the product 1. Open the printer you installed the product using the HP standard TCP/IP port, select the box labeled Always print to this printer, even if its IP address changes - HP LaserJet Enterprise 700 | HP LaserJet Enterprise 700 M712 - User Guide - Page 172
settings, you must also change them for your network. New software programs might be causing compatibility problems Verify that any new software programs are correctly installed and that they use the correct print driver. The computer or workstation might be set up incorrectly 1. Check the network - HP LaserJet Enterprise 700 | HP LaserJet Enterprise 700 M712 - User Guide - Page 173
Solve product software problems (Windows) A print driver for the product is not visible in the Printer folder 1. Reinstall the product software. NOTE: Close any applications that are running. To close an application that has an icon in the system tray, right- - HP LaserJet Enterprise 700 | HP LaserJet Enterprise 700 M712 - User Guide - Page 174
, and then select Printer properties. d. Click the Ports tab, and then click Configure Port. e. Verify the IP address, and then click OK or Cancel. f. If the IP addresses are not the same, delete the driver, and reinstall the driver using the correct IP address. 164 Chapter 7 Solve problems ENWW - HP LaserJet Enterprise 700 | HP LaserJet Enterprise 700 M712 - User Guide - Page 175
the product does not appear in the Print & Fax or the Print & Scan list after the driver is selected Software troubleshooting ▲ Make sure that your Mac operating system is Mac OS X 10.5 or later. Hardware troubleshooting 1. Make sure that the product is turned on. 2. Make sure that the USB cable is - HP LaserJet Enterprise 700 | HP LaserJet Enterprise 700 M712 - User Guide - Page 176
, and then connect the cable directly to the USB port on the computer. NOTE: The iMac keyboard is a non-powered USB hub. 166 Chapter 7 Solve problems ENWW - HP LaserJet Enterprise 700 | HP LaserJet Enterprise 700 M712 - User Guide - Page 177
Remove software (Windows) Windows XP 1. Click Start, Control Panel, and then Add or Remove Programs. 2. Find and select the product from the list. 3. Click the Change/Remove button to remove the software. Windows Vista 1. Click the Windows icon in the lower-left corner of the screen. Click Control - HP LaserJet Enterprise 700 | HP LaserJet Enterprise 700 M712 - User Guide - Page 178
Remove the print driver (Mac OS X) You must have administrator rights to remove the software. 1. Open System Preferences. 2. Select Print & Fax. 3. Highlight the product. 4. Click the minus (-) symbol. 5. Delete the print queue, if necessary. 168 Chapter 7 Solve problems ENWW - HP LaserJet Enterprise 700 | HP LaserJet Enterprise 700 M712 - User Guide - Page 179
tray part number 52 500-sheet tray capacity 36 clearing paper jams 139 loading 37 orientation 36 A accessories ordering 44 part number 52 administration menu map description 10 AirPrint connecting to 102 product name 102 support 102 troubleshooting 103 alternative letterhead mode 29 anticounterfeit - HP LaserJet Enterprise 700 | HP LaserJet Enterprise 700 M712 - User Guide - Page 180
115 troubleshooting tools 115 HP Embedded Web Server (EWS) features 112 network connection 112 HP ePrint Mobile Driver 101 HP ePrint, using 100 HP fraud Web site 46 HP Smart Print 105 HP Universal Print Driver 60 HP Utility 117 HP Utility, Mac 117 HP Web Jetadmin 119 HP Web Services enabling 115 HP - HP LaserJet Enterprise 700 | HP LaserJet Enterprise 700 M712 - User Guide - Page 181
panel 8 loading 3,500-sheet high-capacity tray 39 500-sheet tray 37 toner cartridges 53 Tray 1 31 Trays 2 and 3 34 M Mac driver settings 63, 87 problems, troubleshooting 165 removing software 168 Mac driver settings Job Storage 96 Macintosh HP Utility 117 managing network 110 manual duplex Mac 87 - HP LaserJet Enterprise 700 | HP LaserJet Enterprise 700 M712 - User Guide - Page 182
) 87 drivers 62 drivers (Mac) 63 restore factory 131 shortcuts (Windows) creating 66 using 64 sign in control panel 123 sleep mode disabling 120 enabling 120 sleep schedule setting 121 software HP Utility 117 installing, wired networks (Mac) 18 installing, wired networks (Windows) 15 problems 163 - HP LaserJet Enterprise 700 | HP LaserJet Enterprise 700 M712 - User Guide - Page 183
133 USB connect problems 160 troubleshooting tools HP Embedded Web Server 115 two-sided printing settings (Windows) 69 USB-connection troubleshooting 160 W watermarks printing (Mac) 93 printing (Windows) 91 Web browser requirements HP Embedded Web Server 112 Web services status page description - HP LaserJet Enterprise 700 | HP LaserJet Enterprise 700 M712 - User Guide - Page 184
174 Index ENWW - HP LaserJet Enterprise 700 | HP LaserJet Enterprise 700 M712 - User Guide - Page 185
- HP LaserJet Enterprise 700 | HP LaserJet Enterprise 700 M712 - User Guide - Page 186
© 2012 Hewlett-Packard Development Company, L.P. www.hp.com *CF235-90901* *CF235-90901* CF235-90901
-
 1
1 -
 2
2 -
 3
3 -
 4
4 -
 5
5 -
 6
6 -
 7
7 -
8
-
9
-
10
-
11
-
12
-
13
-
14
-
15
-
16
-
17
-
18
-
19
-
20
-
21
-
22
-
23
-
24
-
25
-
26
-
27
-
28
-
29
-
30
-
31
-
32
-
33
-
34
-
35
-
36
-
37
-
38
-
39
-
40
-
41
-
42
-
43
-
44
-
45
-
46
-
47
-
48
-
49
-
50
-
51
-
52
-
53
-
54
-
55
-
56
-
57
-
58
-
59
-
60
-
61
-
62
-
63
-
64
-
65
-
66
-
67
-
68
-
69
-
70
-
71
-
72
-
73
-
74
-
75
-
76
-
77
-
78
-
79
-
80
-
81
-
82
-
83
-
84
-
85
-
86
-
87
-
88
-
89
-
90
-
91
-
92
-
93
-
94
-
95
-
96
-
97
-
98
-
99
-
100
-
101
-
102
-
103
-
104
-
105
-
106
-
107
-
108
-
109
-
110
-
111
-
112
-
113
-
114
-
115
-
116
-
117
-
118
-
119
-
120
-
121
-
122
-
123
-
124
-
125
-
126
-
127
-
128
-
129
-
130
-
131
-
132
-
133
-
134
-
135
-
136
-
137
-
138
-
139
-
140
-
141
-
142
-
143
-
144
-
145
-
146
-
147
-
148
-
149
-
150
-
151
-
152
-
153
-
154
-
155
-
156
-
157
-
158
-
159
-
160
-
161
-
162
-
163
-
164
-
165
-
166
-
167
-
168
-
169
-
170
-
171
-
172
-
173
-
174
-
175
-
176
-
177
-
178
-
179
-
180
-
181
-
182
-
183
-
184
-
185
-
186
 |
 |
LASERJET ENTERPRISE 700
User Guide
M712
2
3