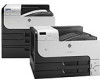
HP LaserJet Enterprise 700 HP LaserJet Enterprise 700 M712 - User Guide - Page 24
Connect the product to a network by using a network cable and install the software (Windows)
 |
View all HP LaserJet Enterprise 700 manuals
Add to My Manuals
Save this manual to your list of manuals |
Page 24 highlights
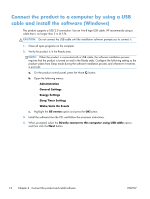
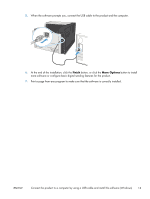
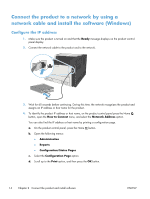
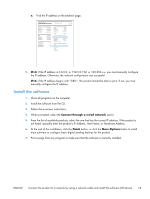
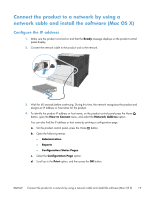
Connect the product to a network by using a network cable and install the software (Windows) Configure the IP address 1. Make sure the product is turned on and that the Ready message displays on the product controlpanel display. 2. Connect the network cable to the product and to the network. 3. Wait for 60 seconds before continuing. During this time, the network recognizes the product and assigns an IP address or host name for the product. 4. To identify the product IP address or host name, on the product control panel press the Home button, open the How to Connect menu, and select the Network Address option. You can also find the IP address or host name by printing a configuration page. a. On the product control panel, press the Home button. b. Open the following menus: ● Administration ● Reports ● Configuration/Status Pages c. Select the Configuration Page option. d. Scroll up to the Print option, and then press the OK button. 14 Chapter 2 Connect the product and install software ENWW
-
 1
1 -
2
-
3
-
4
-
5
-
6
-
7
-
8
-
9
-
10
-
11
-
12
-
13
-
14
-
15
-
16
-
17
-
18
-
 19
19 -
 20
20 -
 21
21 -
 22
22 -
 23
23 -
 24
24 -
 25
25 -
 26
26 -
 27
27 -
 28
28 -
 29
29 -
30
-
31
-
32
-
33
-
34
-
35
-
36
-
37
-
38
-
39
-
40
-
41
-
42
-
43
-
44
-
45
-
46
-
47
-
48
-
49
-
50
-
51
-
52
-
53
-
54
-
55
-
56
-
57
-
58
-
59
-
60
-
61
-
62
-
63
-
64
-
65
-
66
-
67
-
68
-
69
-
70
-
71
-
72
-
73
-
74
-
75
-
76
-
77
-
78
-
79
-
80
-
81
-
82
-
83
-
84
-
85
-
86
-
87
-
88
-
89
-
90
-
91
-
92
-
93
-
94
-
95
-
96
-
97
-
98
-
99
-
100
-
101
-
102
-
103
-
104
-
105
-
106
-
107
-
108
-
109
-
110
-
111
-
112
-
113
-
114
-
115
-
116
-
117
-
118
-
119
-
120
-
121
-
122
-
123
-
124
-
125
-
126
-
127
-
128
-
129
-
130
-
131
-
132
-
133
-
134
-
135
-
136
-
137
-
138
-
139
-
140
-
141
-
142
-
143
-
144
-
145
-
146
-
147
-
148
-
149
-
150
-
151
-
152
-
153
-
154
-
155
-
156
-
157
-
158
-
159
-
160
-
161
-
162
-
163
-
164
-
165
-
166
-
167
-
168
-
169
-
170
-
171
-
172
-
173
-
174
-
175
-
176
-
177
-
178
-
179
-
180
-
181
-
182
-
183
-
184
-
185
-
186
 |
 |
